 Now available in a range of sizes to fit the whole family!
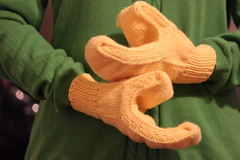
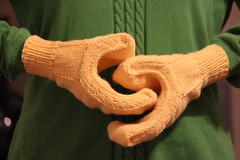
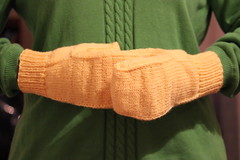
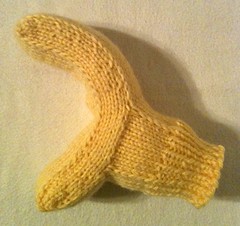
Just in time for Halloween and cooler weather (in the northern hemisphere at least), I am proud to present to you an adorable addition to your favorite child's wardrobe, accessories that resemble the molded plastic hands of those ubiquitous little toys - Lego Man Mitts!
Also available as a free pdf!
Download through Ravelry!
Materials:
Stitch Nation Washable Ewe [100% wool; 183yds/167m per 3.5oz/100g skein]; 1[1, 1, 1, 1, 2] skeins in color #3215 Duckling
US #4/3.5mm circular (for magic loop) or double-pointed needles
Tapestry needle
Stitch holder or waste yarn
Gauge:
22sts = 4in /10cm in stst
Finished Size:
Hand circumference:
5[5.75, 6.5, 7.25, 8, 8.75]in/
13[15, 17, 19, 21, 23]cm
To fit:
0-2
years[3-5 years, 6-9 years, 10 years-Adult S, Adult M, Adult L]
Click here for Abbreviations
PATTERN
Fingers
 Using magic cast-on method,
CO 12[14, 16, 18, 20, 22] sts on each needle - 24[28, 32, 36, 40, 44] sts
total.
Using magic cast-on method,
CO 12[14, 16, 18, 20, 22] sts on each needle - 24[28, 32, 36, 40, 44] sts
total.
Round 1: knit.
Round 2: {k1,
m1R, k10[12, 14, 16, 18, 20], m1L, k1} twice - 28[32, 36, 40, 44, 48] sts.
Round 3: {k2,
sl1, k8[10, 12, 14, 16, 18], sl1, k2} twice.
Round 4: knit.
Round 5: k2,
sl1, k8[10, 12, 14, 16, 18], sl1, k1, w&t, p12[14, 16, 18, 20, 22] w&t,
k1, sl1, k8[10, 12, 14, 16, 18], sl1, k1, k1 tog w/wrap (insert right-hand
needle up through front of wrap then through st and k these tog), k2, sl1,
k8[10, 12, 14, 16, 18], sl1, k2.
Round 6:
k1 tog w/wrap, k to end.
Repeat Rounds 3-6 2[4, 5, 6, 7, 8] more
times. Repeat Rounds 3-4 once
more for all sizes, then Round 3 once again.
Palm (worked flat)
Row 1: k3,
place 8[10, 12, 14, 16, 18] sts on holder or waste yarn.
Row 2: sl1,
p19[21, 23, 25, 27, 29].
Row 3: sl1,
k4, sl1, k8[10, 12, 14, 16, 18], sl1, k5.
Repeat Rows 2-3 2[4, 4, 5, 5, 6] more
times. Do not turn at end of last row.
Using backwards loop cast-on
method, CO 8[10, 12, 14, 16, 18] sts and join to beg of row to begin working in
the round again, k17[19, 21, 23, 25, 27]. You should now be back to the
original beg of your rounds.
Thumb
Round 1: k16[18,
20, 22, 24, 26], sl1, k8[10, 12, 14, 16, 18], sl1, k2.
Round 2: knit.
Round 3: k2,
sl1, k8[10, 12, 14, 16, 18], sl1, k1, w&t, p12[14, 16, 18, 20, 22],
w&t, k1, sl1, k8[10, 12, 14, 16, 18], sl1, k1, k1 tog w/wrap, k2, sl1,
k8[10, 12, 14, 16, 18], sl1, k2.
Round 4: k1
tog w/wrap, k to end.
Round 5: {k2,
sl1, k8[10, 12, 14, 16, 18], sl1, k2} twice.
Round 6: knit.
Repeat Rounds 3-6 0[1, 1, 2, 3, 3] more
times. Repeat Round 5 once
more for all sizes.
Next round: {k1,
k2tog, k8[10, 12, 14, 16, 18], ssk, k1} twice - 24[28, 32, 36, 40, 44] sts.
Cut yarn, leaving about a 18-inch/45-cm
tail. Graft remaining sts together.
Cuff
Place 8[10, 12, 14, 16, 18]
sts from holder/waste yarn onto right-hand needle. With RS facing, continuing
to work around edge of opening, join new yarn and pick up & k8[9, 10, 11, 12,
13] sts along first selvage edge, pick up & k8[10, 12, 14, 16, 18] sts
along CO edge, pick up & k8[9, 10, 11, 12, 13] along other selvage edge,
k8[10, 12, 14, 16, 18] across live sts - 32[38, 44, 50, 56, 62] sts total.
Round 1: {sl1,
k6[8, 10, 12, 14, 16], sl1, k8[9, 10, 11, 12, 13]} twice
Round 2: knit.
Repeat Rounds 1-2 2[4, 5, 6, 7, 8] more
times. Repeat Round 1 once
more for all sizes.
Next Round: Dec
4[6, 8, 10, 12, 14] evenly around – 28[32, 36, 40, 44, 48] sts.
Work k1, p1 ribbing for 8[10,
12, 14, 16, 18] rounds. Bind off in pattern.
Weave
in ends. Block if desired.
Feel free to comment here with questions.
This pattern is intended for personal use only. Please do not try to sell it or any product made from it. Thank you.


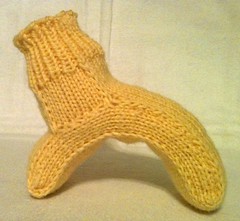
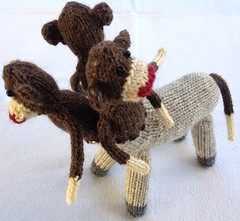 Sunday evening, I indulged my nerd side, which perhaps implies I have a non-nerd side, doesn't it, and that's entirely inaccurate. But that's neither here nor there. A friend and I had the opportunity to attend a Jonathan Coulton concert here in Dallas. If you don't know who that is, go here. I'll wait. Awesome, no? So this little guy is an homage to Skullcrusher Mountain, the first of his songs I ever heard. I created it as a gift to the man himself, his birthday being the day before his Dallas show. I hold no illusions that I'm the first fangirl to do this, but he seemed to appreciate it. It has apparently joined the menagerie on his tour bus. And now you can make one of your very own!
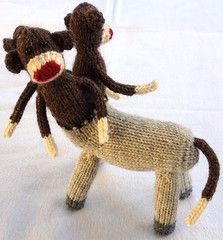 Pony Body:
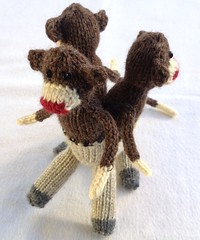 Monkey Bodies:
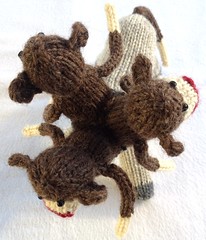 Round 32: k2tog 5 times - 5 sts.
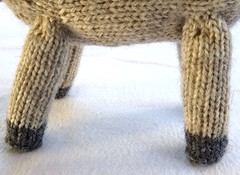 With grey, using backwards loop method, CO 3 sts and slide to other end of dpn.
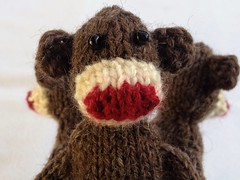 Repeat this row twice more.
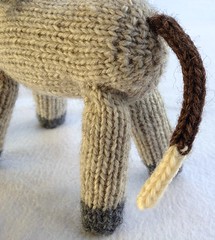 Monkey Tail:
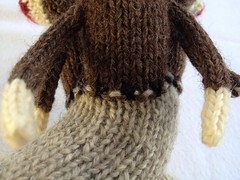 With black, embroider sutures along pony-monkey transition line. Sew on beads for eyes.