Sunday, September 30, 2012

Lego Man Mitts

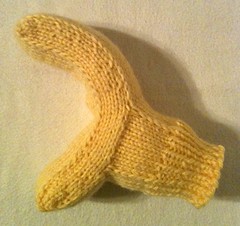
Child Lego Mitts Now available in a range of sizes to fit the whole family!

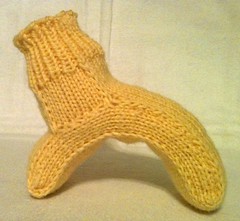
Just in time for Halloween and cooler weather (in the northern hemisphere at least), I am proud to present to you an adorable addition to your favorite child's wardrobe, accessories that resemble the molded plastic hands of those ubiquitous little toys - Lego Man Mitts!

Also available as a free pdf!
Download through Ravelry!

Materials:
Stitch Nation Washable Ewe [100% wool; 183yds/167m per 3.5oz/100g skein]; 1[1, 1, 1, 1, 2] skeins in color #3215 Duckling
US #4/3.5mm circular (for magic loop) or double-pointed needles
Tapestry needle
Stitch holder or waste yarn

Gauge:
22sts = 4in /10cm in stst
Finished Size:
Hand circumference:
5[5.75, 6.5, 7.25, 8, 8.75]in/
13[15, 17, 19, 21, 23]cm
To fit:
0-2 years[3-5 years, 6-9 years, 10 years-Adult S, Adult M, Adult L]

Click here for Abbreviations

PATTERN
Fingers
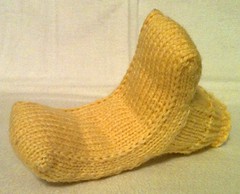
Using magic cast-on method, CO 12[14, 16, 18, 20, 22] sts on each needle - 24[28, 32, 36, 40, 44] sts total.
Round 1: knit.
Round 2: {k1, m1R, k10[12, 14, 16, 18, 20], m1L, k1} twice - 28[32, 36, 40, 44, 48] sts.
Round 3: {k2, sl1, k8[10, 12, 14, 16, 18], sl1, k2} twice.
Round 4: knit.
Round 5: k2, sl1, k8[10, 12, 14, 16, 18], sl1, k1, w&t, p12[14, 16, 18, 20, 22] w&t, k1, sl1, k8[10, 12, 14, 16, 18], sl1, k1, k1 tog w/wrap (insert right-hand needle up through front of wrap then through st and k these tog), k2, sl1, k8[10, 12, 14, 16, 18], sl1, k2.
Round 6: k1 tog w/wrap, k to end.
Repeat Rounds 3-6 2[4, 5, 6, 7, 8] more times. Repeat Rounds 3-4 once more for all sizes, then Round 3 once again. 

Palm (worked flat)
Row 1: k3, place 8[10, 12, 14, 16, 18] sts on holder or waste yarn.
Row 2: sl1, p19[21, 23, 25, 27, 29].
Row 3: sl1, k4, sl1, k8[10, 12, 14, 16, 18], sl1, k5.
Repeat Rows 2-3 2[4, 4, 5, 5, 6] more times. Do not turn at end of last row.
Using backwards loop cast-on method, CO 8[10, 12, 14, 16, 18] sts and join to beg of row to begin working in the round again, k17[19, 21, 23, 25, 27]. You should now be back to the original beg of your rounds.

Thumb
Round 1: k16[18, 20, 22, 24, 26], sl1, k8[10, 12, 14, 16, 18], sl1, k2.
Round 2: knit.
Round 3: k2, sl1, k8[10, 12, 14, 16, 18], sl1, k1, w&t, p12[14, 16, 18, 20, 22], w&t, k1, sl1, k8[10, 12, 14, 16, 18], sl1, k1, k1 tog w/wrap, k2, sl1, k8[10, 12, 14, 16, 18], sl1, k2.
Round 4: k1 tog w/wrap, k to end.
Round 5: {k2, sl1, k8[10, 12, 14, 16, 18], sl1, k2} twice.
Round 6: knit.
Repeat Rounds 3-6 0[1, 1, 2, 3, 3] more times. Repeat Round 5 once more for all sizes.
Next round: {k1, k2tog, k8[10, 12, 14, 16, 18], ssk, k1} twice - 24[28, 32, 36, 40, 44] sts.
Cut yarn, leaving about a 18-inch/45-cm tail. Graft remaining sts together.

Cuff
Place 8[10, 12, 14, 16, 18] sts from holder/waste yarn onto right-hand needle. With RS facing, continuing to work around edge of opening, join new yarn and pick up & k8[9, 10, 11, 12, 13] sts along first selvage edge, pick up & k8[10, 12, 14, 16, 18] sts along CO edge, pick up & k8[9, 10, 11, 12, 13] along other selvage edge, k8[10, 12, 14, 16, 18] across live sts - 32[38, 44, 50, 56, 62] sts total.
Round 1: {sl1, k6[8, 10, 12, 14, 16], sl1, k8[9, 10, 11, 12, 13]} twice
Round 2: knit.
Repeat Rounds 1-2 2[4, 5, 6, 7, 8] more times. Repeat Round 1 once more for all sizes.
Next Round: Dec 4[6, 8, 10, 12, 14] evenly around – 28[32, 36, 40, 44, 48] sts.
Work k1, p1 ribbing for 8[10, 12, 14, 16, 18] rounds. Bind off in pattern.
Weave in ends. Block if desired.

Feel free to comment here with questions.

This pattern is intended for personal use only. Please do not try to sell it or any product made from it. Thank you.

Friday, September 28, 2012

Hawaii: Part VI

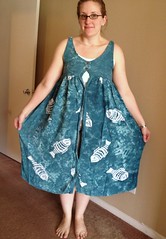
The little fishies on this dress drew my eye at the thrift store last weekend, and I thought to myself, "This will complete my Hawaii wardrobe quite nicely!". I'm also in love with the teal color too. The only drawback was that only 5 of the original 10 buttons remained attached. No problem! I've got just the thing!

Fishy Dress-to-Skirt Refashion - Before
Yes, I am wearing a tank and shorts underneath for this photo.

Tuesday, September 25, 2012

Hawaii: Part V

This piece certainly had the most dramatic change of my Hawaii wardrobe. It began its life as a men's button-down shirt with cute little flamingos all over it.

Flamingo Shirt-to-Dress Refashion - Before

Monday, September 24, 2012

Hawaii: Part IV

We start off today with a brightly-colored floral skirt made of that really thin, airy material. You know the ones. This particular skirt had no more spring in its waistband, though to be fair, it did still have a drawstring.

Fluttery Floral Skirt-to-Dress Refashion - Before

Saturday, September 22, 2012

Hawaii: Part III

The colors in this floral print drew my eye at the thrift store. They're sort of non-traditional colors for a floral print - indigo, pumpkin, and olive green leaves. And technically, this skirt fit in its original form. But it's wasn't going to stay like that for long.

Black Floral Skirt-to-Dress - Before

Friday, September 21, 2012

Hawaii: Part II

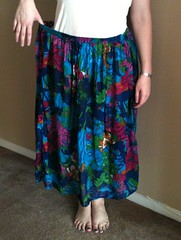
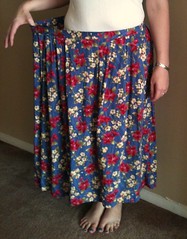
This skirt's floral pattern caught my eye at the thrift store. Its deep pink and pale yellow flowers really stand out against the blue background. But overall, the skirt was not working - too loose around the waist and the hem fell at the awkward mid-calf length. But (and I didn't even notice this until I got it home and was about to cut into it) it has pockets!

Ruffled Floral Skirt - Before

Wednesday, September 19, 2012

Hawaii: Part I

So I'm sure you've all been dying to know where it is the Dude and I going for our 10-year anniversary trip/belated honeymoon. And I'm sure showing a picture of a pile of brightly-colored florals was oh-so-subtle, right? Well, you guessed it! We're going to Hawaii in couple months! I'm incredibly excited and spent the entire day last Saturday stitching up some new (to me) rags. Piece numero uno was found in a sad state for $2 at the local Goodwill.

Blue Floral Shorts-to-Skirt Refashion - Before

Tuesday, September 18, 2012

Big News on the Knitting Front!

Disclaimer: An abundance of exclamation points are contained within. Those with heart conditions are advised to proceed with caution.

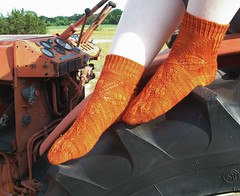
Guess what! I've got a sock pattern published in this issue of Knitty magazine! You have no idea how challenging it has been to not announce it to the world before now. But the issue just went live, so there's no more need for secrecy. You should go check out my Earthbound socks. Go ahead. I'll wait here.

Earthbound Socks

Isn't this issue fabulous? I mean, it ought to be. It is the 10th anniversary issue after all. And I am so honored to be a part of it!

Ok, that's all I have to say.

Why are still sitting there? Don't you have yarn to go buy?

Monday, September 17, 2012

Two for the Price of One

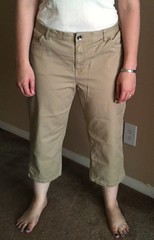
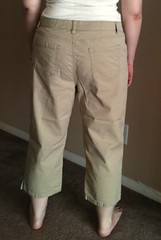
I have two remakes to share with you today. The first is a basic resize; the second was a bit more involved. Let's start out simple. These khaki-colored denim capris may look like they fit in the waist, but that's because they sagging down on my hips quite a bit. They're intended to be much higher-waisted than in these photos.

Khaki Capris - BeforeKhaki Capris - Before

Sunday, September 16, 2012

Let that be a lesson to you

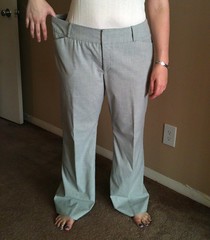
I had these slacks that I had only worn a few times (though I did get them second-hand originally, so they certainly weren't brand new, but still in good condition). Now, clearly, they don't fit anymore.

Slacks Refashion - Before

Wednesday, September 12, 2012

Same Stuff, Smaller Size

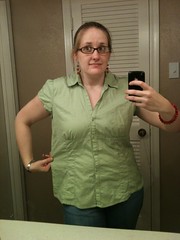
Today's makeovers are not drastic changes; the shirt is still a shirt, the pants are still pants, and the vest? Yep, still a vest. However, our menu today does feature my first-ever pants tailoring experiment, of which I am pretty proud. We begin with a pair of slacks, a button-down top, and a vest that were getting snug on me last year, but are now a few sizes too large. I'm afraid I don't have a before picture for the vest, but as I said, it started out about the same as it finished, just bigger.

Green Blouse - BeforeShrunken Pants - Before

Tuesday, September 11, 2012

Quick Change

So I put on this khaki jacket this morning, and it just didn't quite work. I really liked the idea of the jacket with the rest of the outfit (army green short-slacks, rust-colored cami, jade jewelry, chocolate brown pumps), but it was too big and the sleeves have always been a bit too short for my monkey arms. Overall, it just didn't flatter.

I really wanted to wear it, but had no time for alterations before needing to leave for work. So what's a girl to do? Well, the sleeves are an easy fix - just roll them up a couple times. And to make it a bit more fitted, I snipped off the button and, with a few quick flicks of my needle and thread, sewed it back on a couple inches further in from the front edge. Behold! A fast, almost no-sew solution!

Quick Change - BeforeQuick Change - After

Monday, September 10, 2012

Black & White & Beige All Over

I went to the thrift store last weekend on a mission. My husband's and my tenth wedding anniversary is coming up soon, and seeing as how we got married quite young and had no money for a honeymoon, we're planning a trip for the big 1-0 to make up for it. So the purpose of my thrifting excursion was to buy a week's worth of garments to be refashioned into a vacation wardrobe. Can you guess where we're going?

Thrifted Florals for Refashioning

Stop back by soon to see these pieces transformed!

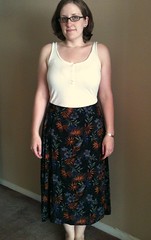
And while I was out a'thriftin', I also picked up this little skirt for $2, no alterations needed. Well, I did notice after I put it on to wear it to work the other day that there is a little spot where the waistband is coming undone. But it's under the belt, so no biggie. I'll mend it up before I wear it again. I just loved the non-traditional-floral colors used in this floral pattern - black, white, and beige. Also, pockets! Gotta love skirts and dresses with pockets!

Black & White & Beige All Over

Friday, September 07, 2012

And now for something completely different...

So a few years ago, I cut off all my hair. I mean, pixie cut. It was a huuuuge mistake, and I knew it right away. I've been growing it out since then with no real long-term plans. After pulling it back in a bun every day this summer, I was ready for a change. I knew I didn't want to go quite as short as last time, but with my recent weight loss and the fact that I now wear earrings and dresses and skirts, not just jeans everyday, I thought perhaps I could pull off a shorter 'do now.

Now, I usually just go to Super Cuts or some such place as I am incredibly cheap, but a friend recommended I try the Paul Mitchell cosmetology school nearby. Instead of paying a little and getting a basic cut from someone who just graduated, you can pay even less ($12!) for someone who is about to graduate and has an instructor watching their every move and available to fix any mistakes they make. Plus, I love having my hair played with, and since the students are still learning, they take their sweet time with it. Normally, they allot 2 hours for a "Cut & Style", but I have a ton of hair, which took a lot of thinning and layering to reduce its volume, so I got 3 full hours of hair play tonight (yeah, hair play, I said it). Anyway, I can't believe I'd never gone there before, and I will absolutely go back. I really love the results!

Haircut - BeforeHaircut - After

Disclaimer: In the photo on the right, my hair was styled at the salon.
So there's a pretty good chance this is the best it will ever look.


9/8/12: Edited to add a photo the next day of how it looks when not styled by a soon-to-be-professional. My waves really come out when they don't have 2.5 tons of hair weighing them down.

Haircut - Au Naturale

Wednesday, September 05, 2012

Great Divide

Often, my fashions involve combining elements of multiple pieces to create one new garment. Well, today we're going the other way around - one pair of over-sized slacks is becoming a skirt and a vest!

Slacks to Skirt & Vest - Before
(I swear, I try not to make goofy "before" faces, but it's more difficult than you'd think!)

Saturday, September 01, 2012

Sexy T-Shirt Dress: My First Tutorial

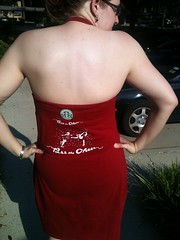
I picked up another $1 Dallas Stars tee at the thrift store a while, and I had this idea in my head of how to turn it into a cute dress. I didn't want to ruin it in the experimentation, so I started by trying my idea out on an old tee leftover from my barista days (holiday season 2007, to be specific).

Red T-Shirt Dress RefashionRed T-Shirt Dress Refashion, Back

Wanna see how I did it?