Sunday, December 24, 2017

Christmas Quickie

Whilst digging through my craft closet for gift wrap yesterday, my eyes instead fell on this buffalo plaid skirt. It's been hanging in there for months (years?) now, but for some reason, on this particular day, the sight of it gave me the immediate urge to sew something. I had no doubt, when I came across it at a clothes swap, that its soft wool blend fabric and pre-fringed edging would make a perfect winter accessory. Now was finally the time to make that happen!

Buffalo Plaid Cowl - Before

First, I used my seam ripper to salvage the button and zipper, and also to separate the lining from the plaid around the back slit.

Buffalo Plaid Cowl - In ProgressBuffalo Plaid Cowl - In Progress

Next, I cut off the waistband (the photo of which has mysteriously disappeared from my phone) and picked out the darts. Then I stitched closed the back seam where the zipper and slit had been.

Buffalo Plaid Cowl - In ProgressBuffalo Plaid Cowl - In Progress

A final re-hemming of the top edge, and my new cowl was ready for a chilly night on the town.

Buffalo Plaid Cowl - In ProgressBuffalo Plaid Cowl - After

I've been so preoccupied with yarn lately that my sewing machine had gathered a bit of dust, unfortunately. It felt really good to be able to whip something up in about 15 minutes.

Buffalo Plaid Cowl - AfterBuffalo Plaid Cowl - After

I hope you're all enjoying some rest and relaxation and/or festive family gatherings. Happy holidays, everyone! See you in the new year!

Buffalo Plaid Cowl - After

Sunday, December 10, 2017

Wonder Woman Blankie

When one of my coworkers announced her pregnancy last summer, I was really hoping it would be a girl. She, her husband, and their daughter are all a bit obsessed with superheros, so I was itching for an excuse to knit up a modified 
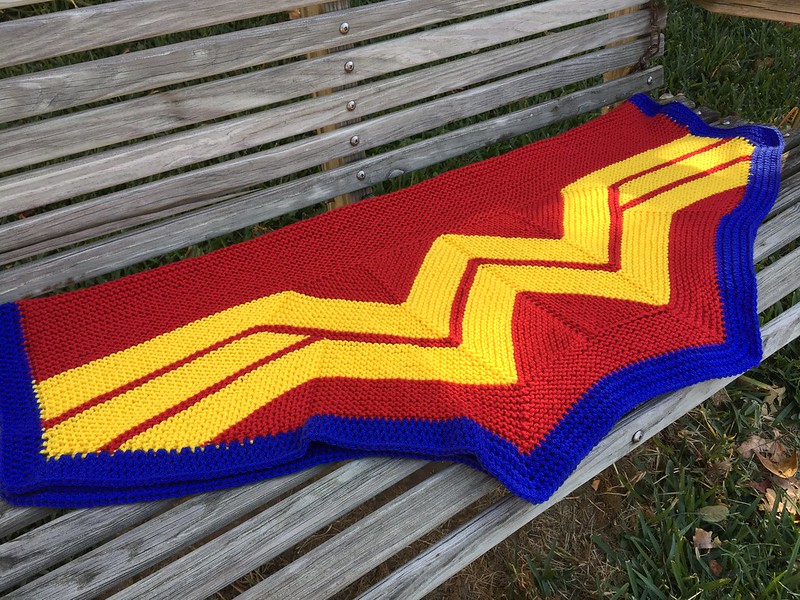
Wonder Woman Wrap Blankie for the occasion. Shortly thereafter, she found out it was indeed another little girl, so I got to work! I've heard from several other crafters who've wanted to modify my patterns for other purposes, so I thought I'd share my blanket mods with you, just in case you're looking to do something similar. I used the knitted WWWrap as my starting point, but similar tweaks could also be made to the crochet version, if you're so inclined.

Wonder Woman Blankie

First off, I knew it needed to be machine washable since baby blankets are susceptible to all sorts of stains. I found just what I needed at my local Joann store in the form of 
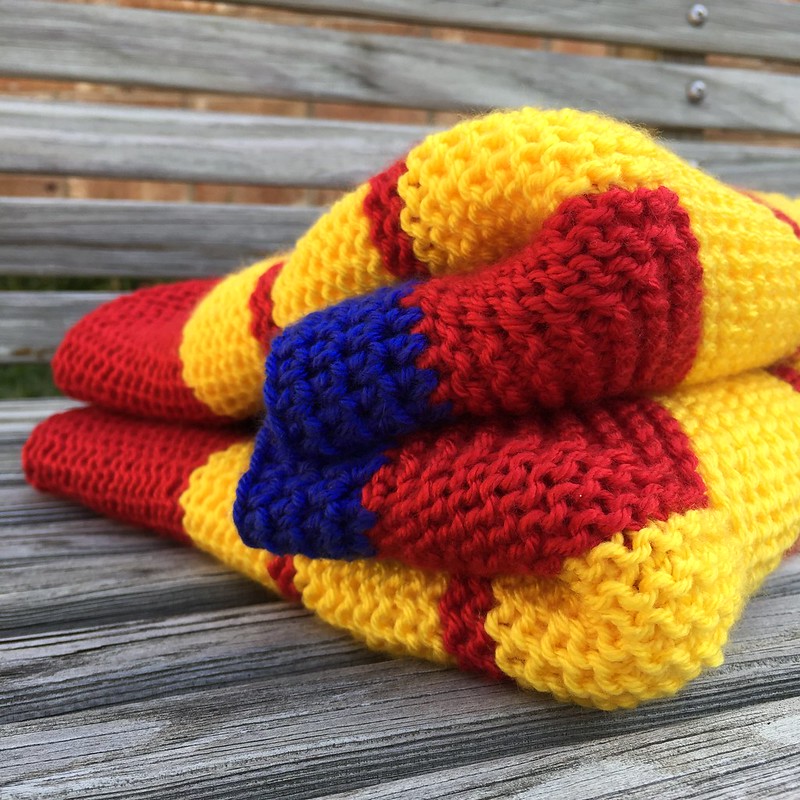
Premier Yarns Deborah Norville Everyday Soft Worsted Solids. They have a wide array of colors, but I was drawn to their Really Red, Lemon, and Royal Blue. I grabbed two skeins each of the red and yellow and one skein of blue for the border. Then I went home and set about swatching!

Wonder Woman BlankieWonder Woman Blankie

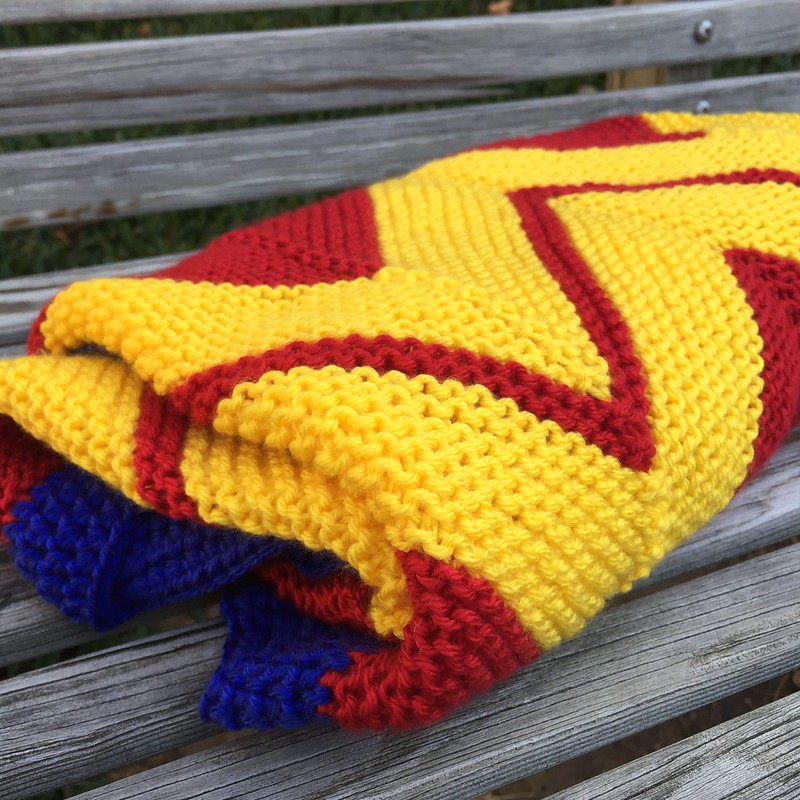
With my worsted weight yarn and size 8 (5mm) needles, I cast on using the Wee size instructions in the pattern. Since I didn't want my blanket to grow in width quite as quickly as the original wrap does, I chose to only work the kfb increase at the beginning and end of every other row, rather than every row. I also slipped the first stitch of every row for a nice clean selvage edge - makes it easier to pick up for the border later! When I reached my desired blanket width, about halfway through the side stripes, I stopped doing the kfb increases altogether so the blanket width would stay constant after that. After finishing the Upper Triangles, I simply continued to knit even in garter stitch until I was almost out of red yarn, leaving enough for just one more row. Next, I made second piece exactly the first and grafted the two halves together in the center with kitchener stitch to form a hexagonal-ish blanket.

Wonder Woman BlankieWonder Woman Blankie

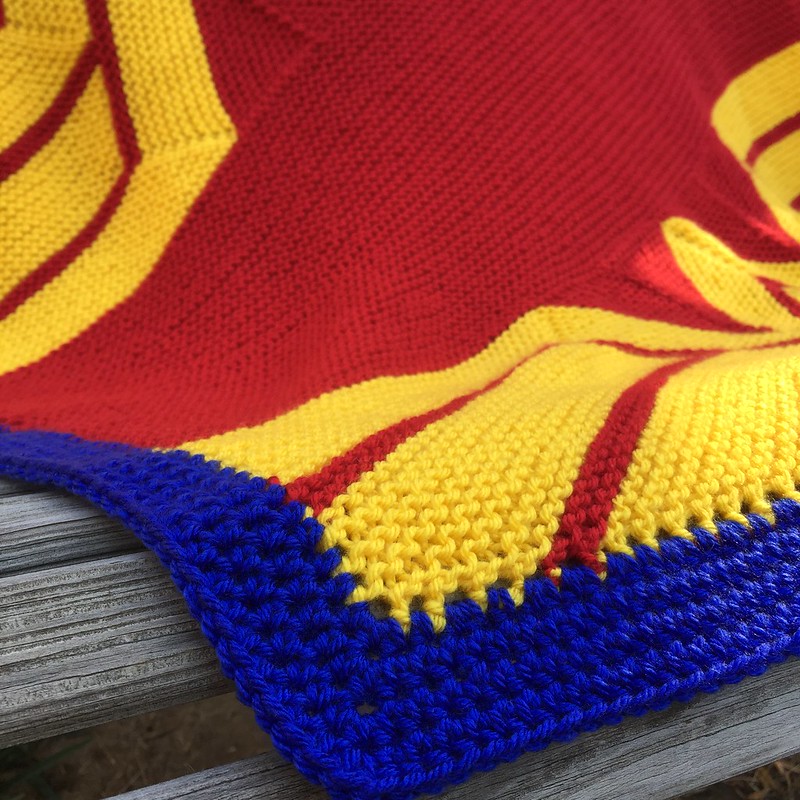
Finally, I grabbed my size H (5mm) crochet hook and worked a border all around consisting of four rounds of half double crochet stitches. Along the cast-on edges, I worked one hdc in each cast-on stitch; along the straight vertical sides, I worked one hdc in each selvage stitch (so 1 hdc per 2 garter rows); and along the angled increases edges, I did 3 hdc for every 2 selvage stitches (so 3 hdc per 4 garter rows). As I worked my border rounds, I did a double increase at each corner as well. I probably could've stood to pick up fewer stitches and/or do fewer increases since the border got slightly ruffly toward the end, but I think it still turned out fine. If you'd rather, you could certainly do a knitted border instead, but the thought of binding off that many stitches was not a pleasant one, so I opted for crochet.

Wonder Woman Blankie

I hope that helps give you some ideas of how to adapt this pattern to other uses. Enjoy!

Sunday, December 03, 2017

Modern Tapestry Crochet

I am not just a knitter. I'm a Knitter. Capital K. Everywhere I look, I see knitting. How I can I recreate that woman's sweater? Oh, that brick pattern would translate nicely to a knitted shawl! I'm a bit obsessive.

My crochet status, however, is strictly lowercase. Technically, I've been crocheting longer than I've been knitting, but once I picked up the needles, the hook just hasn't gotten as much love as it deserves. I've been trying to work on that lately because I do, in fact, enjoy crocheting and want to get better at it, to try new techniques and see what the craft can really do. With this in mind, I jumped at the chance to review a copy of Alessandra Hayden's Modern Tapestry Crochet.

Everpurple Country Cowl

To practice this new-to-me technique of crocheted colorwork, I chose her Evergreen Country Cowl pattern because its two-color southwest-esh design seemed like a fairly simple start to get my feet wet. I used some stash yarn - Patons SWS Soy Wool Solids in Natural Raisin and Natural.

Everpurple Country CowlEverpurple Country Cowl

The author explained everything so well. As a matter of fact, because I had actually read the instructional pages at the beginning of the book, I knew immediately what I'd done wrong when I noticed my cowl was developing an upside-down-funnel shape, narrowing as it went upward. I had been holding the unused color too tightly when crocheting around it causing the fabric to get tighter and tighter. That wouldn't do at all if I wanted it to fit over my huge head, so a'ripping we will go! My second attempt, holding the yarn a little differently for a looser gauge, turned out much more even (and wearable!).

Everpurple Country Cowl

I would highly recommend this book to anyone looking to level-up their hooking skills, or even experienced crocheters on the hunt for stylish, modern accessories. I already have my eye on a few more designs in this book for future projects.

Everpurple Country CowlEverpurple Country Cowl