Showing posts with label free knitting patterns. Show all posts

Saturday, December 08, 2018

Yip Yips

The spaceship has landed, and any fan of late 20th century children’s public television will recognize these lovable aliens.


Crochet them or knit them, use them as holiday stockings, toy storage, kids’ laundry, whatever really!


You should also be prepared to play with ping pong balls and pipe cleaners, and do a little light sewing.


Yip yip yip yip uh-huh uh-huh…

FINISHED MEASUREMENTS
Circumference: 25 inches
Height: 14 inches (excluding tentacles & hanging loop)

GAUGE
8 sts/8 rows = 4 inches in single crochet
8 sts/16 rows = 4 inches in stockinette stitch

MATERIALS
Bernat Blanket/Blanket Brights/Baby Blanket [100% polyester; 220yds/201m per 300g skein]; 1 skein in color of your choice; shown in Royal Blue, Pixie Pink, Pow Purple, Baby Teal, Crimson (crochet), and Baby Lilac (knit)
L/8mm crochet hook (also used for attaching tentacles in both crochet and knit versions)
US10.5/6.5mm circular needle, 24 inches long
Stitch marker
Tapestry needle
2 ping pong balls
Black paint pen or permanent marker
2 pipe cleaners, 12 inches long
Awl, ice pick, corn pick (for poking holes in ping pong balls)
Black flannel fabric, 16 inches by 24 inches
Scissors
Sewing needle
Black thread

Get the FREE crochet pattern or knit pattern now on Ravelry!

Sunday, December 10, 2017

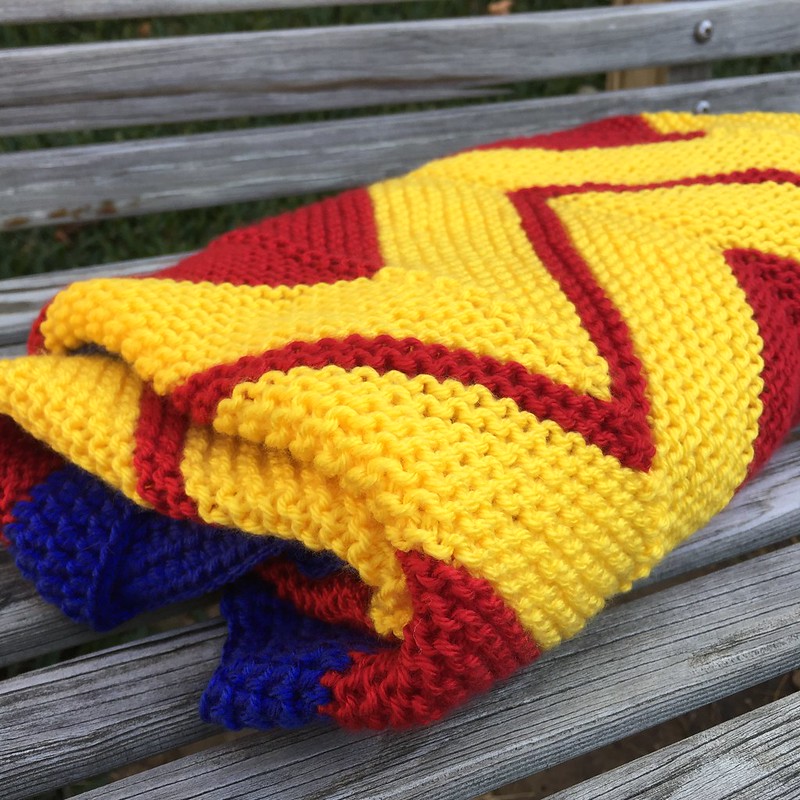
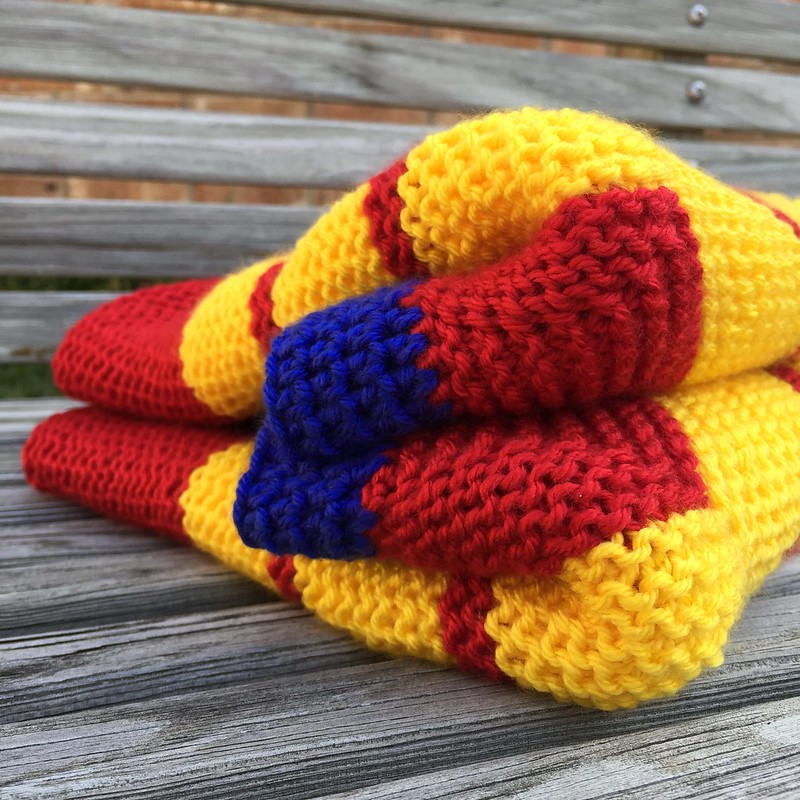
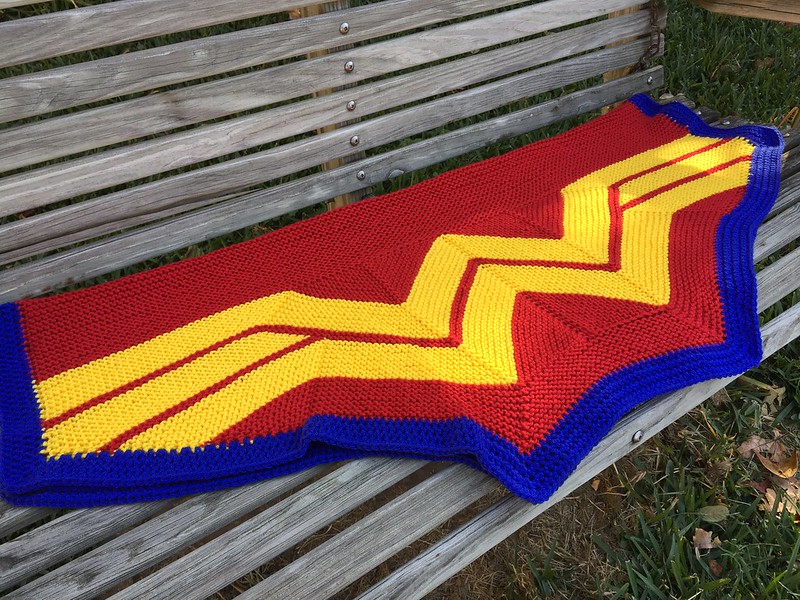
Wonder Woman Blankie

When one of my coworkers announced her pregnancy last summer, I was really hoping it would be a girl. She, her husband, and their daughter are all a bit obsessed with superheros, so I was itching for an excuse to knit up a modified Wonder Woman Wrap Blankie for the occasion. Shortly thereafter, she found out it was indeed another little girl, so I got to work! I've heard from several other crafters who've wanted to modify my patterns for other purposes, so I thought I'd share my blanket mods with you, just in case you're looking to do something similar. I used the knitted WWWrap as my starting point, but similar tweaks could also be made to the crochet version, if you're so inclined.

Wonder Woman Blankie

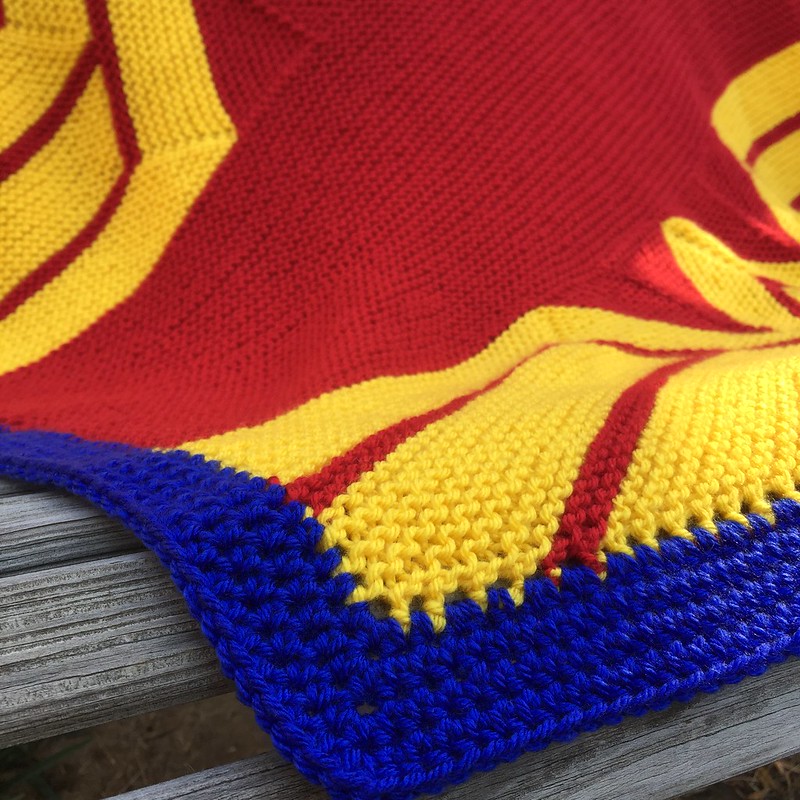
First off, I knew it needed to be machine washable since baby blankets are susceptible to all sorts of stains. I found just what I needed at my local Joann store in the form of Premier Yarns Deborah Norville Everyday Soft Worsted Solids. They have a wide array of colors, but I was drawn to their Really Red, Lemon, and Royal Blue. I grabbed two skeins each of the red and yellow and one skein of blue for the border. Then I went home and set about swatching!

Wonder Woman BlankieWonder Woman Blankie

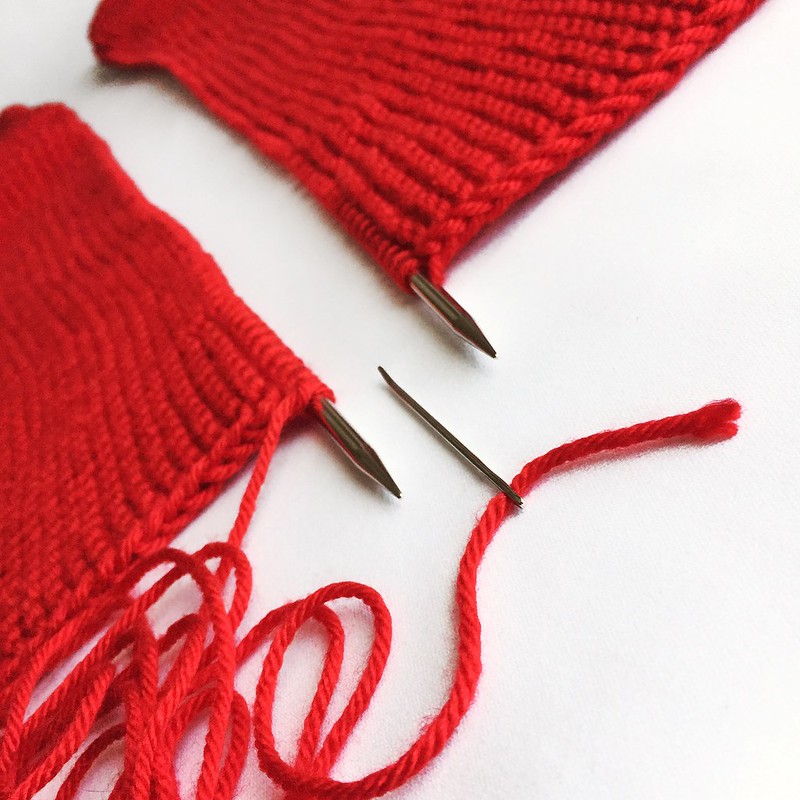
With my worsted weight yarn and size 8 (5mm) needles, I cast on using the Wee size instructions in the pattern. Since I didn't want my blanket to grow in width quite as quickly as the original wrap does, I chose to only work the kfb increase at the beginning and end of every other row, rather than every row. I also slipped the first stitch of every row for a nice clean selvage edge - makes it easier to pick up for the border later! When I reached my desired blanket width, about halfway through the side stripes, I stopped doing the kfb increases altogether so the blanket width would stay constant after that. After finishing the Upper Triangles, I simply continued to knit even in garter stitch until I was almost out of red yarn, leaving enough for just one more row. Next, I made second piece exactly the first and grafted the two halves together in the center with kitchener stitch to form a hexagonal-ish blanket.

Wonder Woman BlankieWonder Woman Blankie

Finally, I grabbed my size H (5mm) crochet hook and worked a border all around consisting of four rounds of half double crochet stitches. Along the cast-on edges, I worked one hdc in each cast-on stitch; along the straight vertical sides, I worked one hdc in each selvage stitch (so 1 hdc per 2 garter rows); and along the angled increases edges, I did 3 hdc for every 2 selvage stitches (so 3 hdc per 4 garter rows). As I worked my border rounds, I did a double increase at each corner as well. I probably could've stood to pick up fewer stitches and/or do fewer increases since the border got slightly ruffly toward the end, but I think it still turned out fine. If you'd rather, you could certainly do a knitted border instead, but the thought of binding off that many stitches was not a pleasant one, so I opted for crochet.

Wonder Woman Blankie

I hope that helps give you some ideas of how to adapt this pattern to other uses. Enjoy!

Thursday, August 17, 2017

Wonder Woman Wrap: The Sequel

Following last month's release of my Wonder Woman Wrap knitting pattern, I have been absolutely inundated with requests for a crochet version as well as a child's size. Of course, I am only too happy to oblige!

Wonder Woman Wrap - Crochet
Wee Wonder Woman Wrap - Crochet

So I've spent the past several weeks making calculations, working up swatches and samples, and obviously, having my very first crochet pattern thoroughly tested by experienced crocheters to make sure it's up to snuff.

Wonder Woman Wrap - CrochetWee Wonder Woman Wrap - Crochet

Now, I am pleased to announce the release of a crocheted Wonder Woman Wrap, in addition to the re-release of the knitting pattern - and both versions now include two sizes! The original "Wondrous" size is perfect for wrapping up all cozy-like, while the "Wee" size is ideal for children, or maybe just an adult who fancies more of a scarf than a shawl.

Wonder Woman Wrap - CrochetWee Wonder Woman Wrap - Crochet

CROCHET SPECS:

SIZE
Wee[Wondrous]

FINISHED MEASUREMENTS
Span: 64[94] inches
Height at center: 15[24] inches

MATERIALS
Fingering weight yarn - 220[400]yds/200[365]m each of two colors
   Wee sample:
      Louet Gems Fingering [100% merino; 185yds/169m per 50g skein];

         2 skeins Navy, 1 skein Pewter
   Wondrous sample:
      Lazy Cat Yarns Radiance [50% merino, 50% silk; 437yds/400m per 100g skein];
         1 skein 102 Sweet Dreams, 1 skein Amber Waves
H/8 or 5mm hook
Tapestry needle

GAUGE
12 hdc by 13 rows = 4 inches by 4 inches, after blocking

Download the FREE CROCHET pattern via Ravelry!

And check out the miniature knit version too!

Mini Wonder Woman Wrap
Mini Wonder Woman WrapMini Wonder Woman Wrap

KNIT SPECS:

SIZE
Wee[Wondrous]

FINISHED MEASUREMENTS
Span: 60[86] inches
Height at center: 11[22] inches

MATERIALS
Fingering weight yarn - 175[360]yds/160[330]m each of two colors
   Wee sample:
      Lazy Cat Yarns Endurance [75% merino, 25% nylon; 231yds/211m per 50g skein];
         1 skein 102 Sweet Dreams, 1 skein Amber Waves
   Wondrous sample:
      Lazy Cat Yarns Opulence [70% merino, 20% silk, 10% cashmere; 437yds/400m per 100g skein];
         1 skein 102 Sweet Dreams
      Hedgehog Fibres Sock [90% merino, 10% nylon; 437yds/400m per 100g skein];

         1 skein Pollen US #4/3.5mm circular needle
Tapestry needle
5 stitch markers

GAUGE
17 sts/33 rows = 4 inches by 4 inches in garter stitch, after blocking

Download the FREE KNIT pattern via Ravelry!

Mini Wonder Woman Wrap

Tuesday, July 04, 2017

Wonder Woman Wrap

I've discovered something over the last few months. When life gets stressful, I knit. I don't sew. I don't cross-stitch. I don't really do any other crafts either. They're all fun, of course, but I guess they each take more energy or something. At the end of a looooong work day, all I want to do is sit on the couch and knit. Even if it's a new design that still requires brain power, I'm much more relaxed with yarn in my hands than anything else.

Wonder Woman Wrap

You know what else I've discovered? I'm pretty badass. Wonderful, in fact! And hey, so are you! I say we all knit ourselves a little affirmation accessory right away.

Wonder Woman WrapWonder Woman Wrap

I tried to keep this pattern as simple as possible so it would be accessible to a wide range of knitters. However, some fairly basic short-rows were required to get the logo right. With that said, I think an advanced beginner, or even an adventurous newbie, could still handle it.

Wonder Woman WrapWonder Woman Wrap

FINISHED MEASUREMENTS
Span: 86 inches
Height at center: 22in

MATERIALS
Color A: Lazy Cat Yarns Opulence [70% merino, 20% silk, 10% cashmere;
400m/437yd per 100g skein]; color: 102 Sweet Dreams; 1 skein
Color B: Hedgehog Fibres Sock [90% merino, 10% nylon;
400m/437yd per 100g skein]; color: Pollen; 1 skein
US #4/3.5mm circular needle
Tapestry needle
5 stitch markers

GAUGE
17 sts/33 rows = 4 inches in garter stitch

Download the FREE pattern via Ravelry!

Wonder Woman Wrap

Sunday, April 30, 2017

Death Star

Oh, I am so behind in blogging, you guys. It's been a work- and fun-filled couple of months, and I promise to tell you all about it. In between it all, however, I did have time to whip a quick bit of knitted geekery for my brother's birthday gift. And you get to benefit as well! You can download the FREE PDF for this pattern from Ravelry!

Death Star

As many kids our age did, my brother and I grew up loving Star Wars, so a cuddly little Death Star ball seemed a perfectly appropriate present. I used some pale grey DK weight yarn I had on hand, but you can feel free to substitute as you like. If you use a different weight yarn, just increase or decrease your needle size accordingly to get a fairly dense fabric, so your filling doesn't poke through your stitches.

Death StarDeath Star

FINISHED MEASUREMENTS
Circumference = 12in/30cm
Height = 4in/10cm

MATERIALS
Plymouth Yarn Encore DK [75% acrylic, 25% wool;
150yds/137m per 50g skein]; Color: 466 Grey; 1 skein
US 1/2.25mm circular or double-pointed needles
Stuffing (fiber fill, waste yarn, etc.)
Tapestry needle

GAUGE
24 sts/32 rows = 4in/10cm in stockinette stitch

Download PDF through Ravelry!

Death Star

Monday, December 07, 2015

Craftmas Part One: Hand-Knit Stockings

We're decking the halls in preparation for the upcoming holidays, and we're doing it on a budget! Today, for your viewing pleasure, I bring you a set of three simple stockings to hang by the fire.

Simple Holiday Stockings

I knitted these up with some aran weight yarn that's been languishing in my stash for years now. It's so old it's actually been discontinued, but you could substitute any yarn of a similar thickness. I made them up as I went along, creating a basic sock recipe and inserting three different stitch patterns into it. This way, if we ever need supplementary stockings, I can make them in another pattern without worrying too much about matching the original three perfectly.

So how can you make your own? I'm so glad you asked! The pattern is available as a free pdf download from Ravelry. And if you don't have a Ravelry account yet? Well, that's free too, silly! Besides, if you enjoy any sort of fiber art - knitting, crochet, spinning, weaving - you really should check it out. It's an incredibly useful resource for organizing your stash, keeping track of your projects, finding new patterns and designers, conversing with like-minded craft enthusiasts, and about a billion other things!

So what are you waiting for? Go download your own copy and get to knittin'! Santa will be here before you know it!

Finished Measurements:
Foot circumference = 12in/30cm
Foot length = 8in/20cm, easily adjusted
Leg length = 12in/30cm, easily adjusted

Materials:
180-230yds/165-210m of aran weight yarn per stocking
Samples were knit with the following:
Patons SWS Soy Wool Solids [70% wool, 30% soy; 110yds/100m per 2.8oz/80g skein]
     Cable sample: 2 skeins #70012 Natural
     Lattic sample: 2 skeins #70008 Natural Snow
     Chevron sample: 2 skeins #70008 Natural Snow and 1 skein #70012 Natural
US8/5mm needles
Cable needle
Tapestry needle

Gauge:
20 sts/24 rows = 4in/10cm in stockinette stitch

Simple Holiday Stockings

Monday, June 02, 2014

SuperStar!

Guess who's the newest Knit & Crochet SuperStar over at Cut Out + Keep!

Knit & Crochet Superstar Carissa

Check back each day this week for another one of my featured projects.

Wednesday, December 04, 2013

Skullcracker

I am pleased as punch to present to you my newest knitting pattern, the Skullcracker cap! You can find the FREE pattern in the Winter 2013 issue of Knitty.

Skullcrusher Hat

It's available in four sizes, from infant to adult large.

Skullcrusher Hat

And you can choose the solid-colored or two-colored version.

Skullcrusher Hat

The best part? Hats work up super quick for great holiday gifts!

Skullcrusher Hat

Happy knitting!

Wednesday, June 12, 2013

Vino

ATTENTION KNITTERS: Only six and a half more knitting months until Christmas. Time to get started on you gift knitting. And what better way than with these fabulous fingerless mitts by yours truly in the newest issue of Knitty?

Vino Mitts

Wednesday, March 06, 2013

Nori

I am so very proud to present to you my second non-self-published knitting pattern - Nori!

Nori Shawl

She's a lovely triangular shawl, knit from side-to-side, featuring a wavy lace pattern reminiscent of the algae paper used to wrap sushi. For the full pattern, check out the latest issue of Knitty magazine!

Nori Shawl

Monday, December 03, 2012

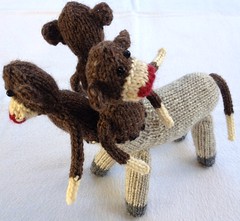
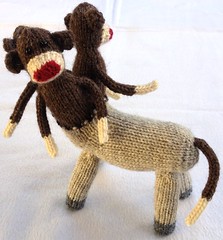
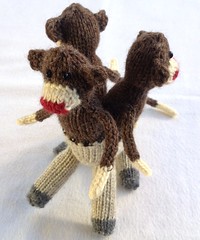
Half-Pony-Half-Monkey Monster

Half-Pony-Half-Monkey MonsterSunday evening, I indulged my nerd side, which perhaps implies I have a non-nerd side, doesn't it, and that's entirely inaccurate. But that's neither here nor there. A friend and I had the opportunity to attend a Jonathan Coulton concert here in Dallas. If you don't know who that is, go here. I'll wait. Awesome, no? So this little guy is an homage to Skullcrusher Mountain, the first of his songs I ever heard. I created it as a gift to the man himself, his birthday being the day before his Dallas show. I hold no illusions that I'm the first fangirl to do this, but he seemed to appreciate it. It has apparently joined the menagerie on his tour bus. And now you can make one of your very own!

Also available as a free pdf!
Download through Ravelry!

Yarn:
Small amounts of worsted weight yarn in beige, brown, grey, cream, and red
Sample was knit with the following:
Lion Brand Fisherman's Wool [100% wool; 465yds/425m per 8oz/225g skein]; 35yds/32m in #123 Oatmeal and 20yds/19m in #126 Nature's Brown
Lion Brand Wool-Ease Worsted [20% wool, 80% acrylic; 197yds/180m per 3oz/85g skein]; 6yds/6m in color #152 Oxford Grey and 2yds/2m in #138 Cranberry
Hobby Lobby I Love This Wool! [100% wool; 220yds/201m per 4oz/113g skein]; 16yds/15m in color #10 Ivory
Red Heart Heart & Sole [70% wool, 20% nylon; 213yds/195m per 1.76oz/50g skein]; 2yds/2m in color #3012 Black

Other Materials:
US #2/2.75mm double-pointed needles
Tapestry needle
Waste yarn
Stuffing
6 small black beads

Finished Measurements:
Approximately 8in/20cm tall and 8in/20cm long

Gauge:
Not really that important, but about 22 sts/31 rows = 4in/10cm in stockinette stitch

Click here for Abbreviations

Special Abbreviations:
kww = knit with wrap = Insert right-hand needle upward through wrap, then through stitch, and knit the two together.

PATTERN
Half-Pony-Half-Monkey MonsterPony Body:
With beige, using backwards loop method, CO 3 sts and slide to other end of dpn.
Round 1: kfb 3 times - 6 sts.
Distribute to dpns and join to work in the round.
Round 2: k
Round 3: kfb 6 times - 12 sts.
Round 4: k.
Round 5: [kfb, k1] 6 times - 18 sts.
Round 6: k.
Round 7: [kfb, k2] 6 times - 24 sts.
Round 8: k.
Round 9: [kfb, k3] 6 times - 30 sts.
Rounds 10-29: k.
Short-Row 30: k27, w&t.
Short-Row 31: p24, w&t.
Short-Row 32: k21, w&t.
Short-Row 33: p18, w&t.
Short-Row 34: k15, w&t.
Short-Row 35: p12, w&t.
Short-Row 36: k9, w&t.
Short-Row 37: p6, w&t.
Round 38: k6, [kww, k2] 4 times, do not turn.
Round 39: [k2, kww] 4 times, k18.
Repeat Short-Row 30-Round 39 twice more.
Knit 1 round.
Half-Pony-Half-Monkey MonsterMonkey Bodies:
Cut beige and join brown.
Round 1: p.
Round 2: [kfb, k8, kfb] 3 times - 36 sts.
Round 3: [kfb, k10, kfb] 3 times - 42 sts.
Round 4: [kfb, k12, kfb] 3 times - 48 sts.
Round 5: [kfb, k14, kfb] 3 times - 54 sts.
Round 6: [kfb, k16, kfb] 3 times - 60 sts.
Lightly stuff body. Transfer last 40 sts to waste yarn and distribute first 20 sts to dpns.
Round 7: k20 and join to work in the round.
Rounds 8-15: k.
Round 16: [k3, k2tog, ssk, k3] twice - 16 sts.
Round 17: [k2, k2tog, ssk, k2] twice - 12 sts.
Round 18: k.
Round 19: [k2, kfb twice, k2] twice - 16 sts.
Round 20: [k3, kfb twice, k3] twice - 20 sts.
Rounds 21-28: k.
Round 29: [k2, k2tog] 5 times - 15 sts.
Round 30: k.
Round 31: [k1, k2tog] 5 times - 10 sts.
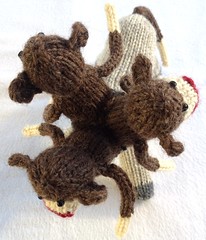
Half-Pony-Half-Monkey MonsterRound 32: k2tog 5 times - 5 sts.
Cut yarn, thread through remaining loops, pull tight, and tie off. Transfer first half of live sts from waste yarn to dpns. Join to work in the round. Join new strand of brown, leaving long tail (about 12in/30cm) for sewing later.
Repeat Rounds 7-32 and tie off.
Stuff the first two monkeys. Transfer last 20 live sts from waste yarn to dpns, and join new strand of brown.
Repeat Rounds 7-32 for third monkey, pausing to stuff after Round 28 and again for tying off.
Use long tail to secure hole in center between monkeys.

Pony Leg (make 4):
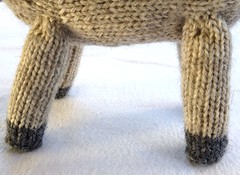
Half-Pony-Half-Monkey MonsterWith grey, using backwards loop method, CO 3 sts and slide to other end of dpn.
Round 1: kfb 3 times - 6 sts.
Distribute to dpns and join to work in the round.
Round 2: kfb 6 times - 12 sts.
Round 3: p.
Rounds 4-7: k.
Cut grey and join beige.
Rounds 8-27: k.
BO, stuff firmly (to provide support), and sew to body.

Monkey Arm (make 6):
With brown, using backwards loop method, CO 4 sts, leaving long tail for sewing later, and slide to other end of dpn. Work i-cord for 12 rounds. Cut brown and join cream. Work 6 more rounds of i-cord.
Final round: k2tog twice, slip first st over second st and off needle.
Cut yarn and tie off. Sew to monkey bodies.

Monkey Ear (make 6):
With brown, using backwards loop method, CO 5 sts, leaving long tail for sewing later.
Row 1: sl1, k4.
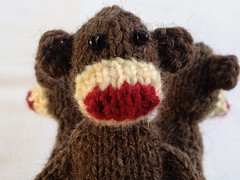
Half-Pony-Half-Monkey MonsterRepeat this row twice more.
Row 4: sl1, k2tog twice - 3 sts.
BO. Sew to monkey heads.

Monkey Mouth (make 3):
With red, using magic cast-on method, CO 8 sts (4 on each needle).
Round 1: [kfb, k2, kfb] twice - 12 sts.
Cut red and join cream.
Round 2: k.
Round 3: [kfb, k4, kfb] twice - 16 sts.
Round 4: k.
BO, leaving long tail for sewing later. Stuff and sew to faces.
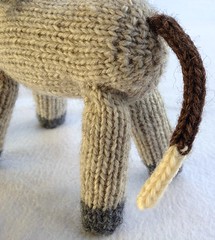
Half-Pony-Half-Monkey MonsterMonkey Tail:
With brown, using backwards loop method, CO 4 sts, leaving long tail for sewing later, and slide to other end of dpn.
Work i-cord for 16 rounds.
Cut brown and join cream.
Work 8 more rounds of i-cord.
Final round: k2tog twice, slip first st over second st and off needle.
Cut yarn and tie off. Sew to pony butt.

Finishing:
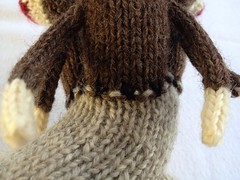
Half-Pony-Half-Monkey Monster With black, embroider sutures along pony-monkey transition line. Sew on beads for eyes.
Weave in ends or hide inside body.

Feel free to comment here with questions.

This pattern is intended for personal use only. Please do not try to sell it or any product made from it. Thank you.