A light dusting of snow on Wednesday (which melted as soon as it hit the ground), combined with the near-constant rain and sleet of the past several days, made outdoor photography just a little too slushy for my liking this week. The good news is, the sun came out just long enough to make indoor photography doable, once I found the right spot in my house. And what better way to spend a cold, wet afternoon than to throw a little fashion show in your living room, right?
When Beth, aka Bethie the Boo, offered us a ride in her time machine, I knew just which decade I wanted to visit. I will always look back fondly on the fads of my youth (well, some of them), and as a 90s teen, that means floral dresses, denim, chunky boots, plaid. And as luck would have it, all these things are making a comeback recently. I've always heard that fashion is cyclical, but as I age, I'm learning this lesson first-hand. On the one hand, seeing more and more trends for the second time makes me feel old. And yet, sometimes nostalgia gets the better of me.
So in the spirit of nostalgia, I threw together a few outfits inspired by 90s fashion, though perhaps tempered by my adult sensibilities.
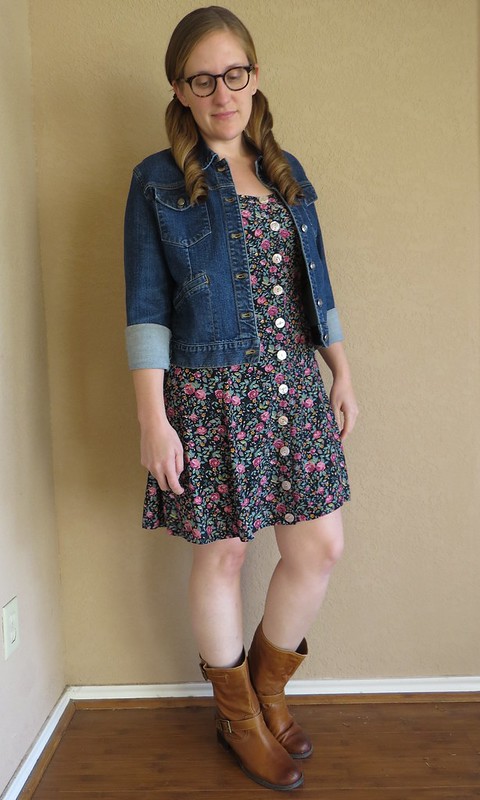
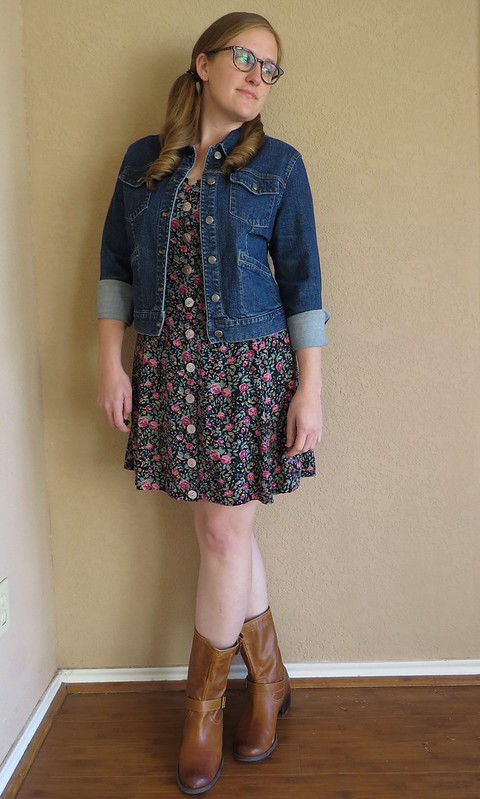
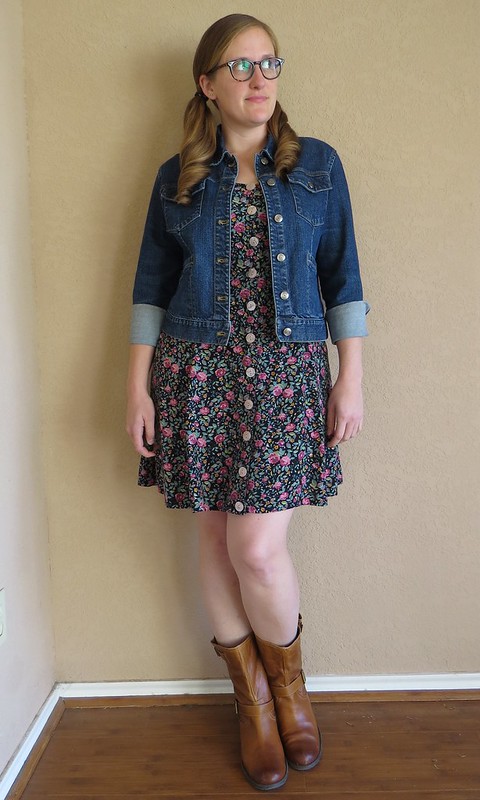
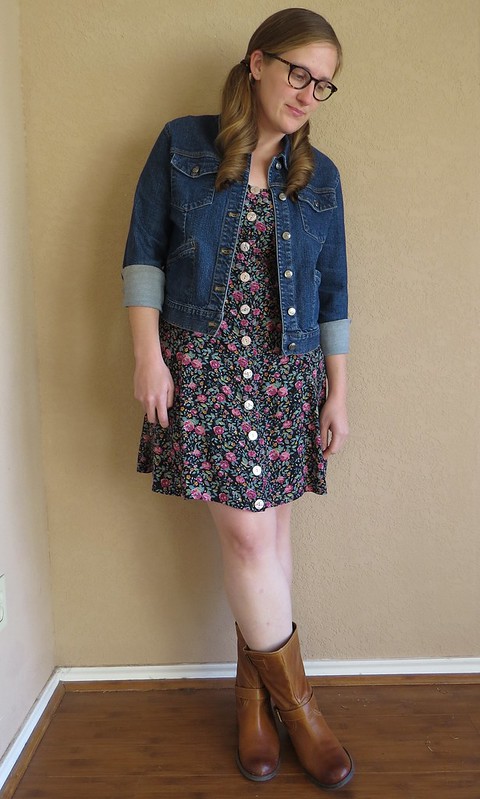
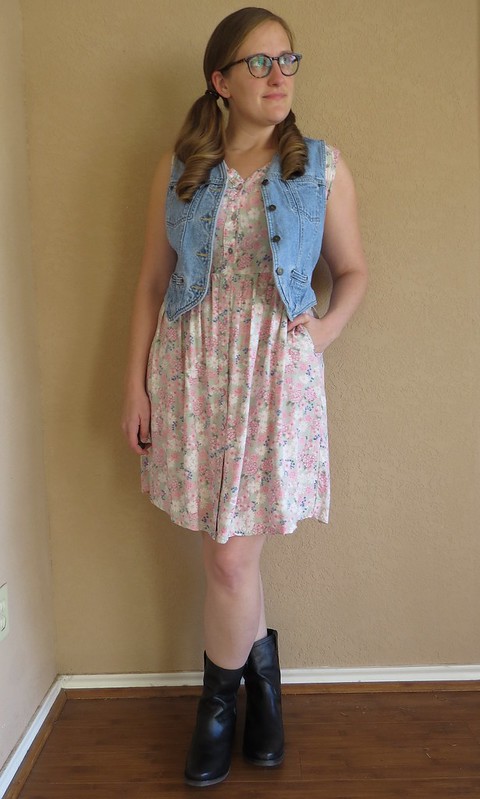
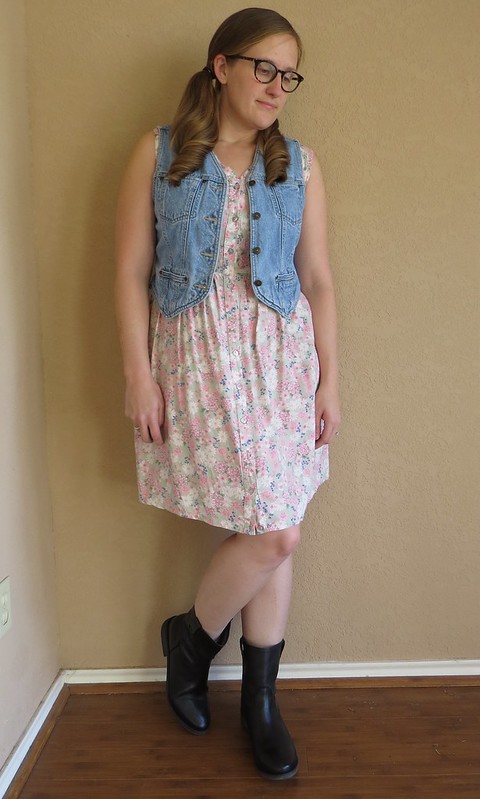
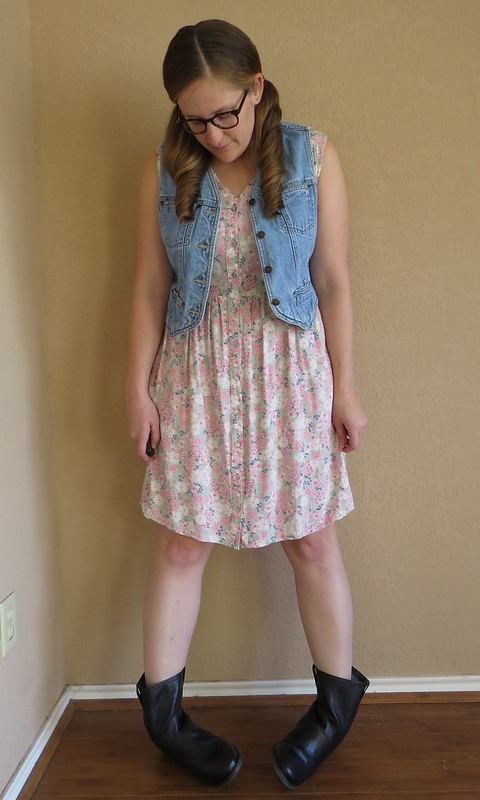
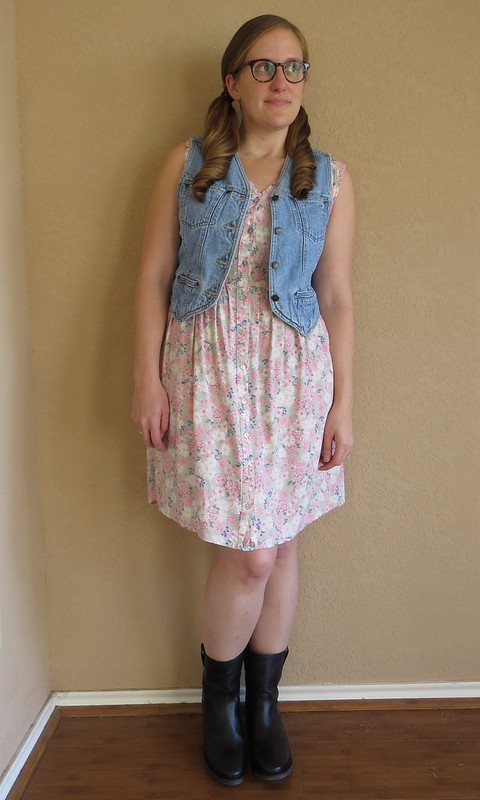
For the first look, I paired a refashioned floral dress with my $5 thrifted denim jacket and $16 thrifted leather boots. Nothing that screams 90s, but it certainly casts a nod in that direction.
Outfit #2 was quite similar, but with a slightly stronger 90s slant. The free denim vest, left over from someone's garage sale, is definitely a little more... vintage, shall we say? Also, the pastel dress (refashioned) and the black leather boots ($30 clearance at Target, originally $60) are in such high contrast to one another, a less subtle call-out to the genuine combat boots (army surplus!) I wore back in the day.
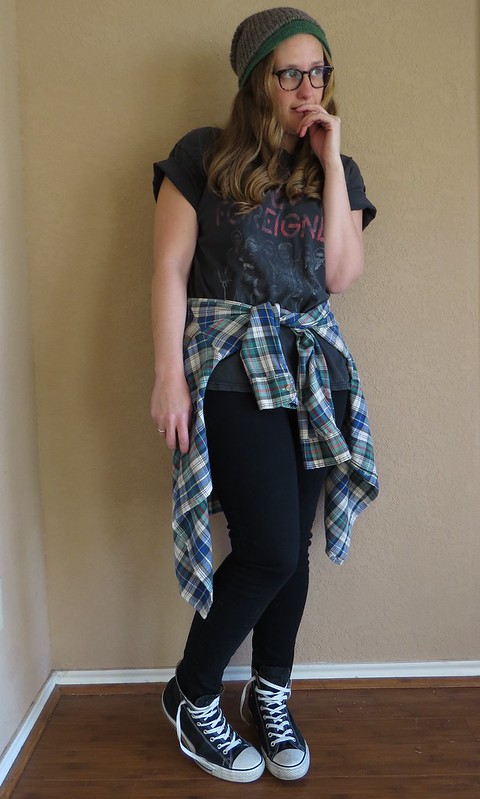
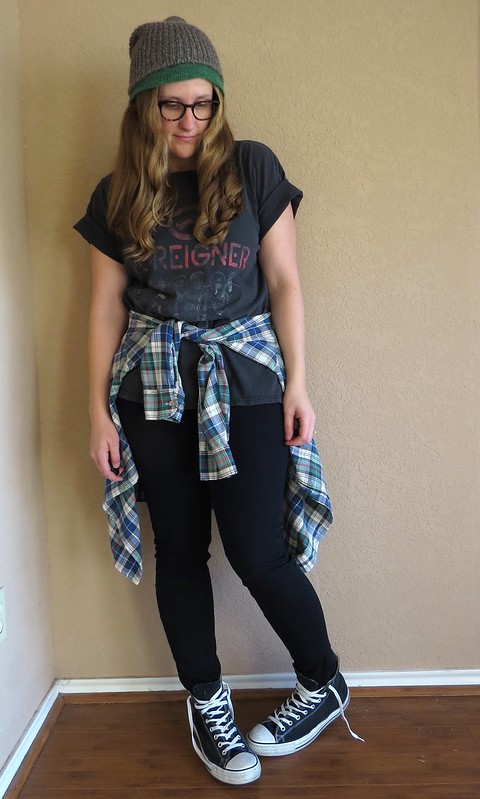
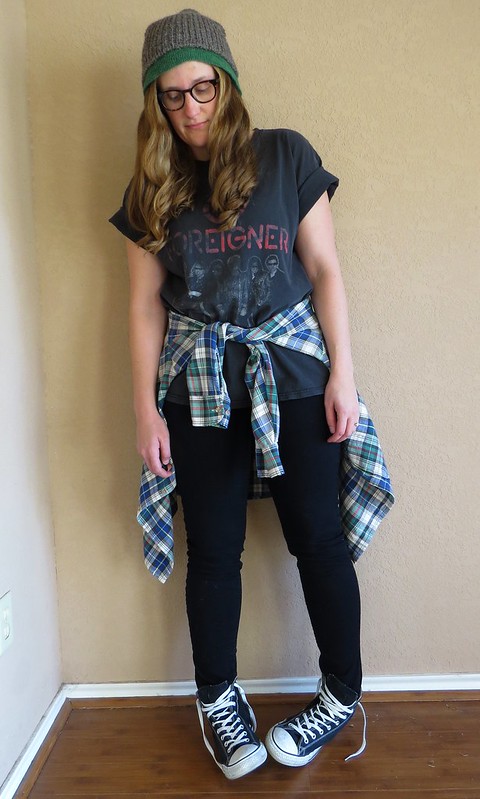
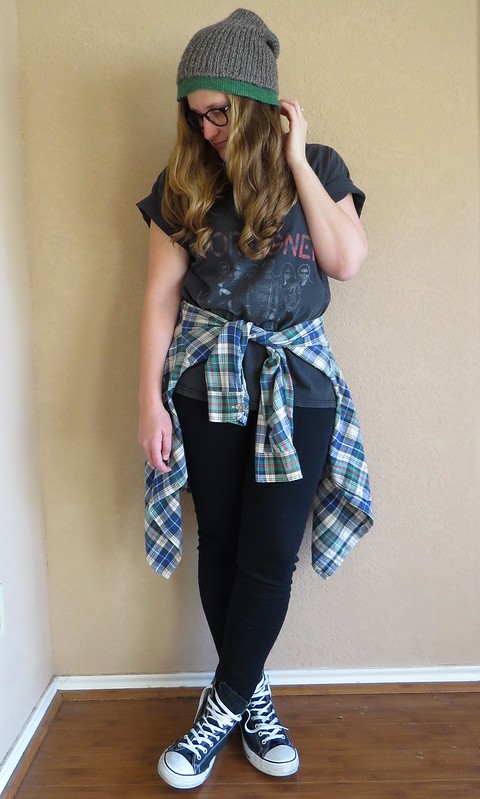
Lastly, in an even more obvious homage to the 90s, I tried the grunge look on for size. I started with a base of black skinny jeans (refashioned) and a used-to-be black Foreigner tee from my husband's closet. I also snagged his black high-top Chucks while I was in there (let's pretend they aren't two sizes too big for me), and added in one of my dad's plaid flannel shirts, borrowed at least 15 years ago and never returned (sorry, Dad!). That shirt spent many an afternoon tied around my waist in junior high school.
I topped it all off with my recently completed, hand-knit Howlcat. It's basically a big tube, half one color and half another, that can be folded with either color toward the outside, making it reversible. Then you can wear it in tube form as a cowl or put a twist in it before folding in half and it becomes a hat. That's four different ways to wear it! I used the yarn I brought back from my trip to Hawaii a couple years ago. The grey is sourced from alpacas local to the Big Island, and the green is a luscious cashmere, hand-dyed in Hawaii.
Sadly, this last outfit had the opposite effect as desired, accentuating the "old" in my mind, rather than the Good Old Days. I'm not sure I could get away with wearing this combination out in public anymore. But hey, it was fun to reminisce!
How about we go see where (when?) the other TSTers took this time-travelling challenge? Just click their pics below, or click the TST icon to visit and like our Facebook page.
Thursday, February 26, 2015
Monday, February 23, 2015
UGLY Skirt Challenge
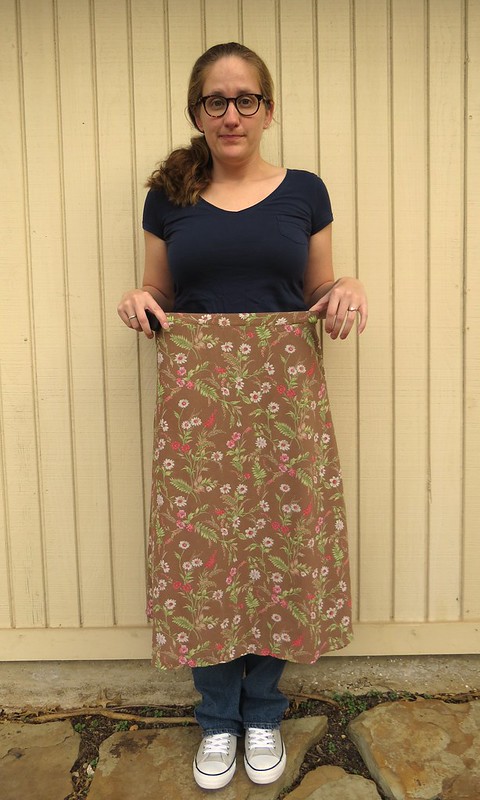
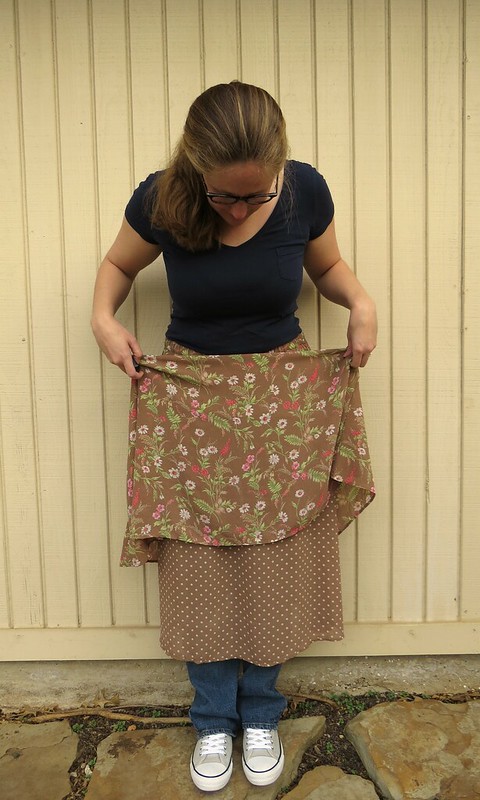
When Audrey over at Skirt Fixation put out a call for refashionistas willing to take a risk on an ugly skirt of her choosing and turn it into something beautiful, I gladly excepted the challenge. What she sent me was pretty bad, sure, but honestly, it could have been a lot worse. It was an awkward length, 100% polyester, and the elastic waistband was shot, but... reversible! Twice as much fabric to work with! And the floral print was kind of meh, but polka dots? It's like Audrey's in my head!
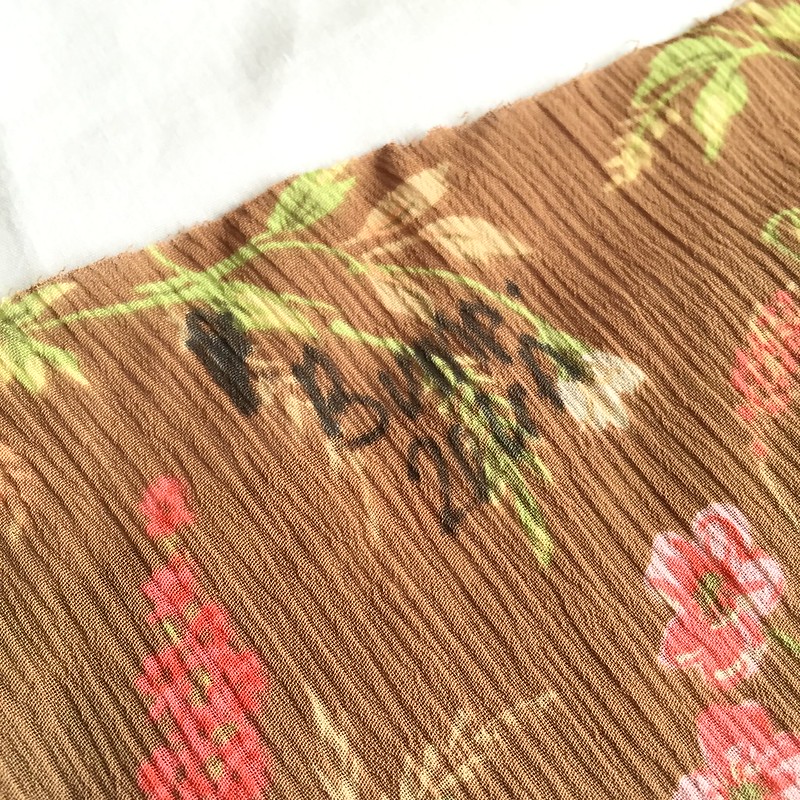
Oh, and one more thing - "Bump. 266A" written in permanent marker near the waistband on the floral side. I've come across this before in my thrifting. It most likely means this skirt belonged to someone in an assisted living center where all the laundry was done together and then redistributed to the correct residents. But don't worry. I've got the perfect way to work around this spot.
Oh, and one more thing - "Bump. 266A" written in permanent marker near the waistband on the floral side. I've come across this before in my thrifting. It most likely means this skirt belonged to someone in an assisted living center where all the laundry was done together and then redistributed to the correct residents. But don't worry. I've got the perfect way to work around this spot.
Thursday, February 19, 2015
Thrift Style Thursday: Marsala + Refashion
The theme this week, suggested by Miche of Buttons and Birdcages, is Pantone's 2015 Color of the Year: Marsala!
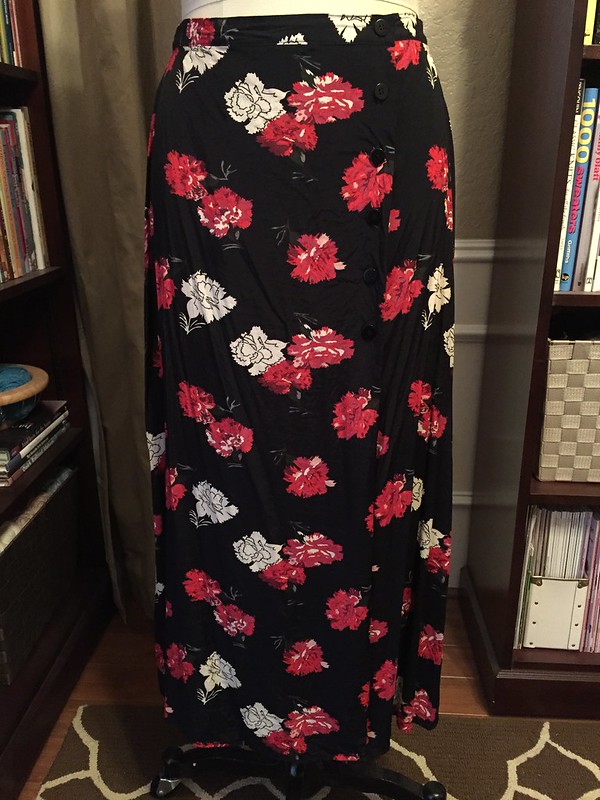
I already had a pair of pants to fit the theme, but wanted something more. So I pulled out this dated (and super wrinkled) wrap skirt I got at the clothes swap last autumn. The carnation print will make a fantastic kimono-style jacket, don't you think?
I already had a pair of pants to fit the theme, but wanted something more. So I pulled out this dated (and super wrinkled) wrap skirt I got at the clothes swap last autumn. The carnation print will make a fantastic kimono-style jacket, don't you think?
Sunday, February 15, 2015
Sunday SewDay: Silk Tee & Firmoo Glasses Review
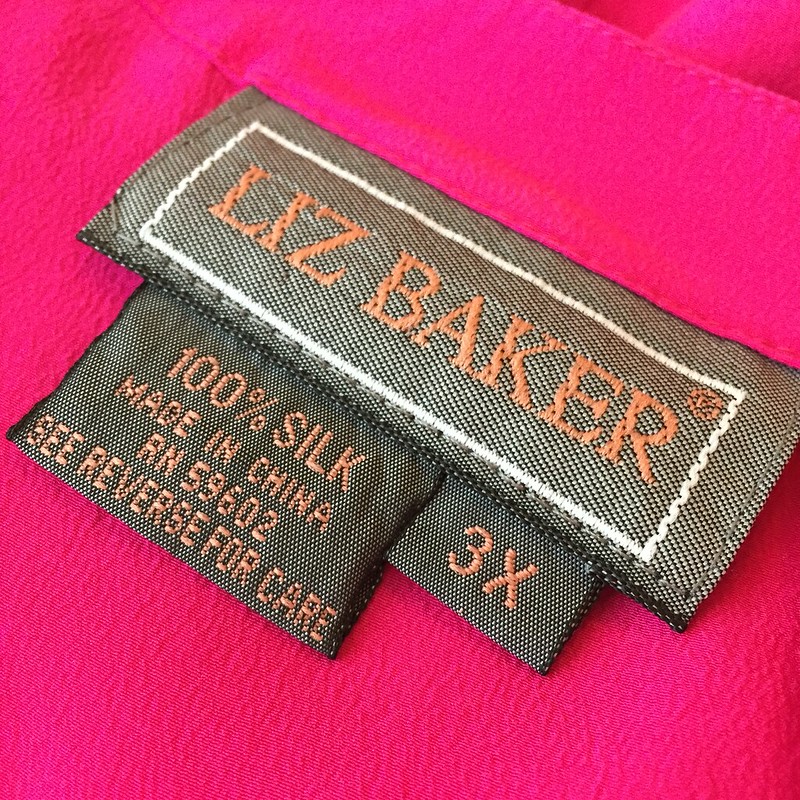
I felt like I needed to do something pink or red for Valentine's Day yesterday, and this hot pink silk blouse from last fall's clothes swap fit the bill perfectly. Too bad it was a size 3X and had shoulder pads out the wazoo. Not to worry! I know just what to do!
Thursday, February 12, 2015
Thrift Style Thursday: Pop of Color
Punxsutawney Phil may have seen his shadow in Pennsylvania last week, but he's clearly never been to Texas. While we do have a cold snap (in relative terms, of course) predicted in the next few days, this past week has been glorious!
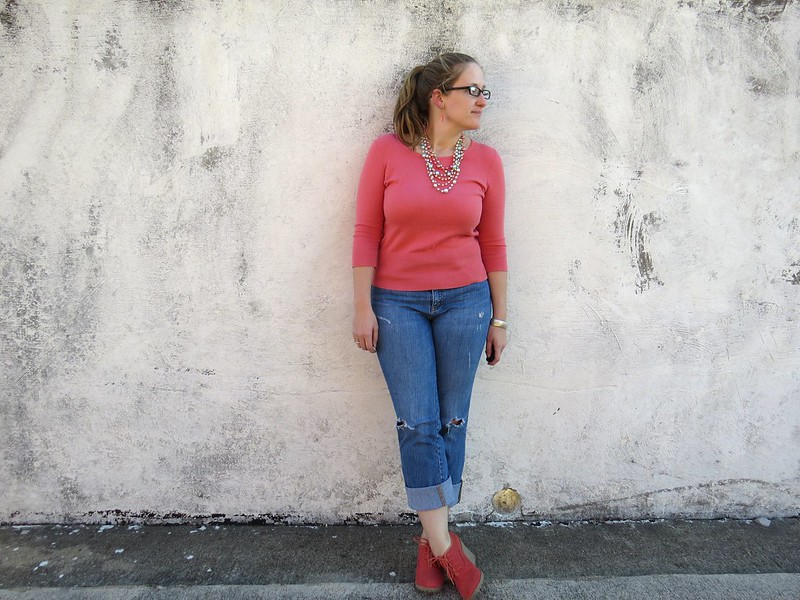
When Kristi, of Delightfully Kristi, asked us to put a Pop of Color into our wardrobes this week, she couldn't have picked a better time! Temps in the 60s and 70s make for a marvelous middle ground between piling on the layers and sweating in shorts and a tank (though I'm sure the latter will be here sooner than I'd like).
Pink and orange are two of my favorite colors to wear, so coral is the perfect happy medium between the two. And of course, it has the added bonus of being a very spring-y color, ideal for this weather.

I love the juxtaposition of pretty pearls and distressed denim - a nice blend of feminine and casual. I made this necklace several years ago from a collection of multicolored fake pearls my grandmother gave me. I really love it and don't wear it as often as it deserves.
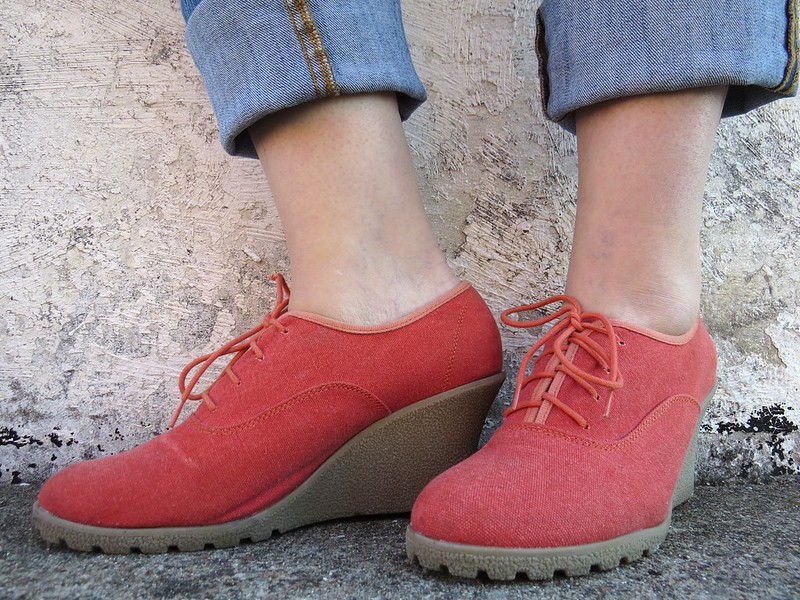
The shoes, too, are a great combination of cute and comfortable. The wedge isn't too high, the canvas is nicely broken-in, and the laces keep them securely on my feet (hey, this is important when you're clumsy).
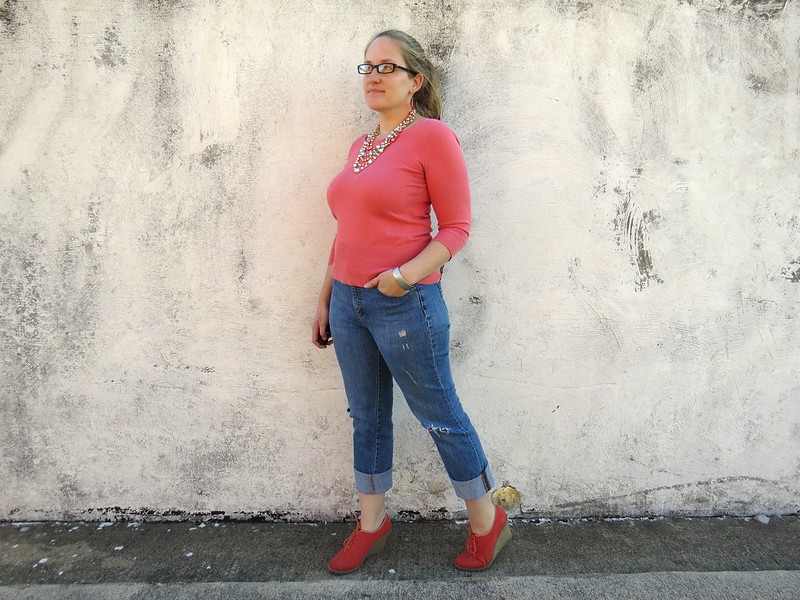
Sweater: $4 thrifted // Jeans: $5 thrifted // Shoes: $13 thrifted
Necklace: me-made // Earrings: me-made // Bracelet: hand-me-down from a friend
What colors do you think the other TST ladies chose to feature in their outfits this week? Let's click their pics and go see!
When Kristi, of Delightfully Kristi, asked us to put a Pop of Color into our wardrobes this week, she couldn't have picked a better time! Temps in the 60s and 70s make for a marvelous middle ground between piling on the layers and sweating in shorts and a tank (though I'm sure the latter will be here sooner than I'd like).
Pink and orange are two of my favorite colors to wear, so coral is the perfect happy medium between the two. And of course, it has the added bonus of being a very spring-y color, ideal for this weather.

I love the juxtaposition of pretty pearls and distressed denim - a nice blend of feminine and casual. I made this necklace several years ago from a collection of multicolored fake pearls my grandmother gave me. I really love it and don't wear it as often as it deserves.
The shoes, too, are a great combination of cute and comfortable. The wedge isn't too high, the canvas is nicely broken-in, and the laces keep them securely on my feet (hey, this is important when you're clumsy).

Sweater: $4 thrifted // Jeans: $5 thrifted // Shoes: $13 thrifted
Necklace: me-made // Earrings: me-made // Bracelet: hand-me-down from a friend
What colors do you think the other TST ladies chose to feature in their outfits this week? Let's click their pics and go see!
Sunday, February 08, 2015
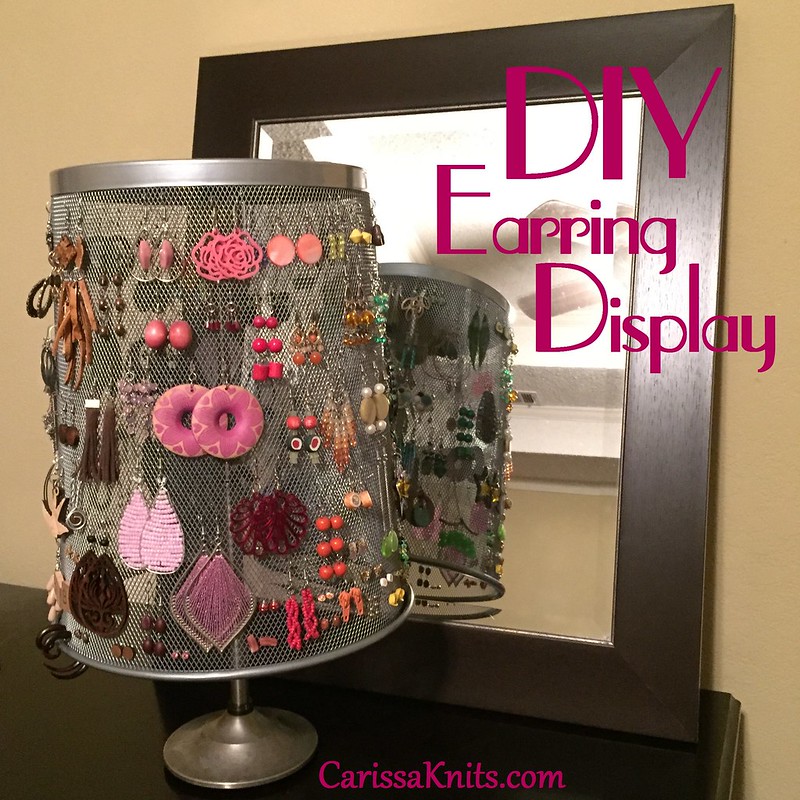
DIY Earring Display
Sometimes, when you're a maker of things, you tend to accumulate an abundance of said things. Sometimes, you run out of room to store these things. Sometimes, you have to make new things to organize your existing things. This weekend I made a new earring stand to accommodate my collection. I was pinspired by this, although I went about it a little differently.
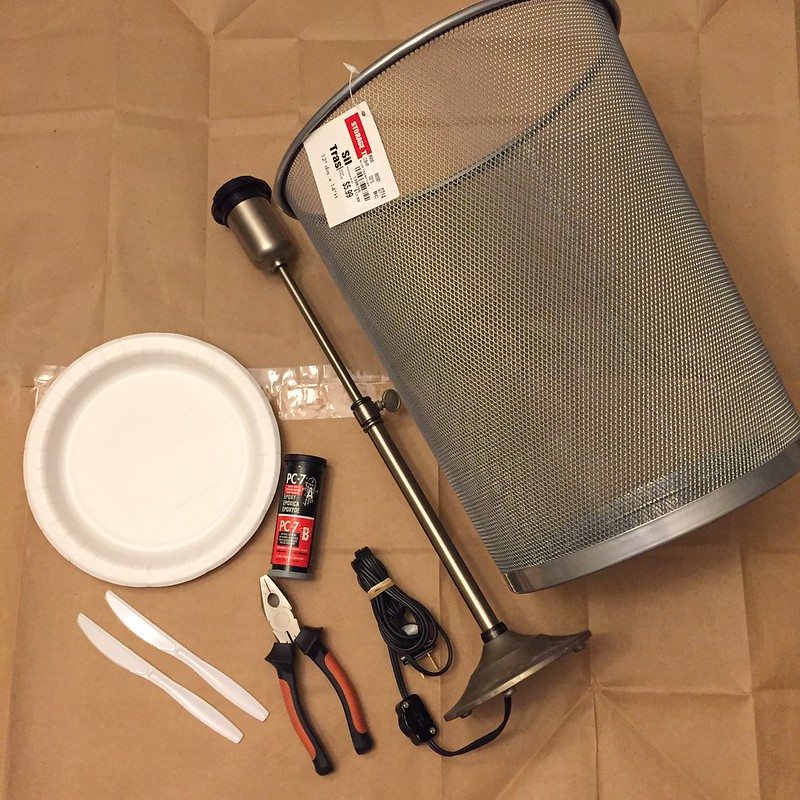
First, the supplies:
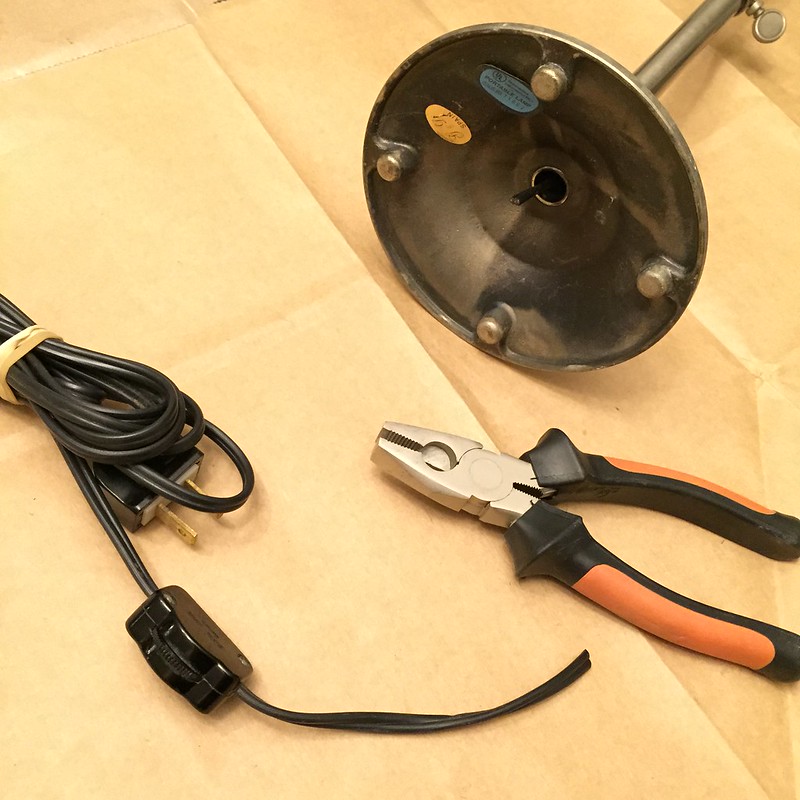
Using the wire snips, I removed the lamp's cord.
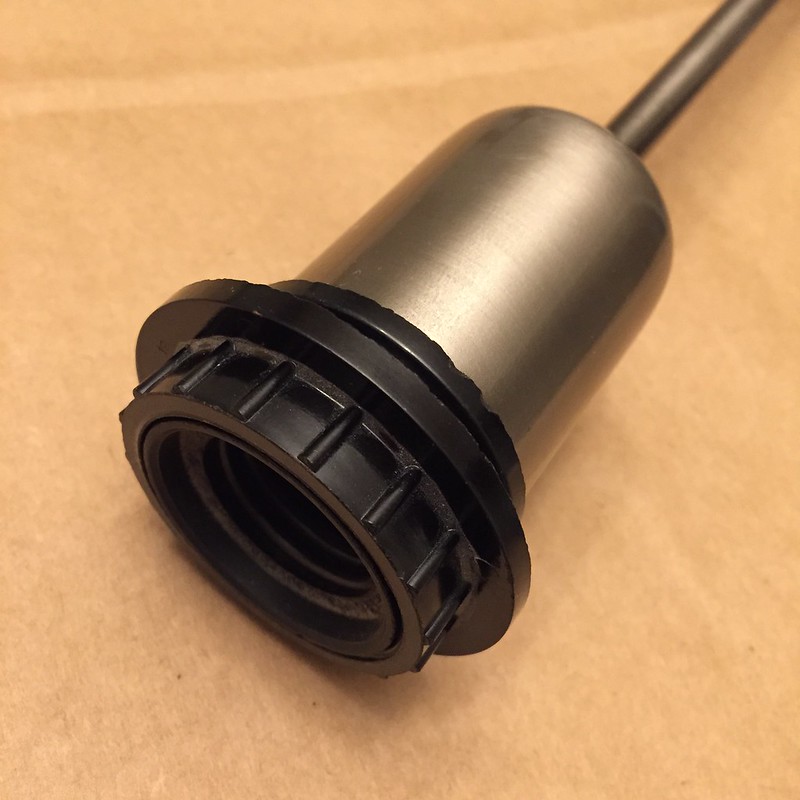
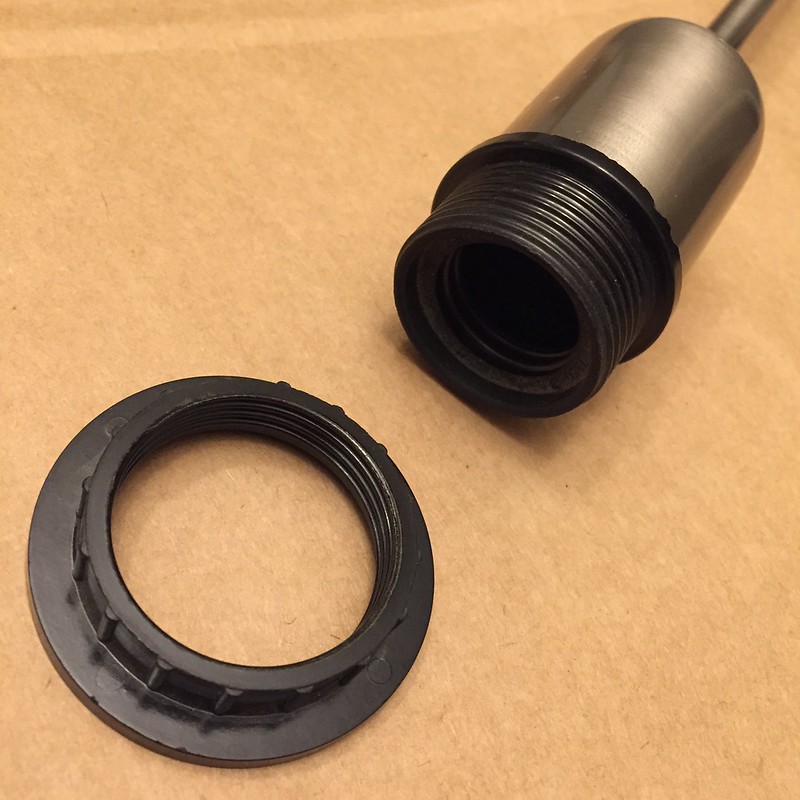
The lamp I found had a plastic ring that would hold the shade or globe onto the base.
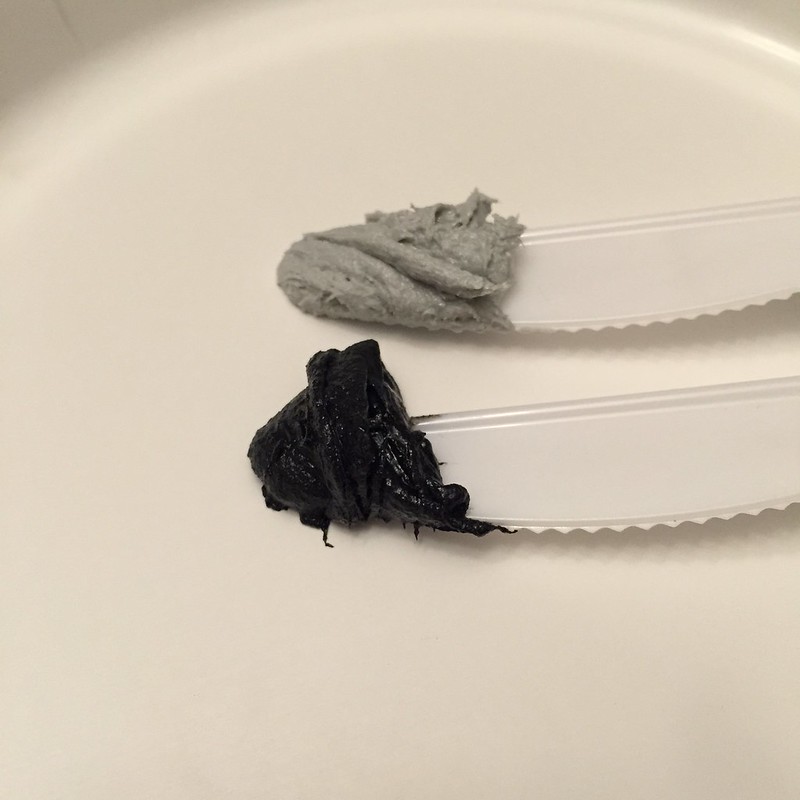
I mixed a small amount of epoxy with my two knives.
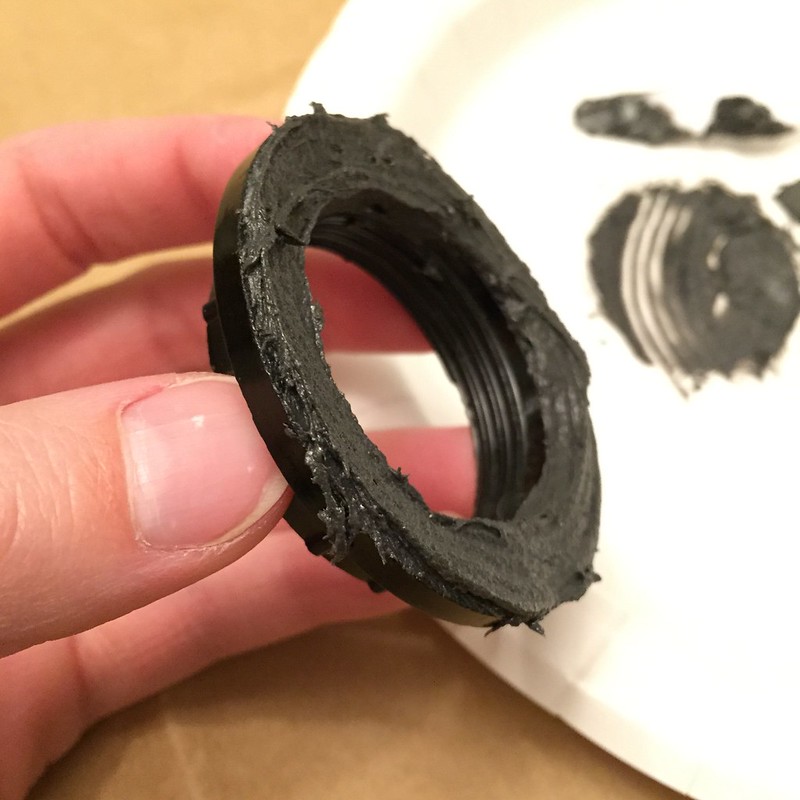
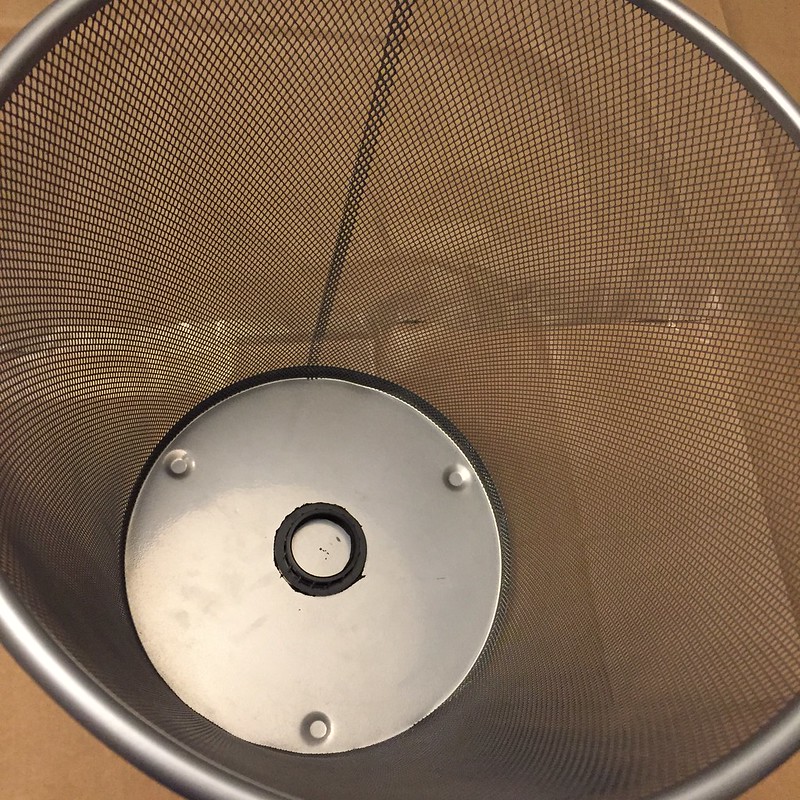
Then I smeared it on the flat side of the plastic ring, making sure not to get it on my skin, and stuck it in the center of the bottom of the trash can.
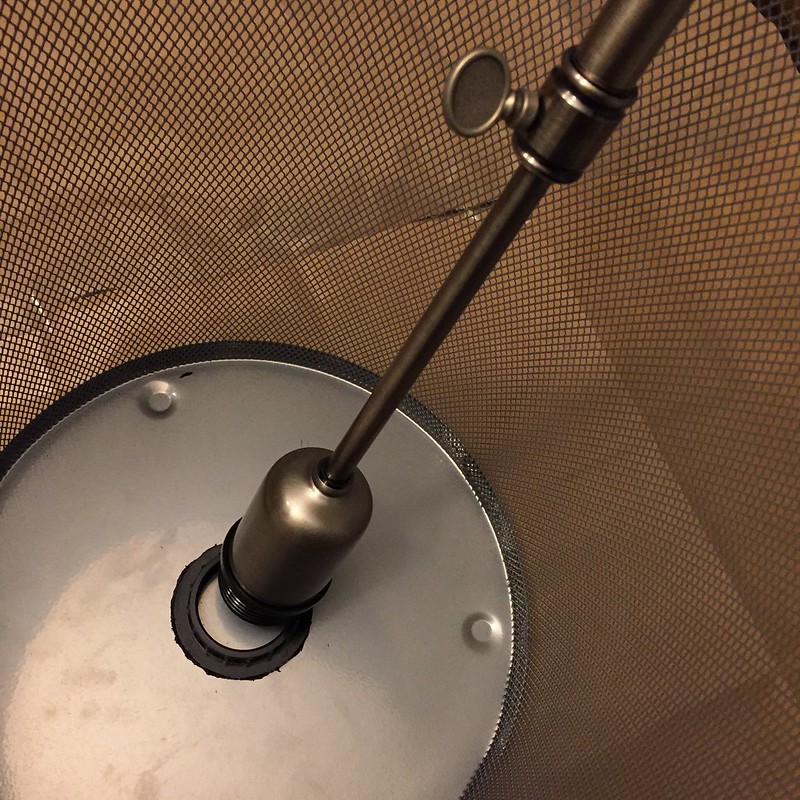
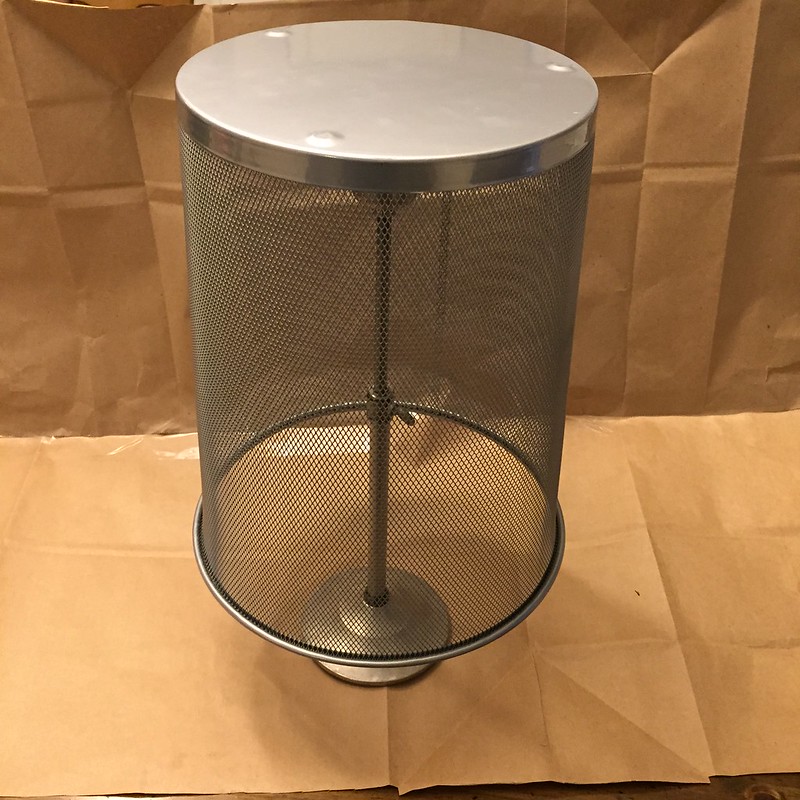
I let the epoxy set overnight. In the morning, I screwed the lamp base into the ring, and there we have it!
Finally, I loaded it up with all my earrings, in rainbow order naturally. I put the studs near the bottom rim, so I can reach up into the trash can to get the earring backs on and off. I had originally intended to use a lazy susan to make it spin-able, but since that plastic ring screws onto the base, I can spin it as is, as long as I don't spin it too far and unscrew it entirely.
Now don't you want to make your own? Have fun personalizing it! Painting the trash can and using a different style of lamp base (or maybe a paper towel holder or a large candle stick?) could give it a completely different look if the modern, minimalist style doesn't appeal to you. You may also have to get creative when it comes to attaching the two together. Not all lamps will have that unscrew-able ring. You could drill a hole in the bottom of the trash can and stick your lamp right through. Add a decorative finial on top to finish it off!
First, the supplies:
- Mesh trash can - I found one for $5.99 at Tuesday Morning
- Lamp base at least a couple inches taller than the trash can - $5.99 from Goodwill
- Epoxy - I already had some on hand from a previous repair project
- Wire snips
- Paper plate and plastic knives - or something similar for mixing epoxy
- Drop cloth or paper bags to protect your work surface
Using the wire snips, I removed the lamp's cord.
The lamp I found had a plastic ring that would hold the shade or globe onto the base.
I mixed a small amount of epoxy with my two knives.
Then I smeared it on the flat side of the plastic ring, making sure not to get it on my skin, and stuck it in the center of the bottom of the trash can.
I let the epoxy set overnight. In the morning, I screwed the lamp base into the ring, and there we have it!
Finally, I loaded it up with all my earrings, in rainbow order naturally. I put the studs near the bottom rim, so I can reach up into the trash can to get the earring backs on and off. I had originally intended to use a lazy susan to make it spin-able, but since that plastic ring screws onto the base, I can spin it as is, as long as I don't spin it too far and unscrew it entirely.
Now don't you want to make your own? Have fun personalizing it! Painting the trash can and using a different style of lamp base (or maybe a paper towel holder or a large candle stick?) could give it a completely different look if the modern, minimalist style doesn't appeal to you. You may also have to get creative when it comes to attaching the two together. Not all lamps will have that unscrew-able ring. You could drill a hole in the bottom of the trash can and stick your lamp right through. Add a decorative finial on top to finish it off!
Subscribe to:
Posts (Atom)


