I so thoroughly enjoyed doing my Hawaii series, I thought I'd try another theme. I've got several button-up shirts that need to be taken in. I've spent the past couple weekends experimenting with different ways to accomplish that. We'll start out simple with this bland, boxy, white blouse.
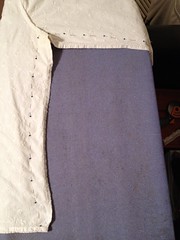
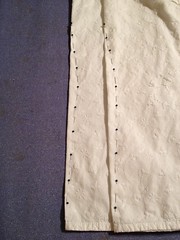
I like the embroidered fabric, and I could always use a white top to match practically everything. So let's get to work! First, we'll try a pretty basic way to take in a top. Turn the shirt inside out and pin the side seams and sleeves. On the body, I took in about the same amount along the entire side seam, but on the sleeves, I took in less and less as I went down the sleeve. This way, the sleeve is about the same circumference around the upper arm as it is at the cuff. This will come into play later.
So now my shirt fits my bust, but is still terribly boxy and unflattering. Let's put some darts in the front to pull in the waist a bit. Still with the shirt inside out, fold one side of the front straight down from about where your nipple would be. Repeat on the other side of the front.
Let's shorten those sleeves too. This is why I un-tapered the sleeves before. With your shirt
right-side out, roll up the sleeve and sew around the top of the cuff, as close to the cuff as possible. Trim off the excess fabric and unroll your cuff, and you're done!
Now we've got a nice button-up blouse to wear with slacks to work or with jeans on the weekend.
Stay tuned for Part II...


I have a lot of shirts that I need to do this to. Your redo looks charming:)
ReplyDeleteWow, big difference! I need to try this on some of my blouses. Thanks!
ReplyDeleteBarbara