


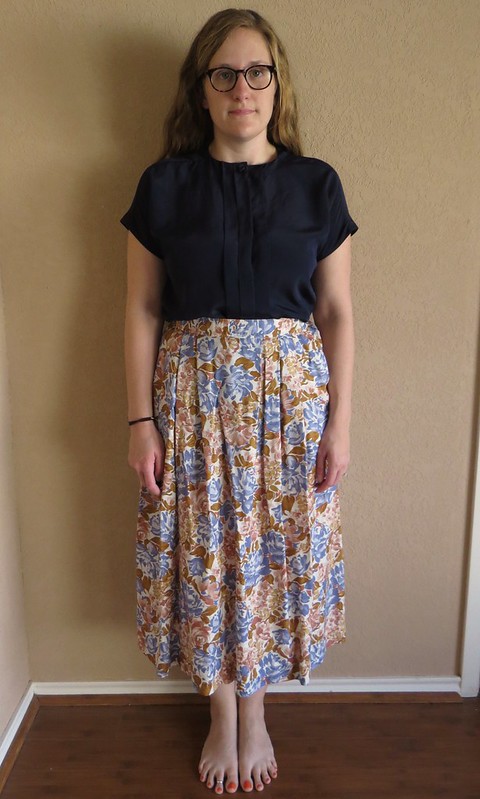
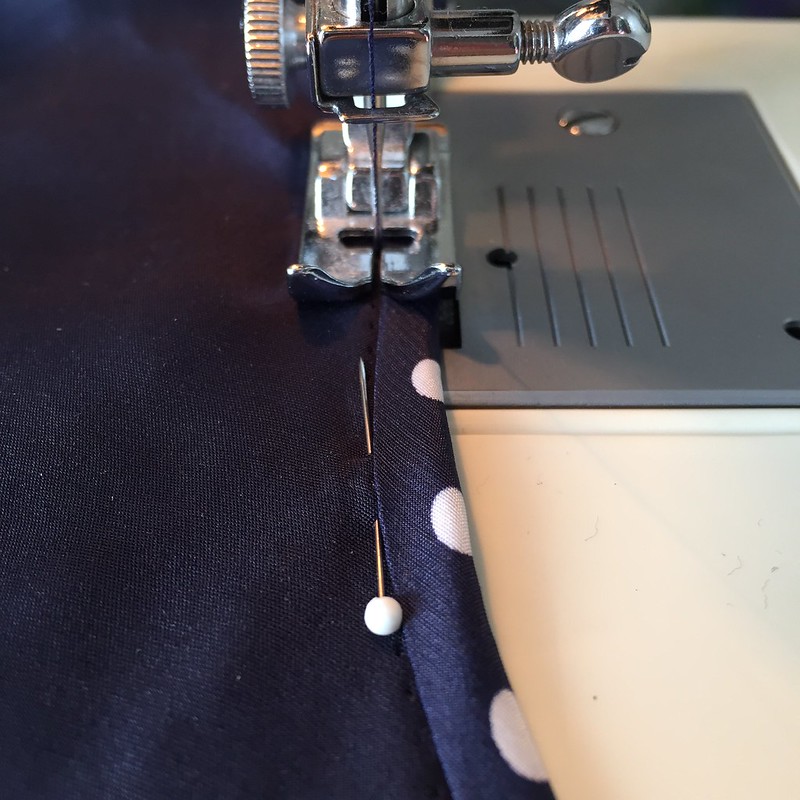
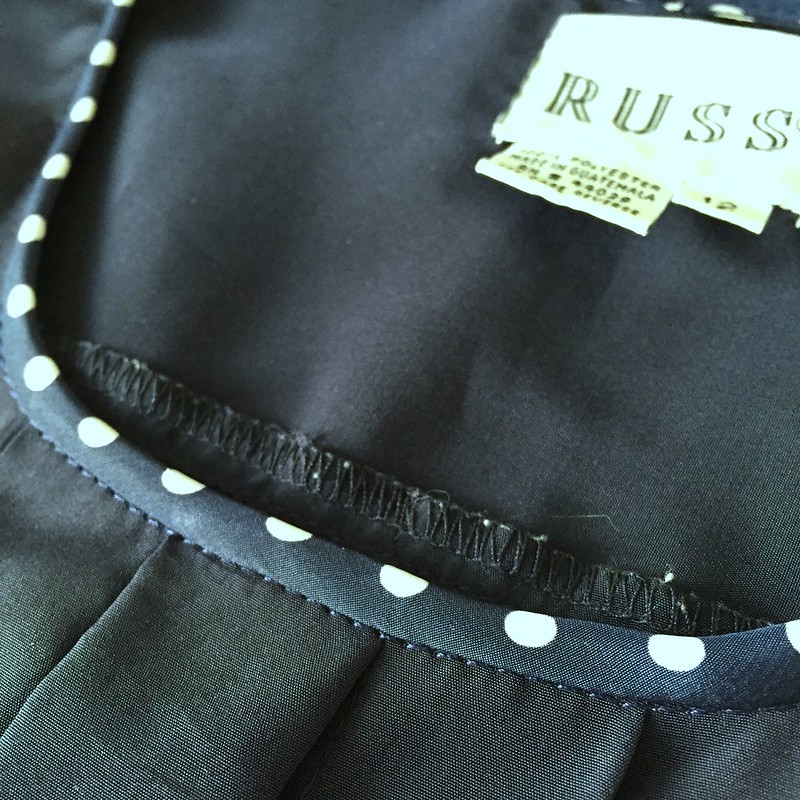
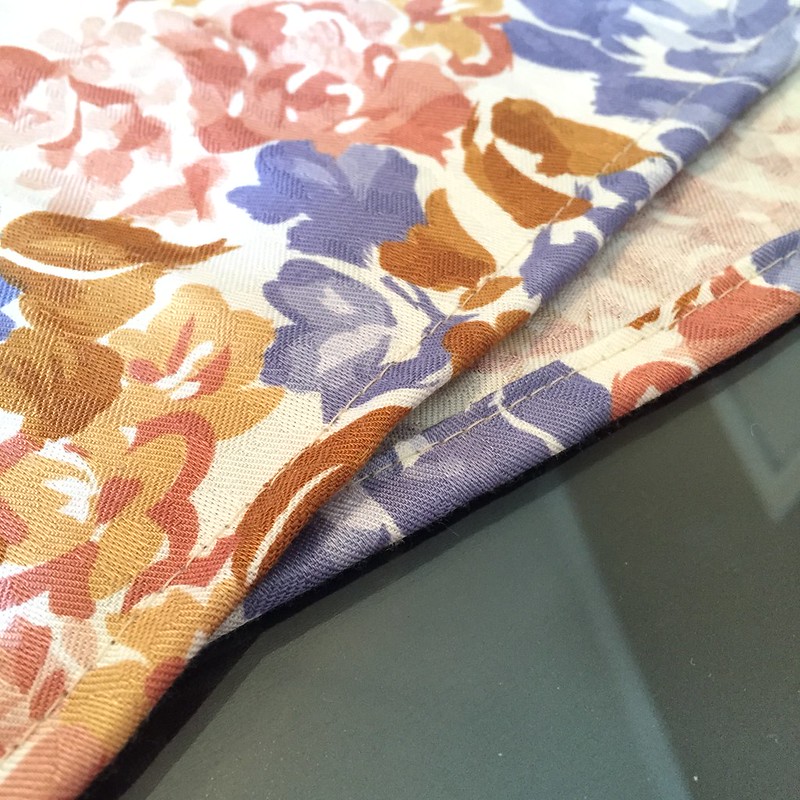
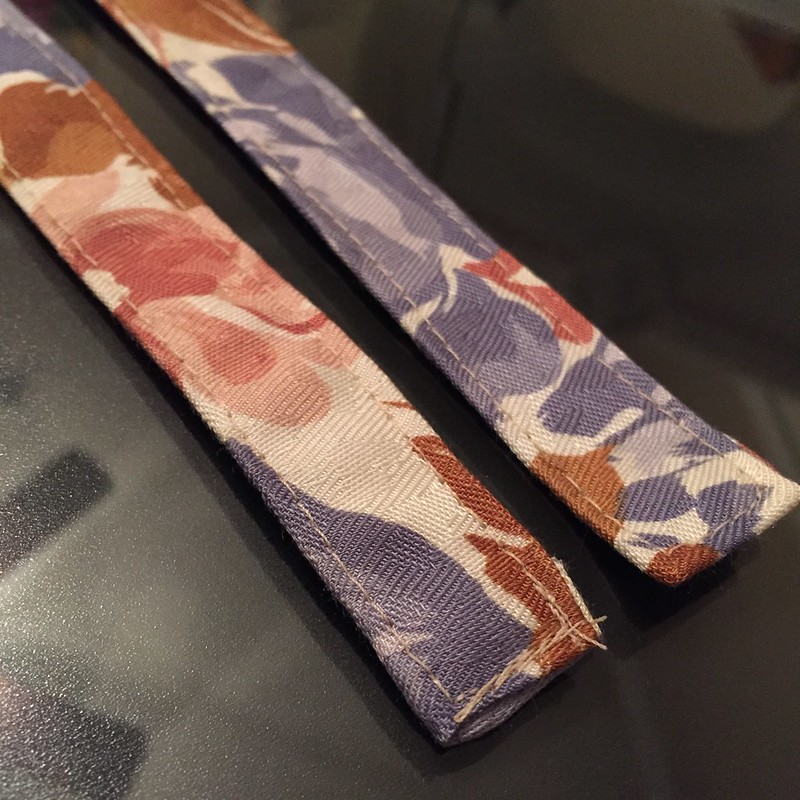
Let's start with the easy one, shall we? The navy blouse was quite nice, but just too tight in the neck for me. To remedy this, I first cut out a new neckline.
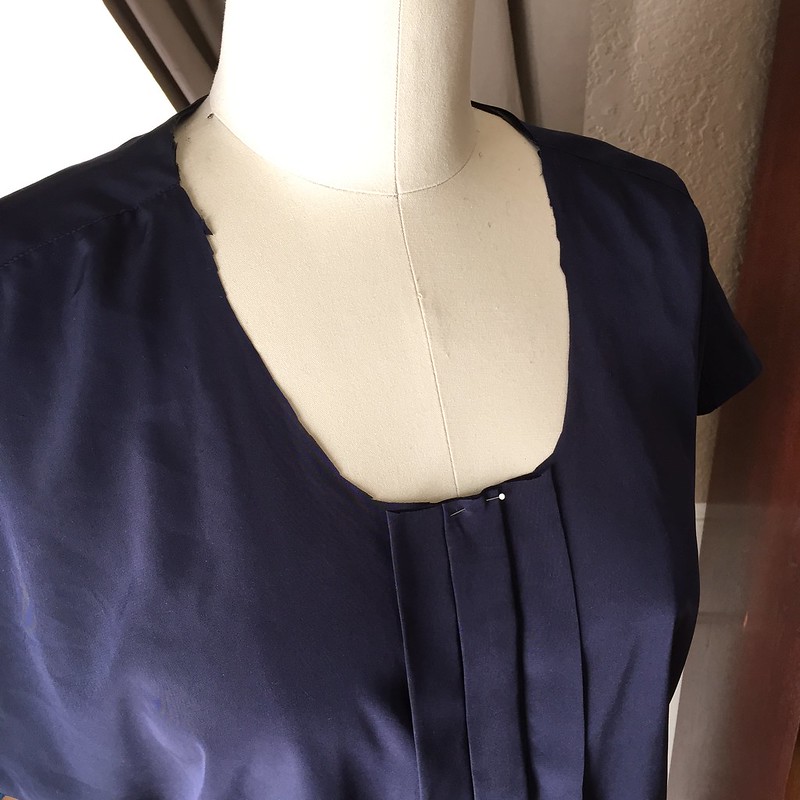
Then I pinned and sewed some bias tape - leftover from another refashion - around the edges, and then pressed it upward.
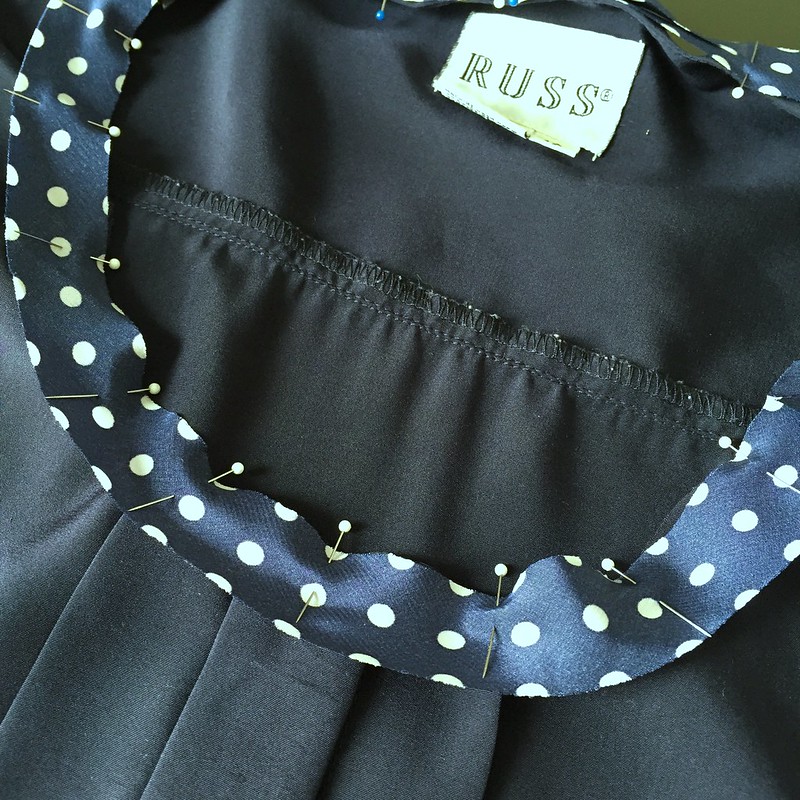
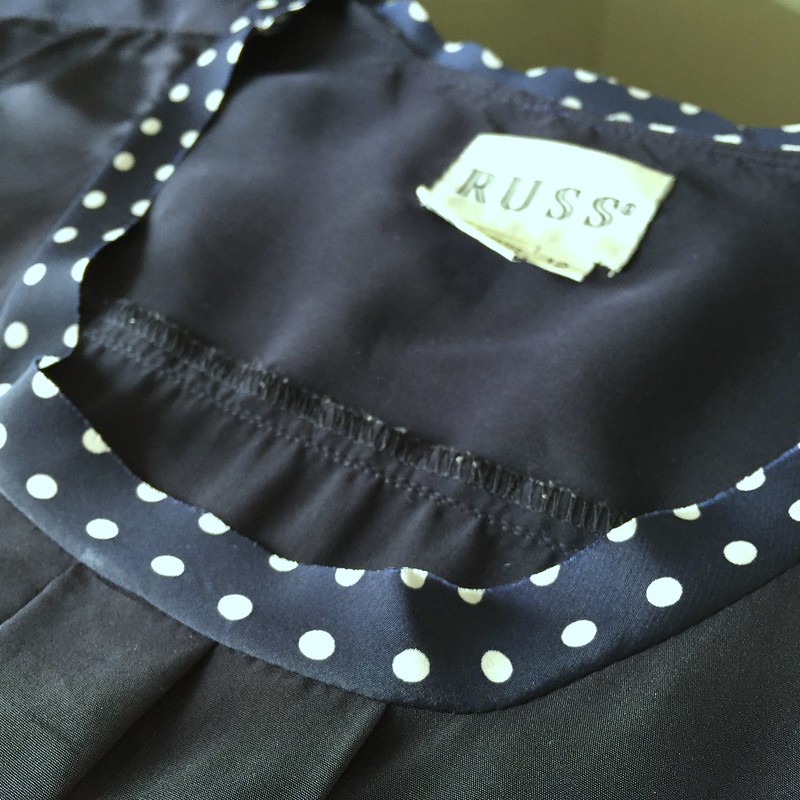
Then it was folded toward the inside and sewn "in the ditch" to hide the stitching. After a final press, it lays perfectly flat!
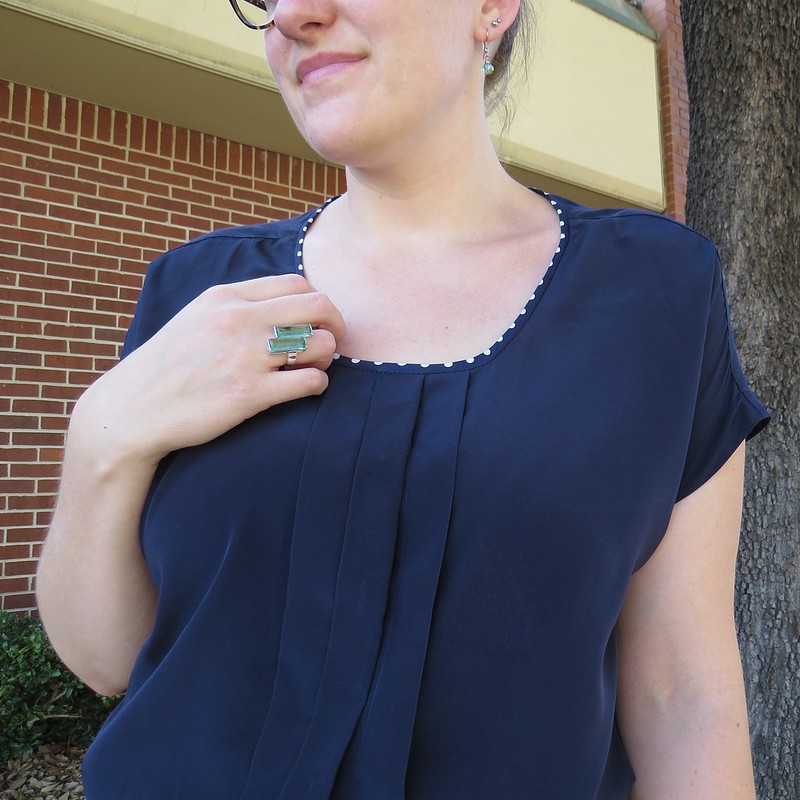
Am I the only one who thinks a little polka dots make anything better?

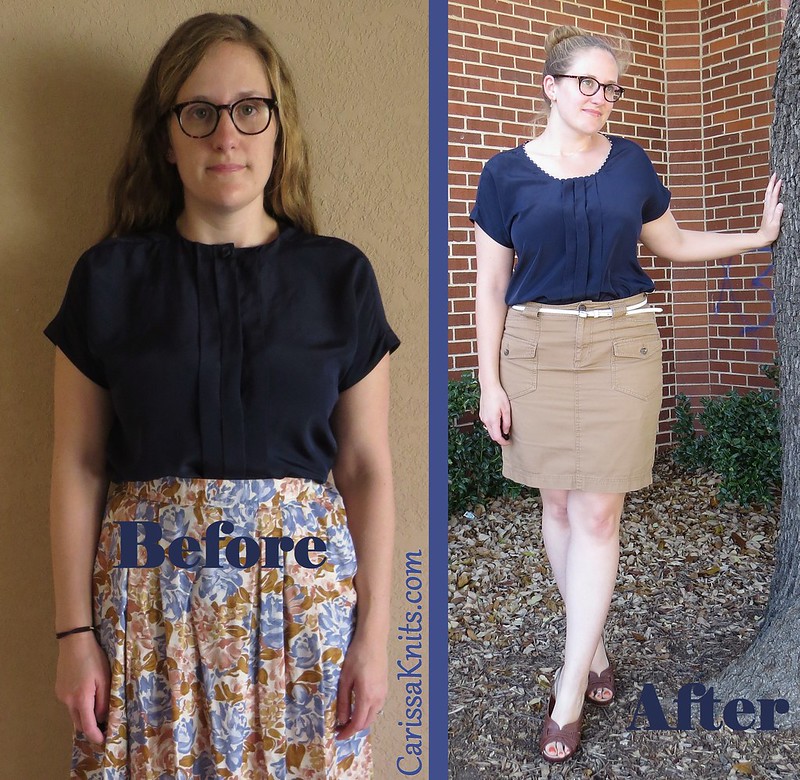
Inspired by my foray into mixing blue hues this week, I added some seafoam-y jewelry, but kept it mostly neutral with a white belt and brown wedges.

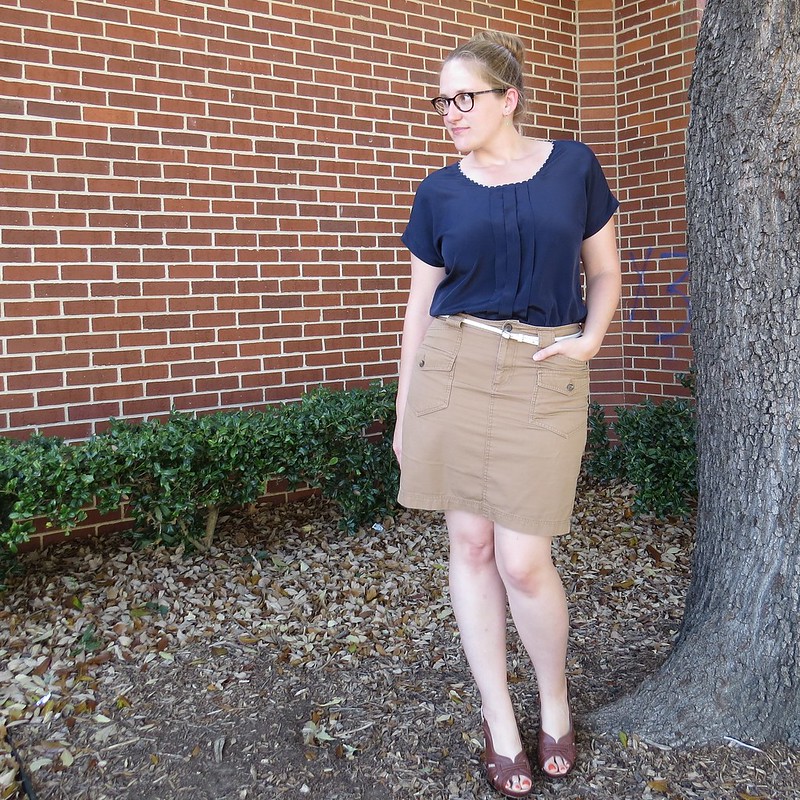
Top: swapped and refashioned // Skirt: $3 thrifted // Shoes: $8 Target clearance
Belt: $2 Old Navy clearance // Ring: Yerdle // Earrings: Etsy (gift with purchase)

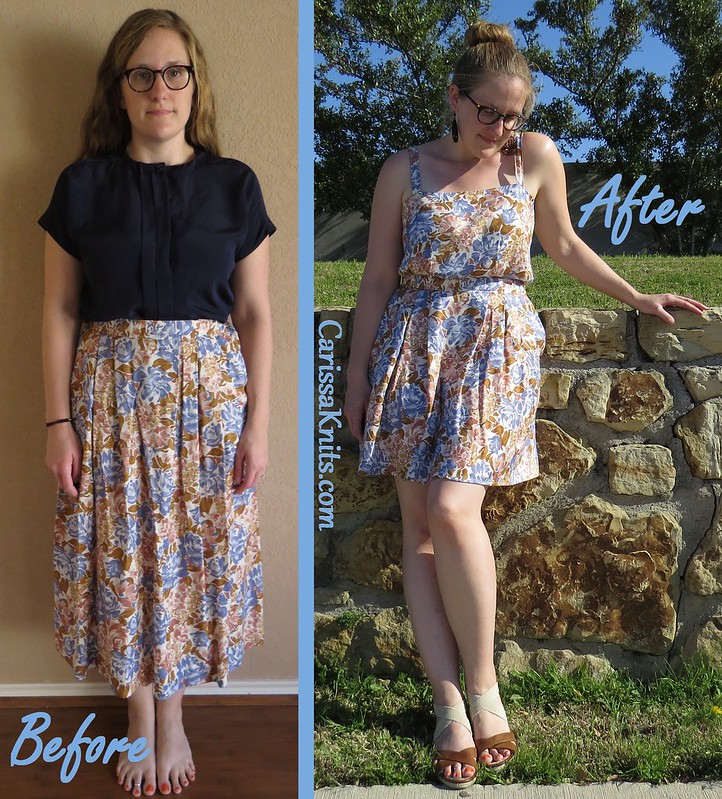
Then it was time to tackle that frumpy, floral skirt. This refashion was slightly more seat-of-the-pants, so the pictorial might be little lacking. It started simply enough, with the removal of about a foot of fabric off the bottom of the skirt and re-hemming the edge.
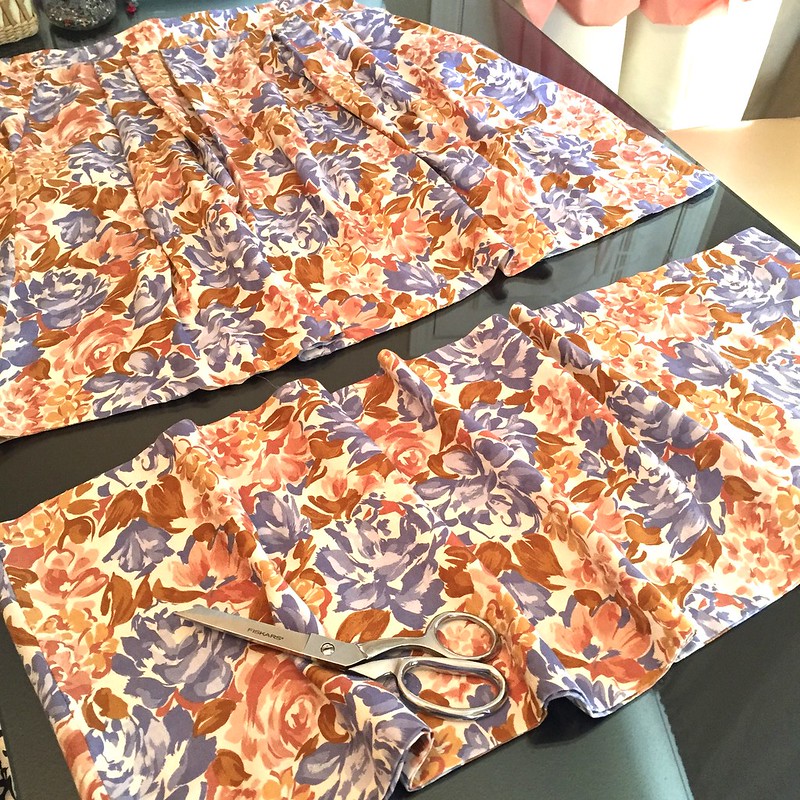
This is where lots of trial and error happened and I failed to properly document things photographically. Basically, I cut the trimmed-off bit into two pieces right down the side seams. Then I used one to create the front of the bodice and the other for the back of the bodice. Once I had all the kinks worked out, I attached the bodice to the skirt's waistband, echoing the existing pleats from the bottom to the top.
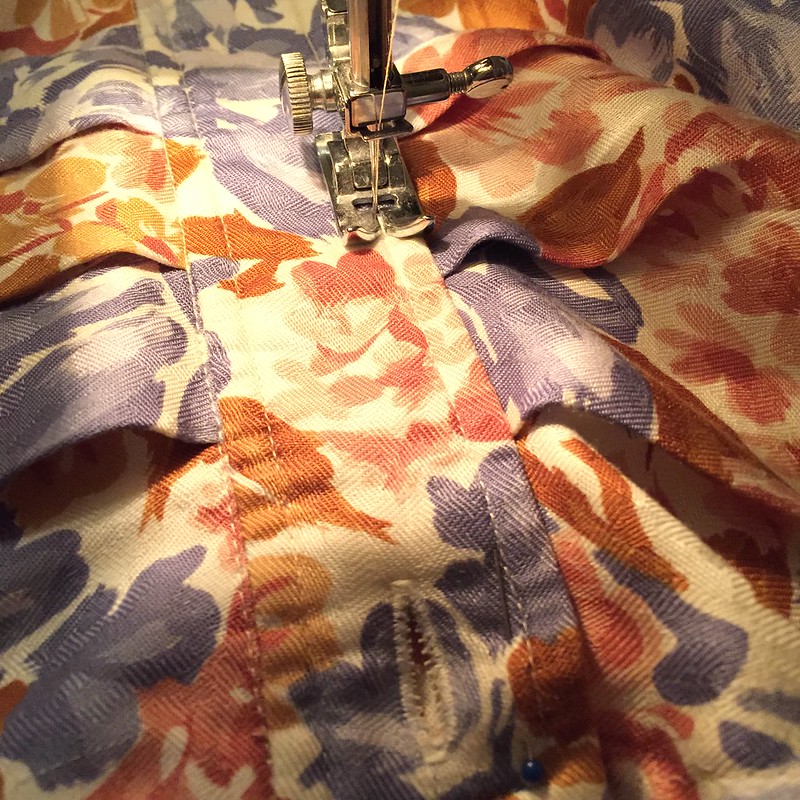
But my dress still needed straps. So I cut two strips from my remnants, about 3 inches wide and 16 inches long, made them into straps, and attached them to the top of the dress.
Now I'm ready for the 84F/29C weather we had this weekend!

I feel like I should be going to a garden party in this dress.


Dress: swapped and refashioned // Shoes: $7 Target clearance // Earrings: $3 Target clearance

Thanks again, Miche, for the awesome swap stuff and the opportunity to get in some more time with my sewing machine!
This week was a fun adventure in seeing the style show with the clothes gifted to you. Then,once again, you have taken the rest of the skirt fabric and created the cutest sundress ! The polka-dot trim of the navy blouse is so attractive. Wow - Carissa - you have the most interesting blog !
ReplyDeleteThanks, Linda! I had a lot of fun putting together outfits for each of the swap items, and then, of course, to be able to refashion a couple of them was awesome too!
DeleteHi Carissa, great refashion! Love the idea of creating a bodice from the hem of a skirt- I'd love to see the back of the dress; how do you get in and out? I know that sounds like a funny question!! :)
ReplyDeleteExcellent question! The skirt had a side-pocket opening in lieu of a zipper, where the waistband overlapped itself a little bit at the pocket and then had a button to close it up, like this. I just made that side of the bodice with a similar overlap, and when I attached it to the waistband, the same single button still works as it always did! The bodice is sewn together right under the arm, and the skirt is closed from the pocket down, so it's just about 6-8 inches at the waist that can open and close.
DeleteOoh, nifty!! Thanks for that Carissa; looking forward to seeing what you come up with next :)
DeleteHi Carissa, can we see the back? Does it look just like the front? I see lots of long skirts at the thrift stores, must try...
ReplyDeleteAlso, could you give a few more details about how you made the new neckline on the shirt? I try to do this but I don't get each side to line up? Do you cut on a "fold"? Thanks. I love visiting your blog.
Yes, the back looks exactly the same, less a couple pleats since it doesn't need to be as full as the front does. The neckline is actually the bottom hem of the original skirt, so I didn't have to do anything special at all!
DeleteYes you should be going to a garden party! Or hosting one!
ReplyDeleteJJ
www.dressupnotdown.blogspot.com
Ha! Our backyard is anything but a garden, but we're working on at least filling in the grass back there so it doesn't become a mud pit when it rains. Maybe one day there will be garden parties in my future...
DeleteAwesome! I like the difference in your expression in the before and after pics :D
ReplyDeleteHey, the difference in expression says a lot about my feelings toward the garment at the time!
DeleteThe polka dot bias is the perfect thing to spice up the top. Sometimes so little makes a big difference.
ReplyDeleteOh I know! I just love how it turned out!
DeleteThe dress is so cute I have always seen ugly skirts w pretty patterns and this inspire me
ReplyDelete