


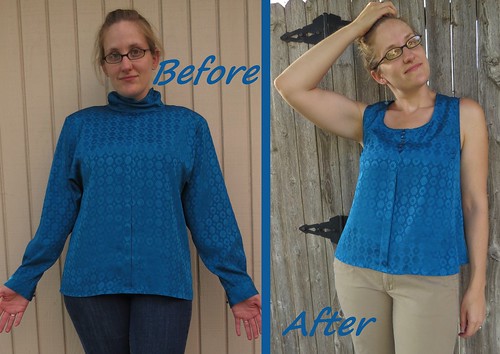
Today's piece began as a $1.50 thrift store find. In its original state, it left something to be desired. Like, pretty much everything.
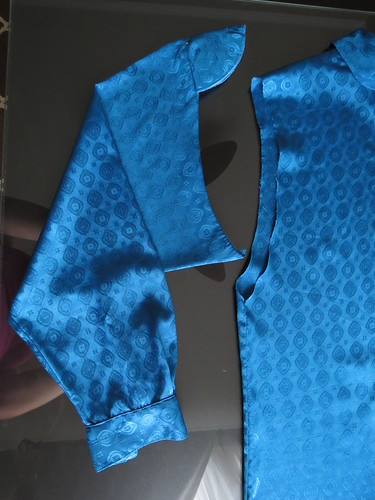
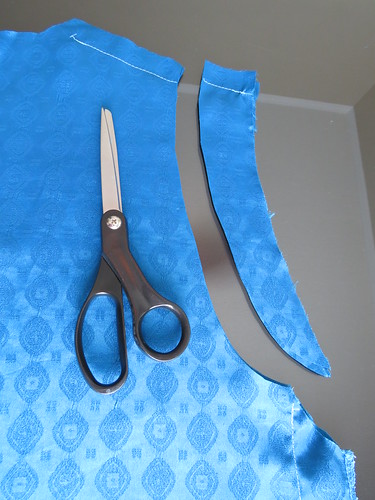
As is so often the case, my first step was sleeve removal, along with the shoulder pads that were attached at the shoulder seams.
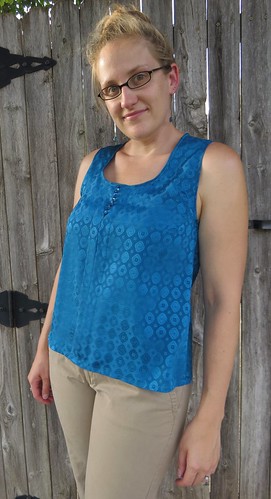
Once those were gone though, I realized just how roomy those armholes really were. I decided I would have to sacrifice some overall length by taking in the shoulder seams to raise the underarms to an appropriate level. So I pinned the shoulders a couple inches down, and took in the sides as well to be fitted at the bust and then flare out.
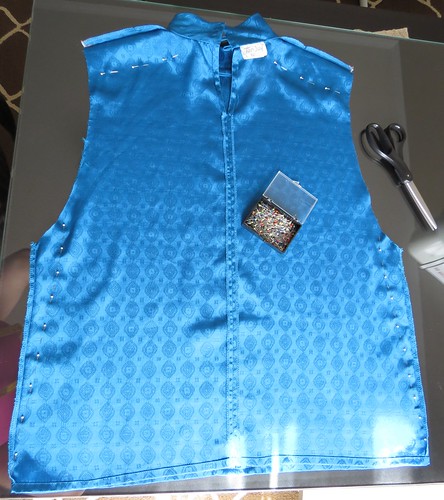
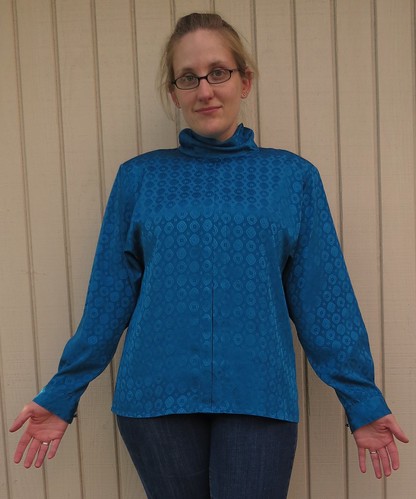
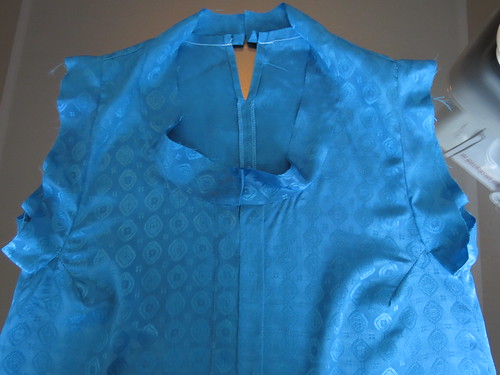
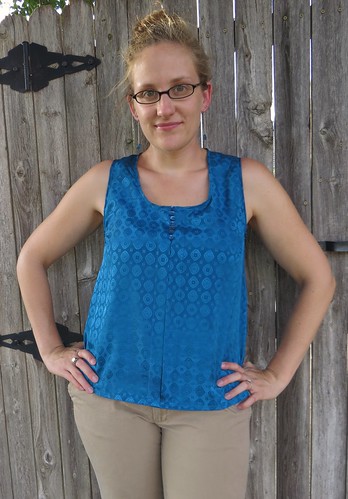
I trimmed off the collar and cut a new scoop neck.
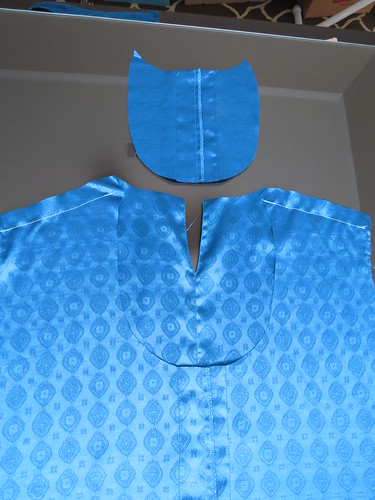
Then I made the shrunken armholes more armhole-shaped by cutting a curve.
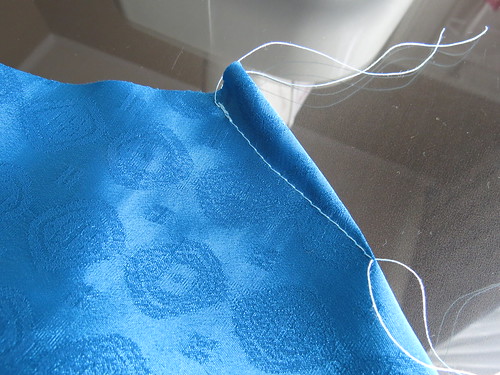
A couple small bust darts will keep the armholes from gaping weirdly. Instead of trying to back-stitch so close to the edge at the tip of the dart, I like to simply sew right off the edge of the fabric, then tie the two ends in a small knot to secure them.
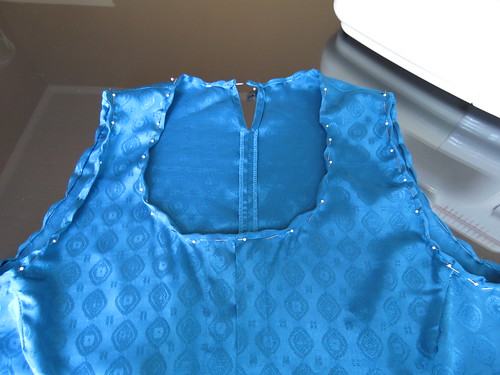
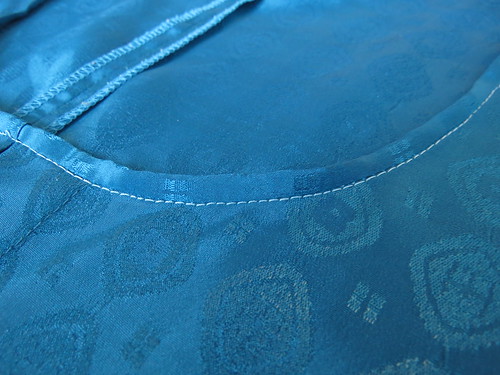
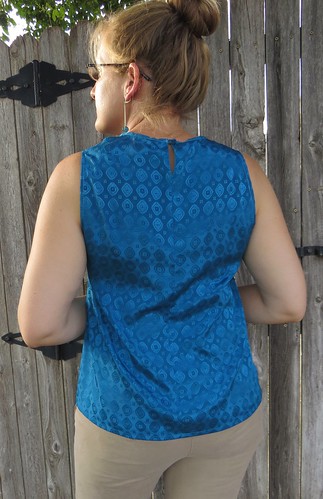
I used strips of fabric from the sleeves to finished the armhole and neck edges. I pinned them to the right side of the blouse.
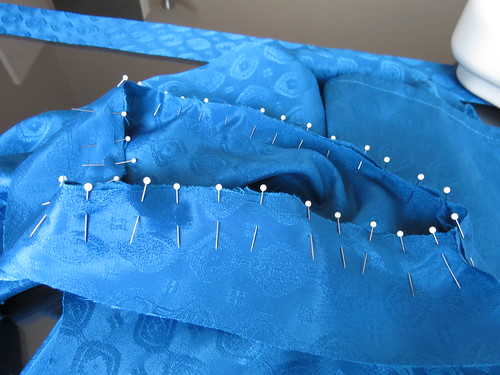
Once sewn, the bindings were pressed outward.
I decided I wanted thinner edgings, so I trimmed off a bit of the binding fabric before folding it over and pinned it.
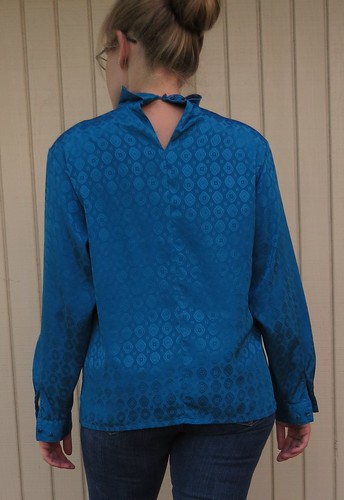
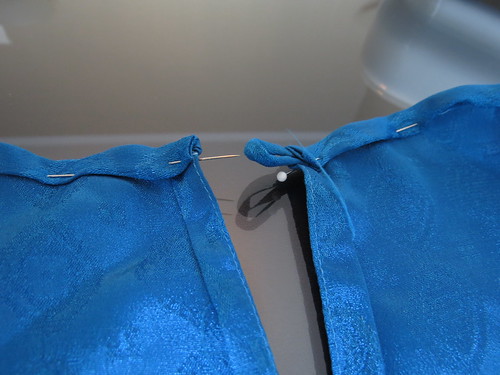
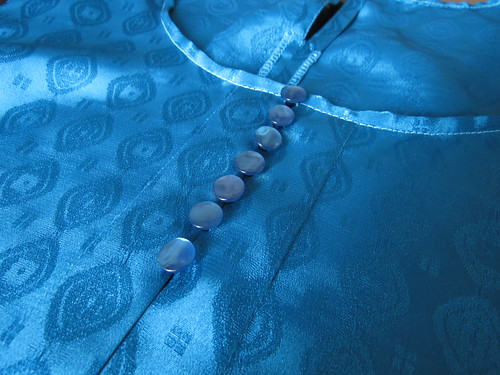
I also salvaged one of the old collar's button loops and reattached it at the back of the neck.
I tried to stitch "in the ditch" so my stitches wouldn't be quite so visible from the outside.
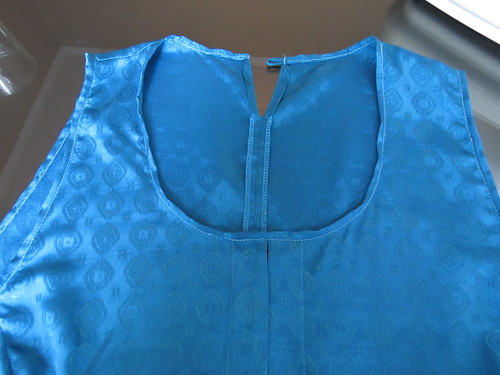
Unfortunately, the best blue thread I had on hand was a sky blue, so it still shows up. I don't think it looks bad though, just not what I was hoping for.
Finally, I took all the salvaged buttons from the original - two on each cuff, three from the collar, and one spare in the inner side seam - and reattached them. One went back to its place on the back of the neck, and the other seven are purely decorative down the front.
Forewarning: It was quite breezy when these photos were taken, so please excuse the wild hair.
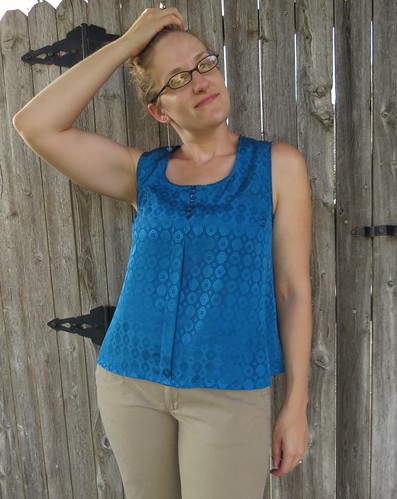
While I don't normally put much effort into my hair (which you've probably noticed), I assure you this was not the look I was going for.
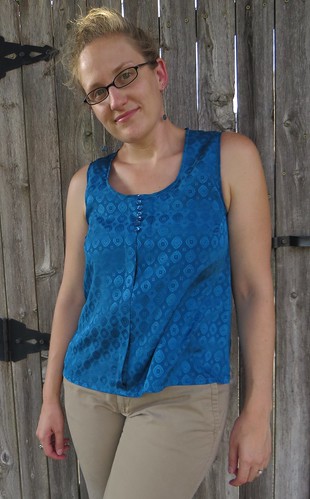
I even resorted to holding my shirt down at times.
Occasionally, something truly magical would happen, and I would have crazy hair while my shirt seemed to hang perfectly still.
Normally, I salvage any unnecessary notions (buttons, zippers, snaps, etc) from my refashions and toss them in my sewing box for later use. But as I was snipping off buttons this time, I just felt they needed to stay with this fabric. After all, they've been together many years, by the look of the original blouse, so who am I to tear a friendship like that apart?
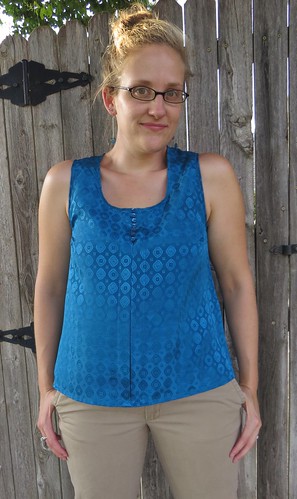
I'm really glad I kept the button detail at the back neck too. Even though it's no longer necessary, with the scoop neck being large enough for my noggin, I think it adds a little extra something, don't you?

I can't believe how timely your post is - I've been struggling with taking in a blouse and how to stop the armholes from gaping. I thought a bust dart might be the answer but didn't know if I could have it end in the armhole. Everything I read on it seemed to place the dart ending at the side seam. But I didn't want to pick out the side seam because I just finished taking the blouse in on the sides and zigzagging it - sheesh. I was getting tired of looking at the dratted thing! (literally :))
ReplyDeleteI love what you did with the buttons, by the way. They look like they belong there.
Somehow, I *sensed* you were in trouble. It's like a super power. ;)
DeleteGlad I could help!
Really Cute!!! I love the flair and the new length, and of course, you know how much I like "watching" the process. The buttons definitely finish this blouse.
ReplyDeleteThanks, Linda! I wasn't sure if the flare was going to flatter or not, but I think it turned out well.
DeleteLove your refashions. The buttons look very cute on the front. Great job once again.
ReplyDeleteThank you, Carol!
DeleteLOVE this one, it looks so good on you too!
ReplyDeleteThanks, Athena!
Delete