


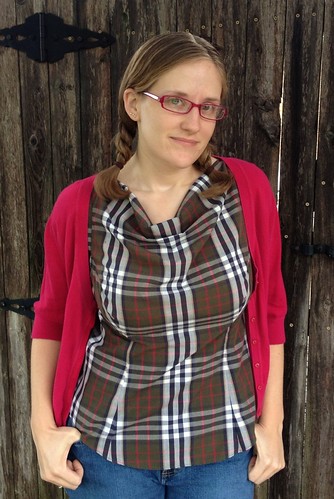
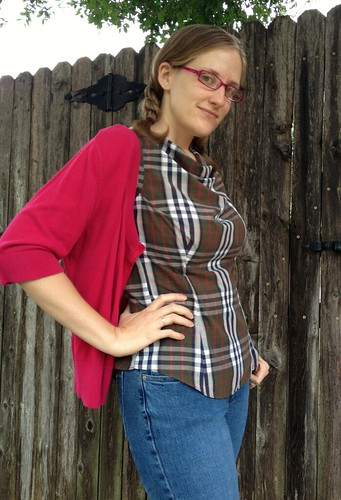
I must admit, I struggled with this one. When you've been heavy for most of your adult life, it's hard to shake the anti-plaid attitude. But it looks so cute in all the magazines and on the runways recently, so let's give it a whirl!
I scoured the thrift store last weekend for something - anything - that would inspire me. I mean, this is the first challenge. I'd really like to not suck on the first challenge. It only took a few hours of brainstorming for it to occur me to check my husband's closet for plaid shirts he never wears anymore. And that's where I scored this puppy.
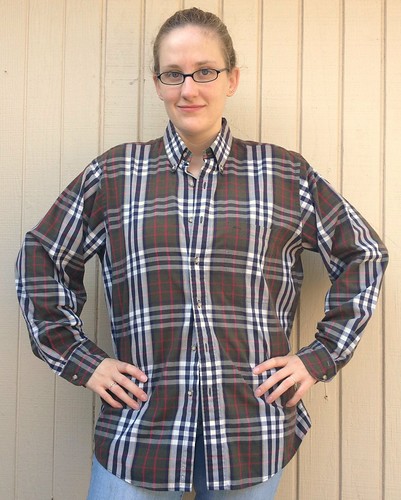
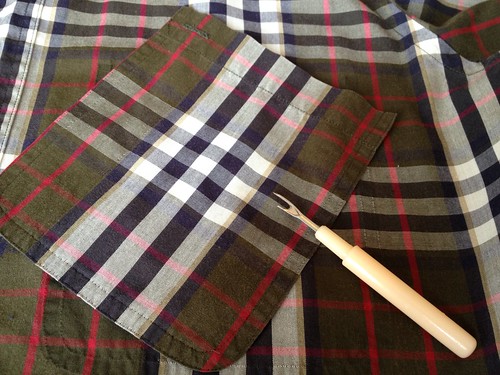
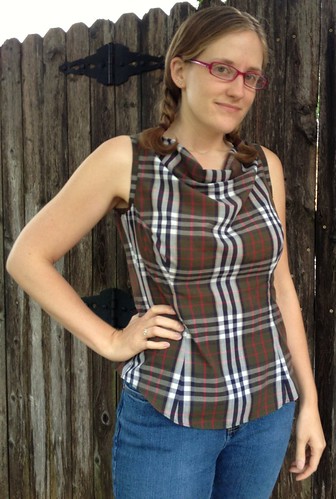
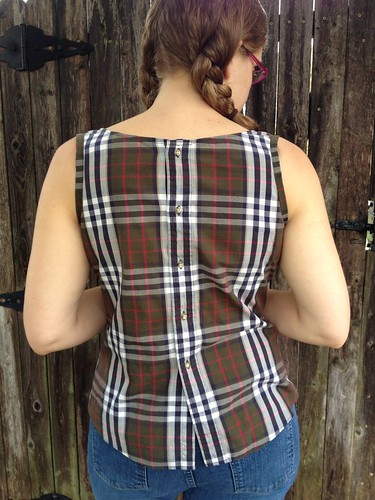
Sure, it's way too big on me, but look at those colors! So lovely and autumnal! Navy and olive green with a thin stripe of deep cranberry. The first step to feminization was to remove the pocket, sleeves, and yoke.
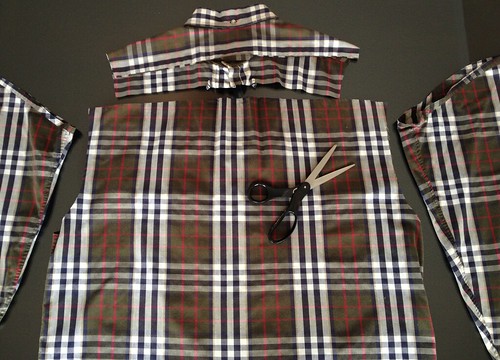
Then I cut my back piece from the front, using an existing well-fitting top as a stencil.

Then I cut the front piece from the back, mirroring the shape of the back, but flaring out toward the top and making it a few inches taller. You'll see why later.
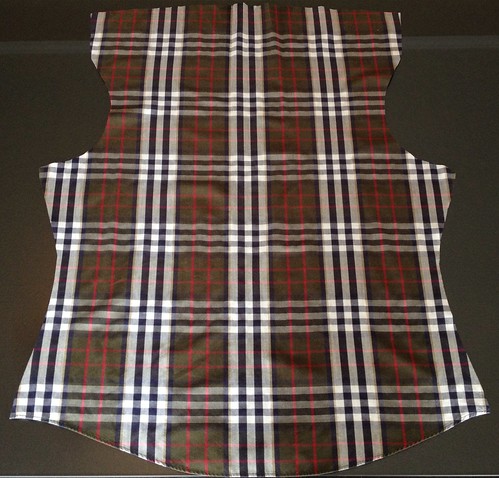
I hemmed the top edges of both the front and back. I evened snipped the laundering tag from the old collar and reattached it because, you know, I'm a teensy bit OCD.
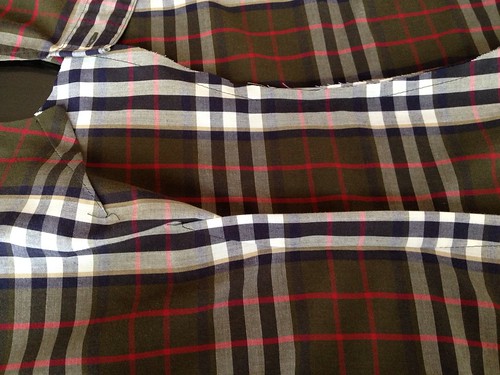
Then I sewed my side seams.
When it was time to sew the shoulder seams, I folded the top of the front piece down a couple inches, toward the wrong side. Then I pinned and sewed at an angle to follow the natural slope of my shoulders.
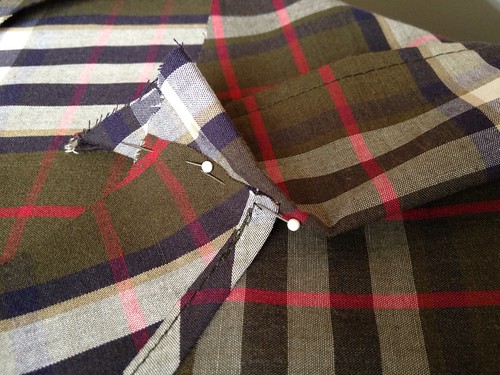
I added some bust darts and waist darts for a more fitted top.
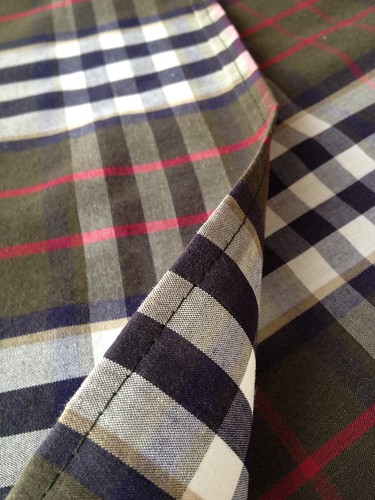
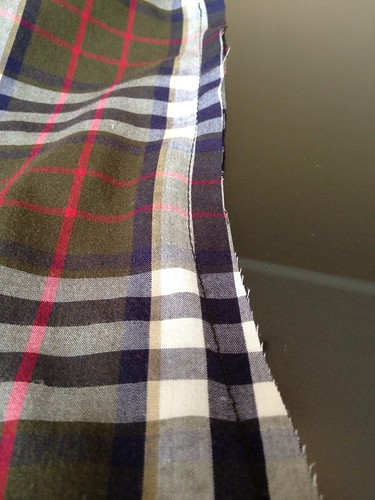
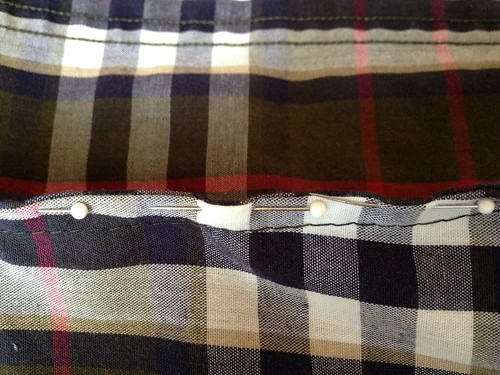
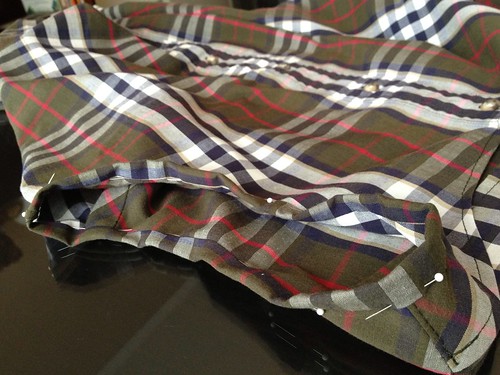
To encase the raw edges of my side seams, I folded each flap of seam allowance toward the center and then sewed the folds together.
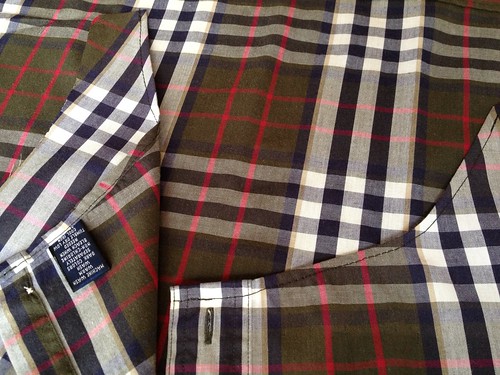
From the amputated sleeves of the original shirt, I cut two strips about 2 inches wide and an inch longer than the circumference of my armholes. I joined the ends of each strip to form two loops and pressed my seam.
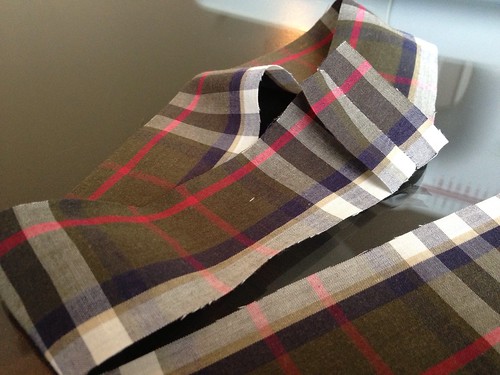
I carefully pinned and sewed each loop to the inside of my armholes.

Then I flipped them out and gave them a good press.

Two folds and some pins later, I've got a pretty sweet armhole binding!
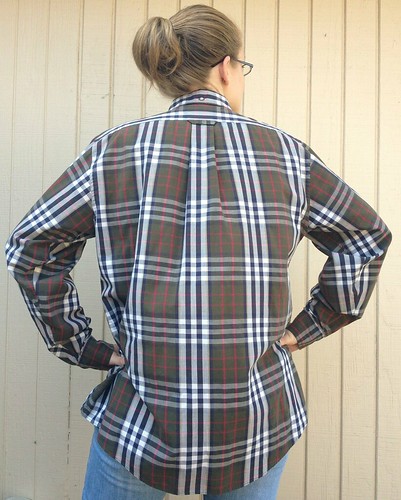
One more trip under the needle and then the iron, and it's complete!

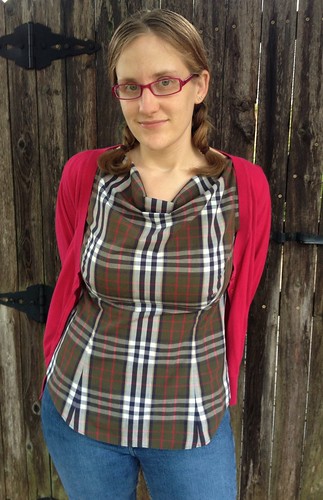
It's gonna see way more daylight now than it ever would've in the deepest recesses of my husband's closet.
So now that you've seen my entry, go have a look at what the other contestants have done and cast your vote here!


Love it! Great job.
ReplyDeleteThanks, Lynn!
DeleteA great refashion that looks so comfortable! I really like the neckline. Good luck!
ReplyDeleteThank you, Susan! Your entry is fabulous as well. Your attention to detail is incredible. Good luck to you too!
DeleteWow! what a transformation. I'll be looking at men's shirts with a new eye! Your tutorial is great. Thank you for sharing with us. I wish you luck in the contest. I managed to stay in the first round during Refashion Runway Season 1. I loved the whole experience.
ReplyDeleteThanks, Barbara! I absolutely loved your yellow tie-dye tee from the stripes challenge!
DeleteYou did a great job with this! It is hard to get the drape of a cowl neckline right, and I think you pulled it off very nicely. I like the buttons up the back as well. :)
ReplyDeleteThank you, Desarae! Your entry is fantastic too. I can't believe you just learned to sew!
DeleteI think you did a great job with this - great photos too.
ReplyDeleteThanks, Sally! Coming from the Season One winner, that means a lot!
DeleteI love what you did with that shirt - your new top is very feminine and looks lovely on you. I've been digging through your archives and I'd also like to say how much I'm enjoying not only your knitting and refashions (your instructions are very clear) but also your dry sense of humour :)
ReplyDeleteOops - meant to post under my "other" name (the one I use at Renegade Seamstress - Jo H.
DeleteThanks, Jenny (or Jo if you prefer)! I'm glad I'm not the only one who thinks I'm hilarious.
DeleteOh it's beautiful! The neckline kind of reminds me of a bow; great job! Good luck in the competition!
ReplyDeleteThanks! Fingers crossed!
DeleteHi Carissa
ReplyDelete!I've featured your Button Up Refashion on SergerPepper here: http://sergerpepper.com/2013/11/refashion-button-up-shirt.html
I hope it's ok for you ;)
Hugs,
MammaNene @ SergerPepper.com
Thanks! I'm honored!
DeleteAbsolutely adorable. I want to make one for myself. I would have trouble getting in and out of it though. Perhaps I can put a side zipper in.
ReplyDeleteI usually leave the top two buttons buttoned, and then do up the bottom two behind my back. It's no more difficult than fastening a bra, I think. But, of course, if you want a zipper in yours, by all means, please do! :)
Delete