


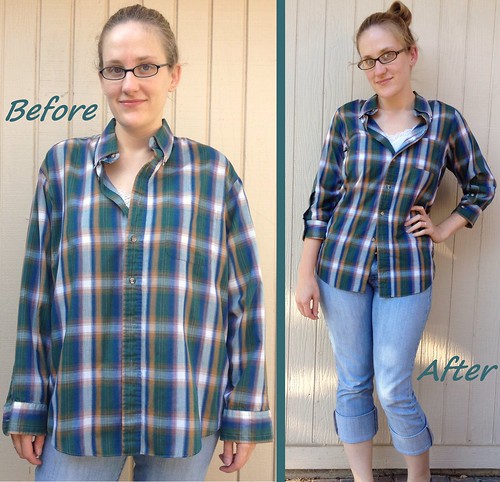
As with my previous project, step one was pocket and sleeve removal. Unlike my previous project, I kept the collar and yoke intact. I'm aiming for a quick and easy refashion here, basically just sizing it down for me. Don't want to steal too much time away from working on next week's challenge!

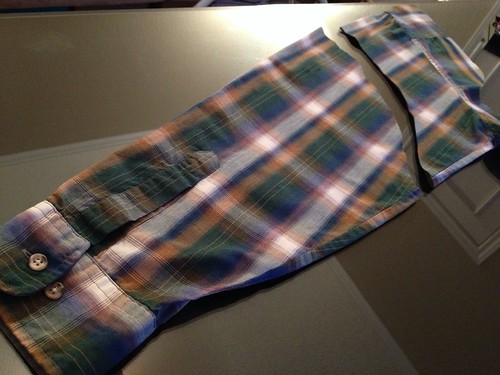
Next I cut my new sleeves out of the existing sleeves. I want to preserve the cuff but have them end up being 3/4-length, so I measured up from the cuff and mirrored the curve of the original sleeve cap when I cut the top off.
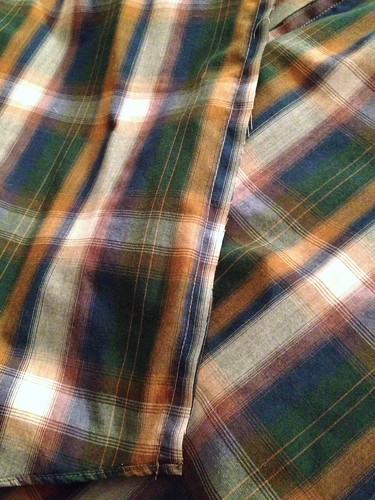
I sewed up my new side seams.
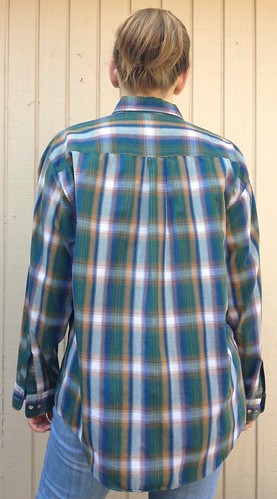
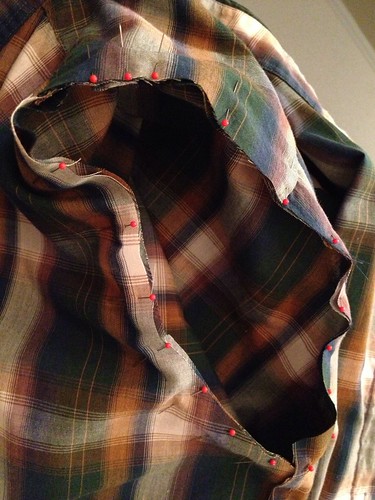
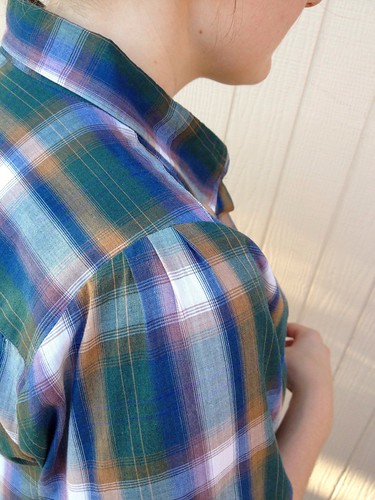
Then I got to re-attaching my sleeves. I want to button detail on the cuffs to be featured on the front of my arms, rather than hidden on the backs of my elbows. So I switched the left and right sleeves. With my shirt inside-out, I inserted a right-side-out sleeve into the armhole and carefully pinned it in place. I added a few tiny pleats at the top of each shoulder to absorb some of the extra fabric, and also to give it a little feminine touch.
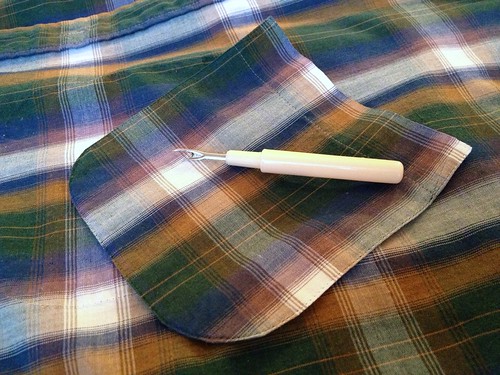
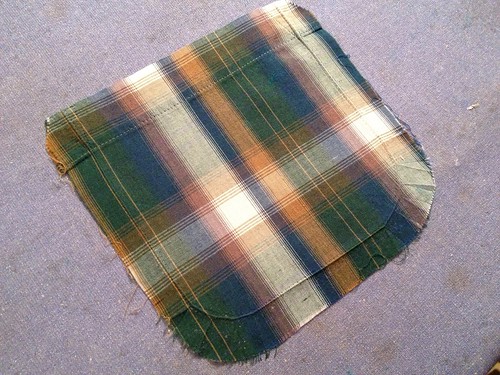
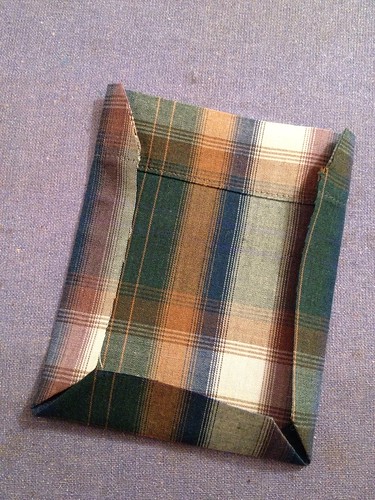
I grabbed the old pocket from my scrap pile, ironed out the folds, and then cut just inside the old fold line. I want to keep the pocket but make it smaller to match my shrunken shirt.
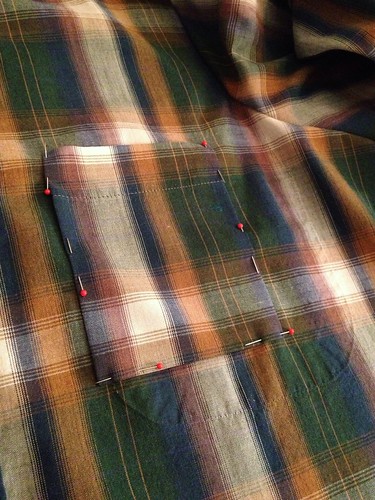
I pressed my edges under, pinned it to my shirt, and sewed it back on. You can see the wrinkled outline of where the original pocket was, but don't worry - those will come out just fine with a quick ironing.
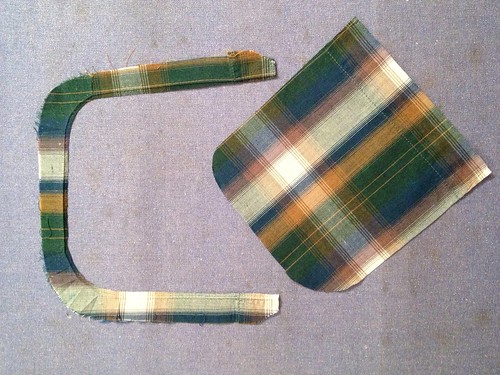
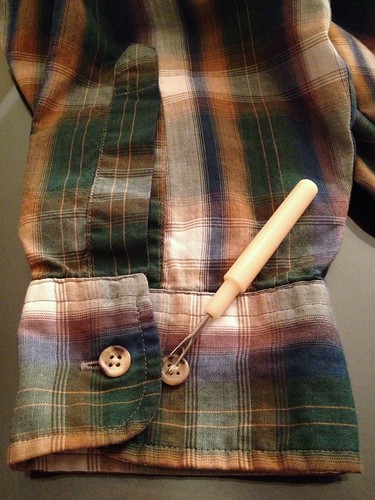
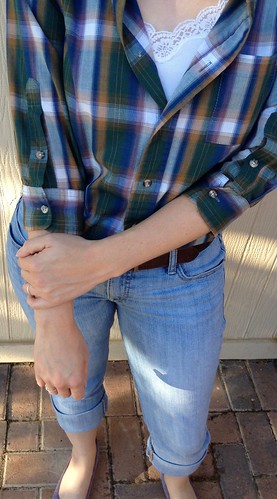
For the final touch, I removed the extra adjustability button from each cuff and sewed it onto vertical slit a little higher up, through both layers of fabric. True, I won't be able to unbutton that button, but that's just fine with me and it keeps that slit from gaping when I bend my elbow.

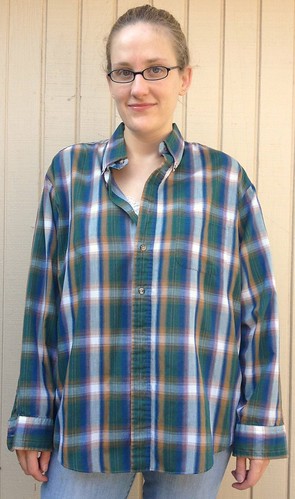
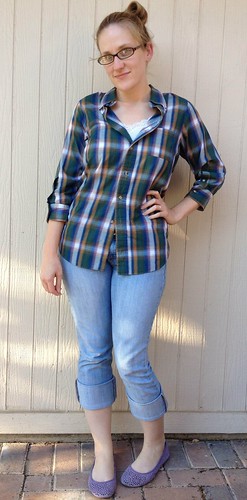
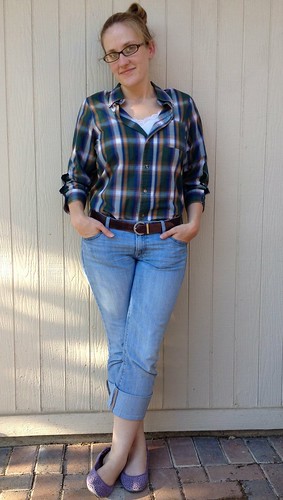
And now it's finished!
The smaller pocket is much better proportioned now. Plus, offsetting the plaid pattern makes it pop a little more, where it used to just blend right in.

I think I like it better untucked, but it's cute tucked in as well.
Here you see the repositioned buttons, and there are those tiny shoulder pleats I was telling you about.
On an unrelated note, I've been messing around with the blog design over the last couple days, going for something a little cleaner, more simplistic. What do you think?

Very cute, Carissa. I like it, and it fits you so nicely.
ReplyDeleteWhy, thank you!
DeleteOh, nice! The new placement of the vent and buttons is really attractive; I must remember the trick is switching the sleeves.
ReplyDeleteI don't think I've been around long enough to see a difference in the page layout ... either that, or I'm just really unobservant. I can say that it does look clean and easy to read, which is a big plus for me.
It's the little things that sometimes make all the difference.
DeleteThis is so awesome, this is exactly what I want to do with a couple of my father in law's old shirts that I inherited. Thanks!!! Love it!
ReplyDeleteThanks! Do post pics when you do!
DeleteLove the plaid, love the redesign, love the site.... love and miss seeing you on Thursdays.... and that is why the side to side stripe on my RV bed cover doesn't line up..... to add interest... to make it pop! lol Great job!
ReplyDeleteAw, I miss seeing you too, Michele! It looks like NC's treating you well though. And your hair has gotten so long!
DeleteI love love love your refashions. They are actually wearable! Sometimes you see things people have refashioned, and they're way too wacky or weird looking to actually wear, but your refashioned clothing is always cute, and the pictures are great!
ReplyDeleteThank you! I certainly try to make pieces I'd actually wear (though occasionally I may miss the mark). After all, this whole thing started as me trying to maintain a collection of wearable pieces while my body shrank. If I didn't make wearable stuff, I wouldn't have anything to wear, and I'm pretty sure my workplace frowns on nudity.
DeleteSo adorable! It's so much more than just a simple refitting of a big shirt. All the little details you put into it make it fantastic! :) Lisa
ReplyDeleteThank you, Lisa! I started with a plan for a simple refit, and I guess I just got carried away a little. :)
DeleteThank you SO much for this post. It makes refitting my husband's old shirts so easy! I'm going to be looking for more men's shirts to refashion.
ReplyDeleteYou're most welcome!
DeleteThe most precise and simple instructions. Thanks for sharing
ReplyDelete