


Six months ago, I showed you how to make your own stitch markers using fishing line and crimp beads. This time, I'm changing it up a bit with metal jewelry findings.
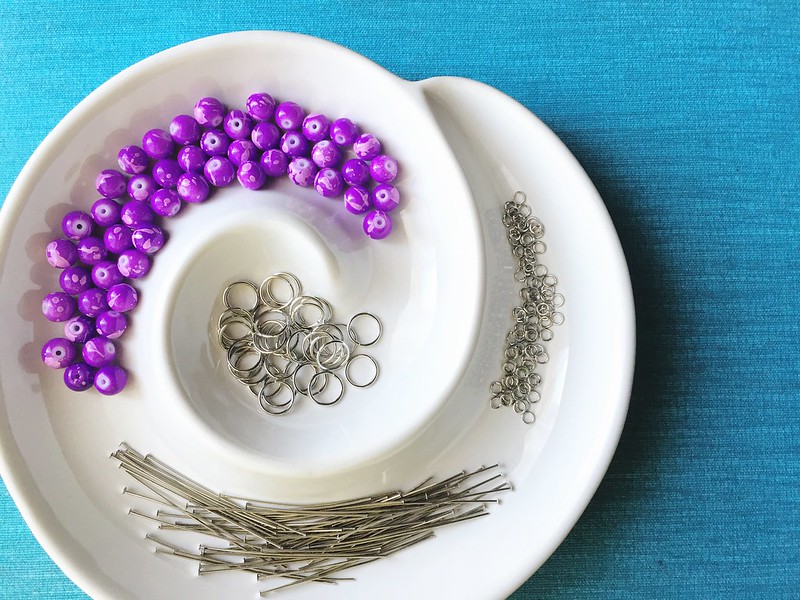
Supplies:
Decorative beads
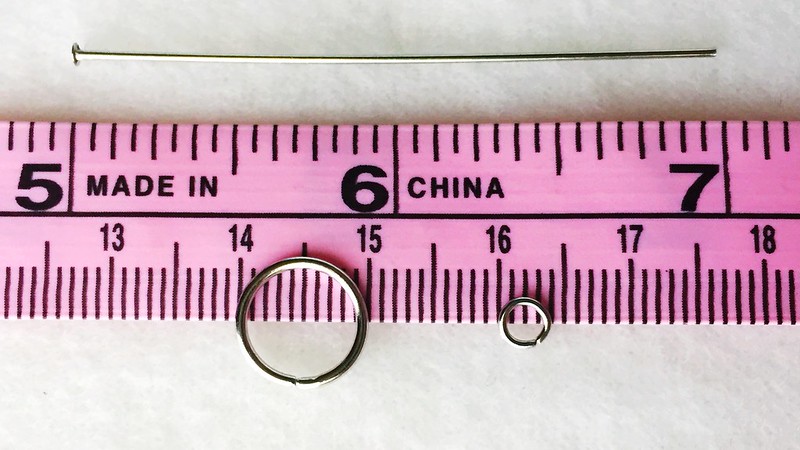
10mm jump rings
4mm jump rings
Head pins
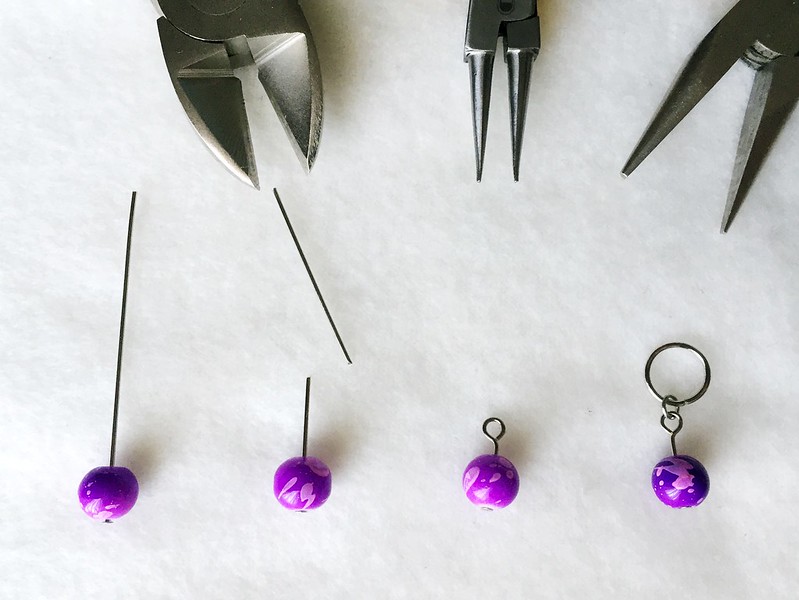
Wire cutters
Round-nose pliers
Flat-nose pliers
I found these purple glass beads on the clearance rack for just $0.99 per package (28 beads per package). The larger jump rings will be able to accommodate needles up to a US size 11 (8mm). The head pins I had on-hand were 2 inches long, but I snipped them down to about 3/4 inch, so if you can find shorter ones, go right ahead.
First, I placed a bead on a head pin and made sure the head of the pin was larger than the hole in the bead. If not, you can use a smaller bead on the bottom as a stopper of sorts. Then, I snipped off the excess length of head pin with my wire cutters, leaving about 1/2 inch above the top of the bead. I used my round-nose pliers to make a loop at the top. And finally, I used my flat-nose pliers to open up one of the smaller jump rings and connect the head pin loop to a larger jump ring.
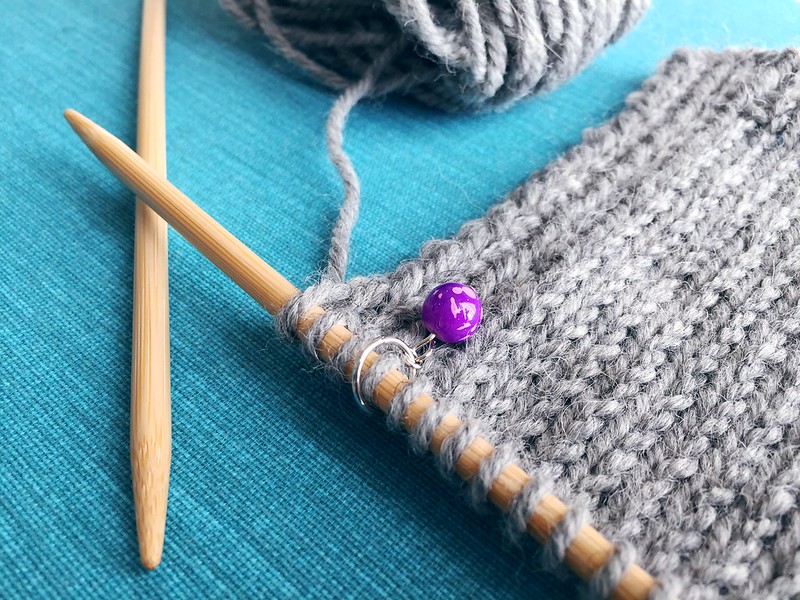
And that's all there is to it! Rinse and repeat until you have a few markers for your own use or 75-100 for a swap, depending on the event and how many participants are expected. Since I was making so many, I set up a little assembly line. I would snip a bunch of head pins down the size, then add beads and make loops until my hand hurt, then add jump rings until my hand hurt in a different way, and so on and so forth until I had them all completed.
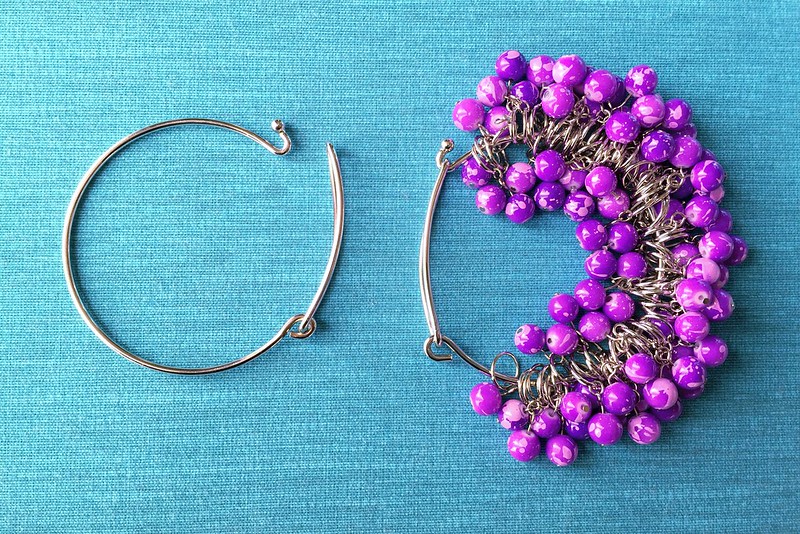
While in the jewelry making section of Michaels, I also found them bracelet blanks, two to a pack. I think they'll be the perfect solution to carrying these stitch markers around the vendor area, with my handmade markers on one bracelet and another ready to receive all the glorious stitch markers from the other swappers. I can't wait to see what everyone comes up with!
It would be fun to see what others come up with. I would like to see some when you have them all.
ReplyDeleteCheck out my latest post! There were so many lovelies to collect - so much fun!
DeleteYour instructions are always marvellous - thanks for this. I'm into making bracelets with buttons and seed beads at the moment, and this little item will be a good way to add some variety.
ReplyDeleteI certainly try, but feel free to ask questions if I'm ever unclear on any details. I'd love to see how your bracelets turn out!
Delete