


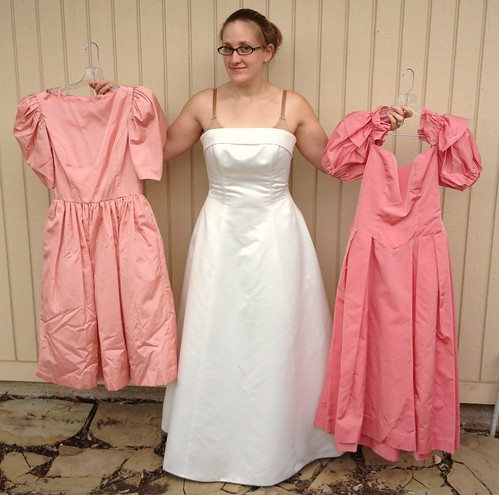
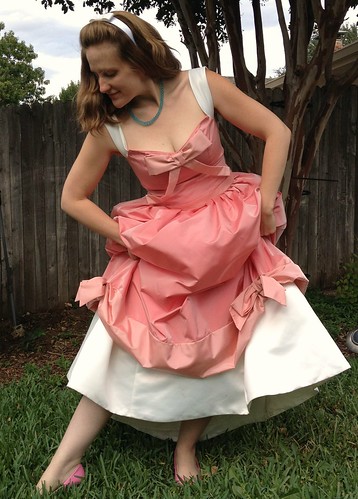
Little did I know at the time, but I totally lucked into the perfect materials for this challenge a few months ago via my local Freecycle community. A woman was offering a wedding dress and two different pink 1980's bridesmaid's dresses. I always jump at the chance of free fabric, so without any idea what I would do with them, these dresses came to live with me. For months, they hung on the back of my sewing room's closet door, eliciting snickers from myself and my guests at even a glance from the hallway.
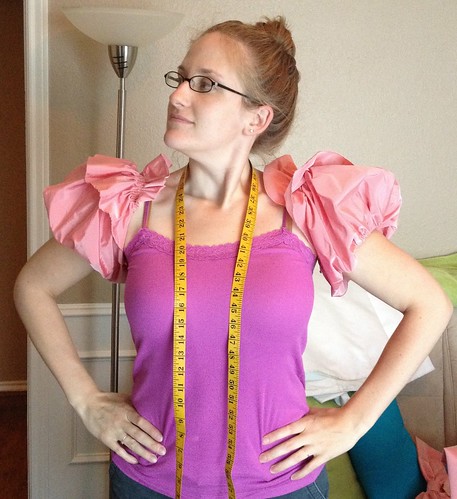
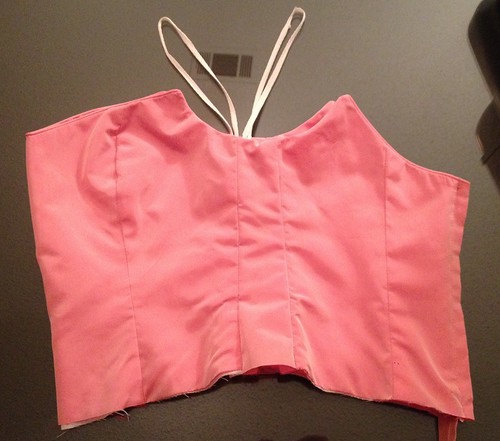
The wedding gown was quite pretty but a bit big on me (luckily, there was boning to keep the bodice up or these before pics could've been really indecent). The bridesmaid's dresses were a bit too small (just a couple inches shy of zipping/hooking in the back).
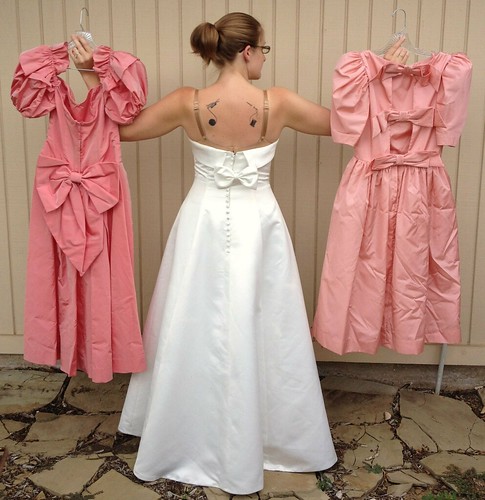
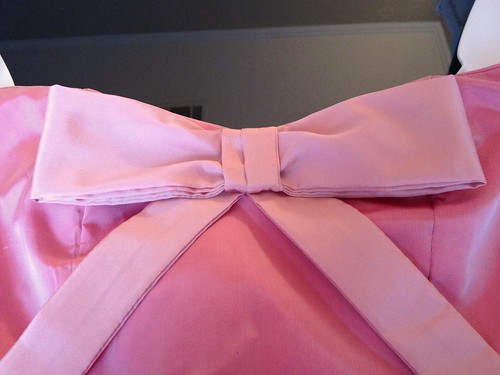
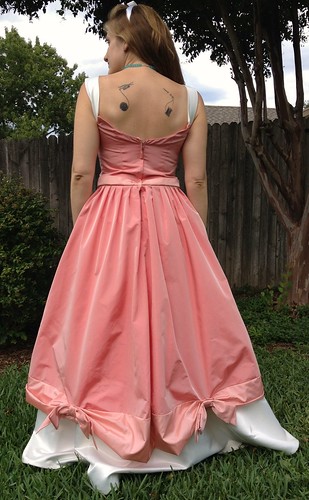
And let's not neglect the backs. Apparently, it's not formal wear without butt-bows.
So let's think for a minute. What sort of Halloween costume could I make with a floor-length white gown and two pink calf-length dresses? Hhmmm... I've got it!!

It's perfect! And you know Cinderella was a refashionista in her own right. Before she wowed Prince Charming in that blue gown her Fairy Godmother magicked up for her, she had grand plans of transforming her mother's "old fashioned" pink and white dress into something more fitting for the ball. Of course, waiting on her evil step-mother and step-sisters kept her too busy for sewing. Luckily, her mice friends and some lovely little birds lent a hand/paw/wing and finished her dress for her just in time. Don't worry though. I'll be recreating this fairy-tale dress all on my own - no cheating with tiny animal helpers.
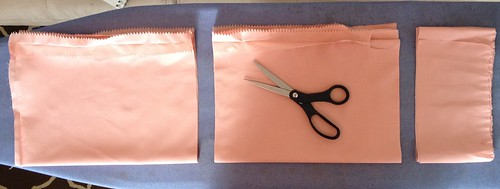
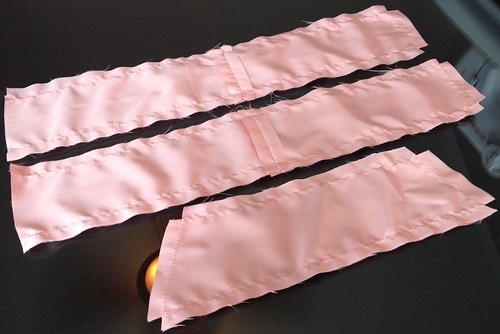
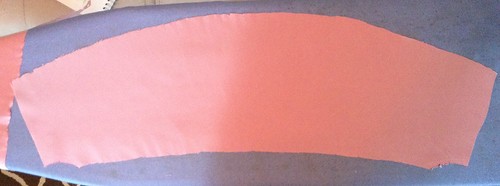
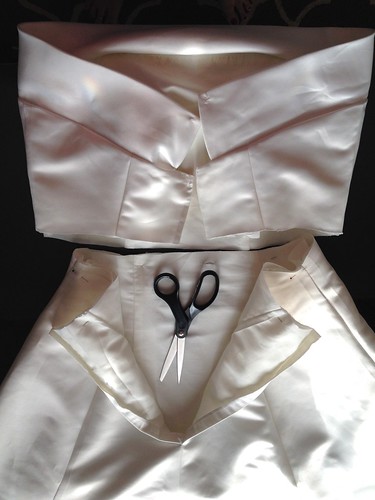
As most refashions do, this one began with scissors. I amputated the pink skirts and carefully ironed out the wrinkles and pleats.
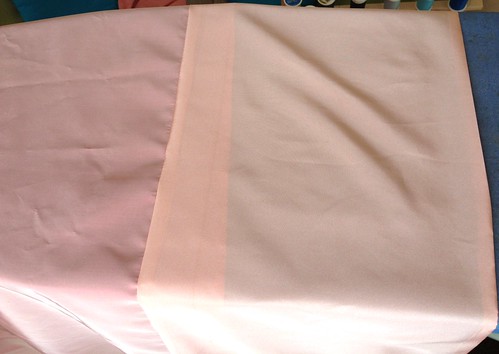
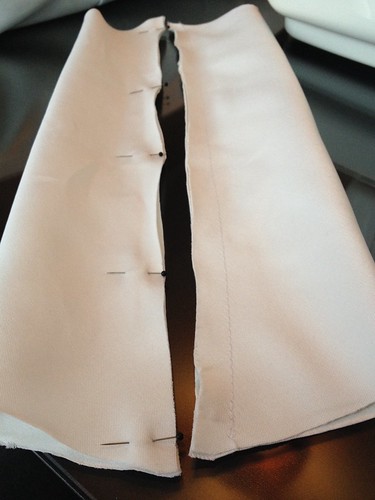
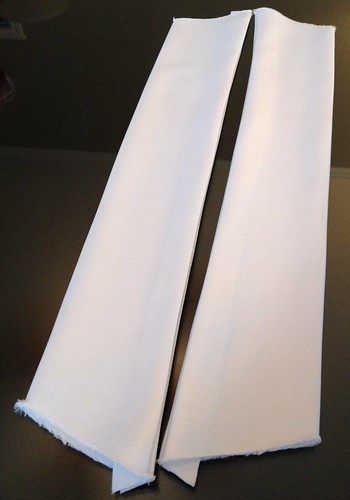
From the pale pink one, I cut a 5-inch wide strip, plus two strips about 13 inches wide. I used part of one 13-inch strips to lengthen the other one, making it the same circumference as the dark pink skirt.
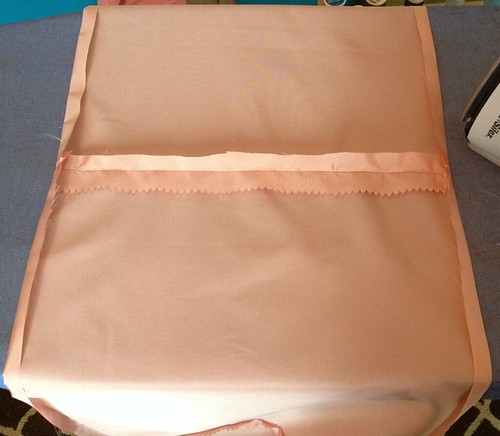
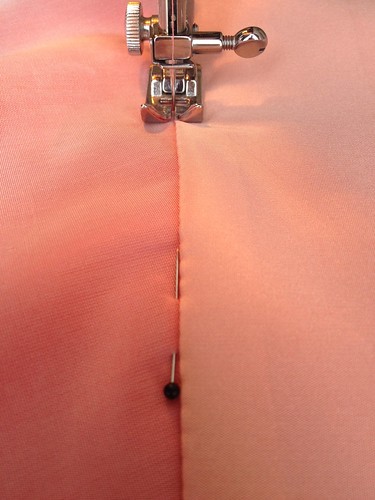
Then I joined the pale pink to the bottom of the dark pink, right sides facing, and then pressed the seam.
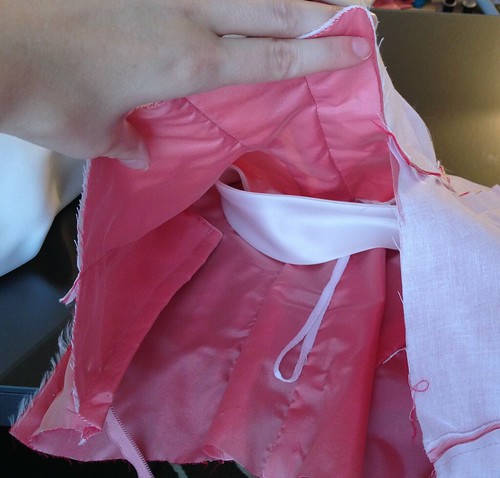
Next I folded the bottom edge of the pale pink upward to the inside and sewed "in the ditch" so my seam wouldn't be too obvious from the outside.
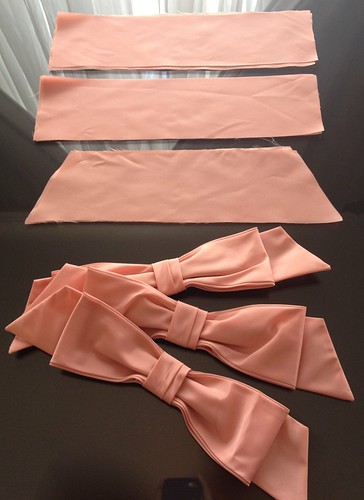
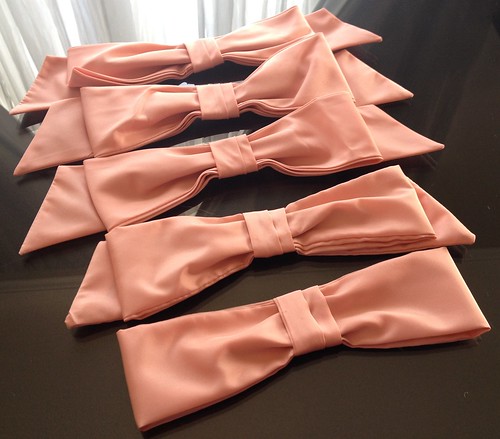
Setting the skirt aside momentarily, I carefully harvested the bows from the back of the pale pink dress. There were only three of them, and I would need five total - four for the skirt and one for the bodice. So from the remainder of that 13-inch strip, I cut the pieces to make two more bows, one with tails and one without.
I stitched my pieces together around the edges, leaving holes and notching out the corners in order to turn them right-side-out.
Once they were right-side-out and pressed, I folded and pinned and hand-stitched them into shape. Can you tell the difference between the originals and mine? Yeah, me too, but whatever. They're good enough.
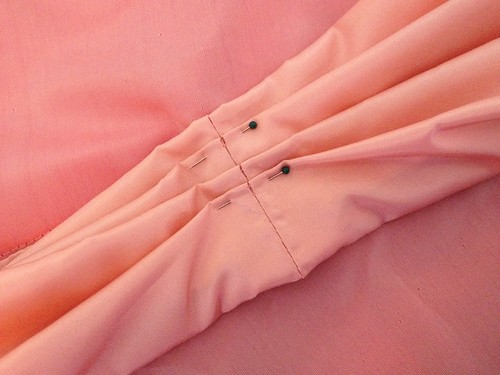
So back to the skirt, I pinched and pleated the pale pink border upward in four places and stitched the folds down.
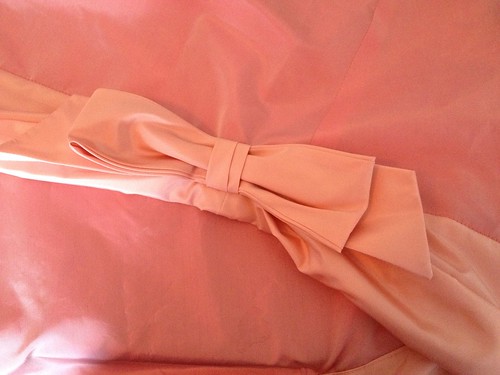
Then I hand-sewed on my four bows with tails.
Now let's tackle the bodice, shall we? The dark pink bodice had a great shape, but it needed some tweaking, like you know, making it fit me for starters. First I removed those beautiful sleeves. Then for some reason, I had this inexplicable urge to go swimming. Weird, huh?
With those out of the way, I could start making my adjustments.
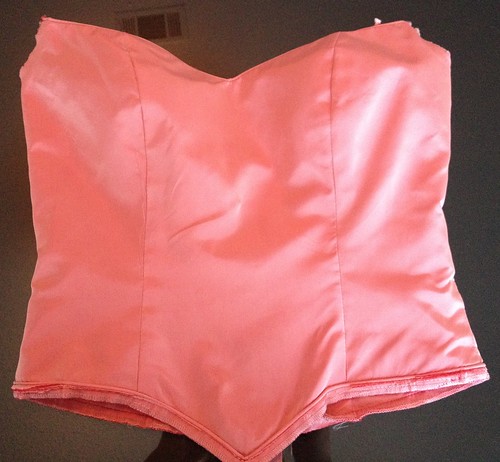
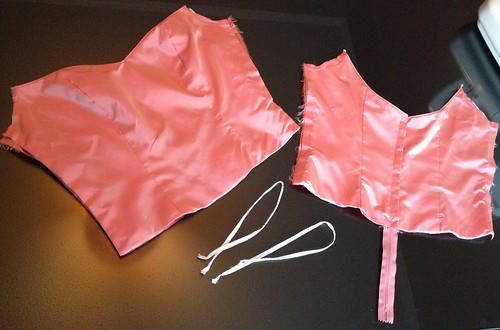
First, I cut the bottom edge straight across and picked out the side seams. I even saved the hanger straps for reuse later.
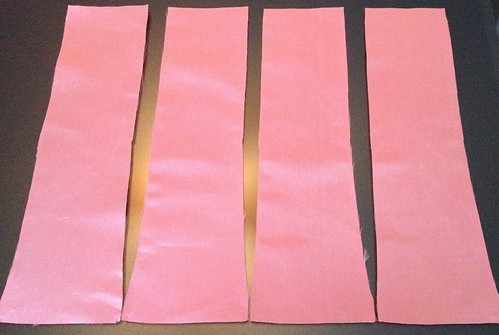
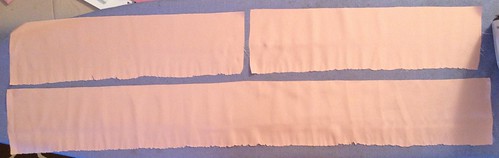
To make some side inserts, I cut apart the huge poofy sleeves and ironed out them out. Seriously, people, sleeves do not need this much fabric! That's a full-size ironing board for comparison.
I cut four rectangles that flared out ever so slightly toward the bottom.
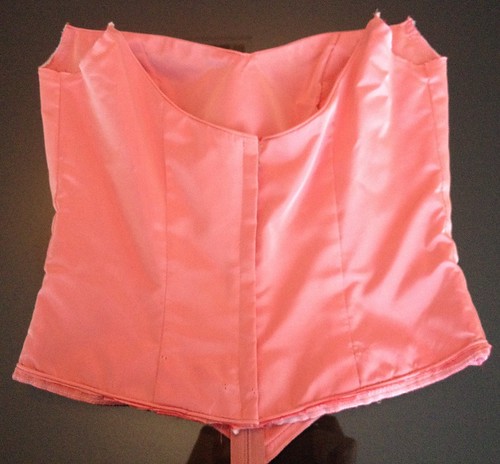
I separated the outer fabric and lining of the front piece and attached my new side panels.
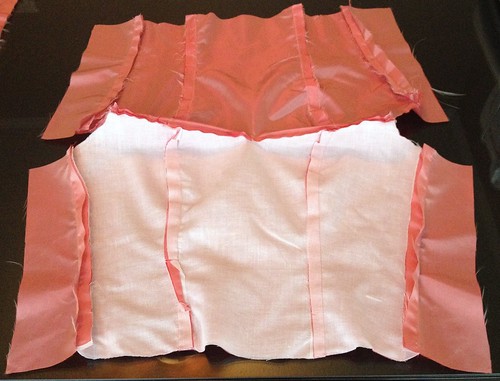
Then I did the same for the back piece. And while the bodice was still inside out, I stitched the underarm edges together, re-inserted my hanger straps.
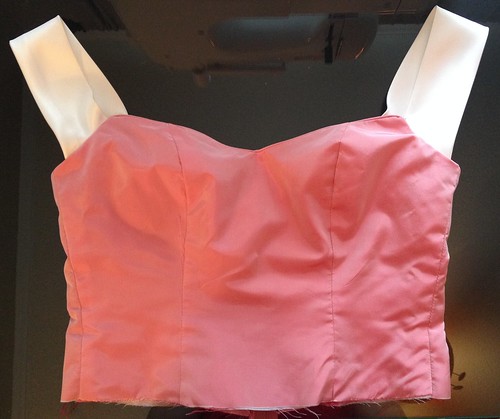
I flipped it right-side-out again, tried it on, and it fit like a glove!
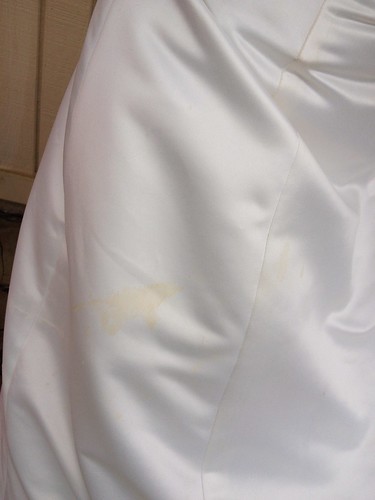
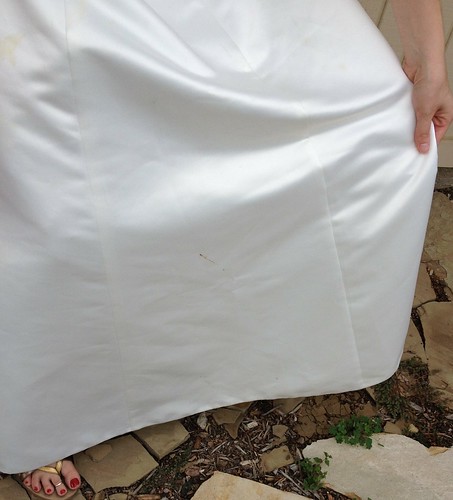
Now it was time to tackle the wedding gown. Did I mention the stains? Yeah, there were stains on the front of the skirt, presumably cake frosting, champagne, etc. No biggie though, since I'll be covering that with my pink over-skirt.
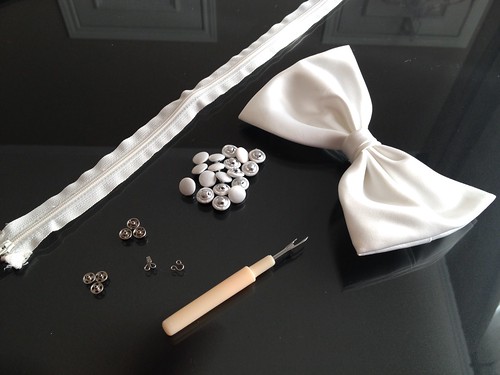
I put the dress on and marked where it needed to be cut. Then I carefully removed all those lovely buttons down the back, as well as hook-n-eyes, snaps, zipper - the lot.
Then I cut. Let me tell you, despite the stains and the fact that this wasn't even my wedding dress, I still had a hard time cutting into it. But cut I did.
From the flappy thing at the top of the bodice, I cut two trapezoidal shapes to become my straps.

I folded them inside-out and stitched along the edge.
Then I flipped them right-side-out again and gave them a good press.
Having realized I needed to attached them to my new bodice, I had to pick out the underarm seam I made earlier, but that wasn't too bad. I inserted my straps in between the lining and outer fabric, with the whole thing inside-out.
Then restitched my underarm seams.
And tada! Straps! Perhaps not as poofy as Cinderella's, but I believe I've made my feelings toward poofy sleeves abundantly clear.
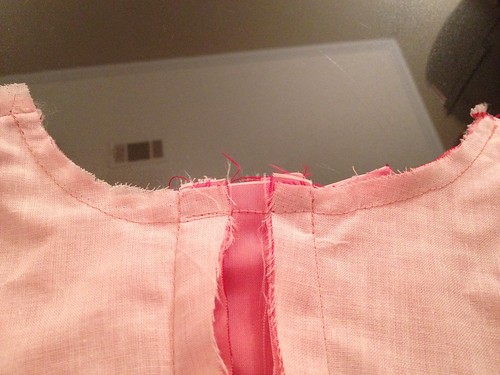
Now my bodice needs Cinderella's signature sashes. Remember the 5-inch-wide strip from the pale pink skirt? I cut it into three pieces - two about 16 inches long and one 32 inches long.
The short ones were made into tubes, while the long one was simply pressed in half. Then I attached them to my bodice.
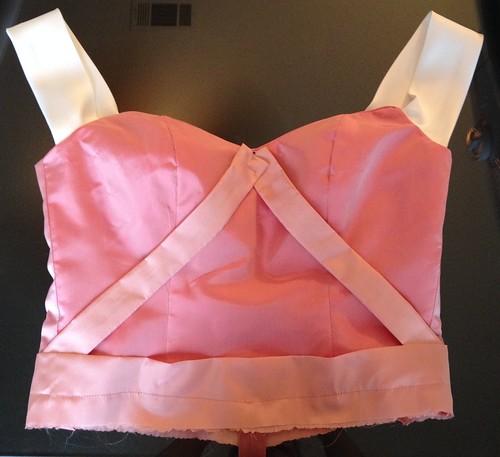
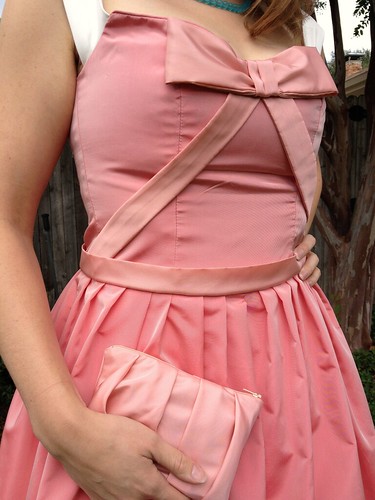
The last remaining bow - the one without the tails - I hand-stitched at the top of the bust. I even tacked down the sides so they wouldn't flop over.
Whew! Okay, the bodice is finished. Let's go back to the skirt for a bit. I removed the little bits of boning from below my cut line on the wedding dress.

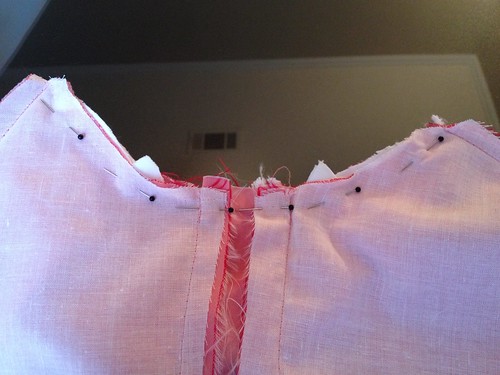
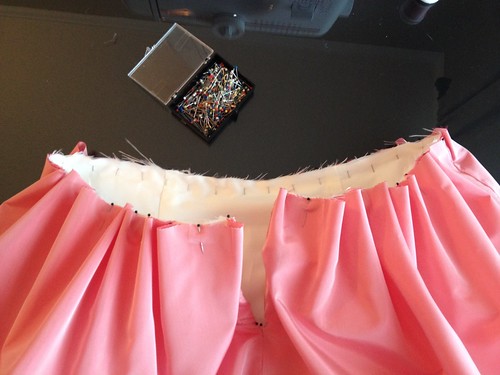
Then I inserted the white skirt into my pink overskirt and started pinning. I pinned at the back on each side of the zipper, then at each side seam, and at the center front. From there, to gather the fabric evenly, I would find the halfway point between each pin on the pink skirt and and the halfway point on the white skirt, and pin them together. I kept doing this until I had a pin every inch or so all the way around.
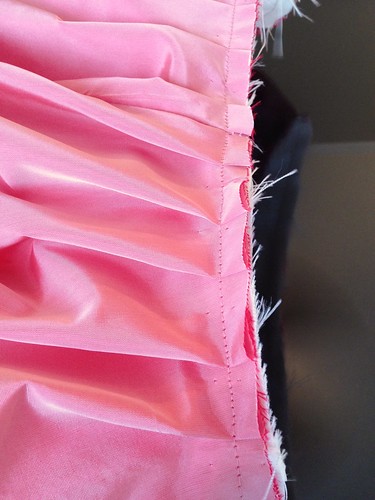
As I sewed the two skirts together, I pleated the excess fabric between pins as I went.
Now let's put the whole dress together. I turned my skirt inside-out and put my right-side-out bodice inside it. Then I pinned and sewed around the waist.
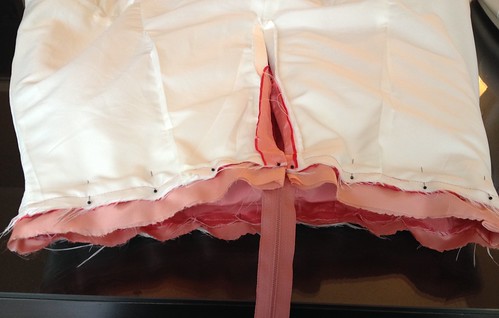
I used the extra fabric of the waist sash to fold over and encase my raw edges. True, this is inside the dress, and no one except me would ever know. BUT this fabric frays like crazy, and I'd prefer not to have strings getting caught in the zipper. Speaking of the zipper, the last step for the dress was reattaching the bottom half of the zipper to my new skirt. I could've sworn I snapped a pic of this, but maybe not. Trust me, though, it happened.

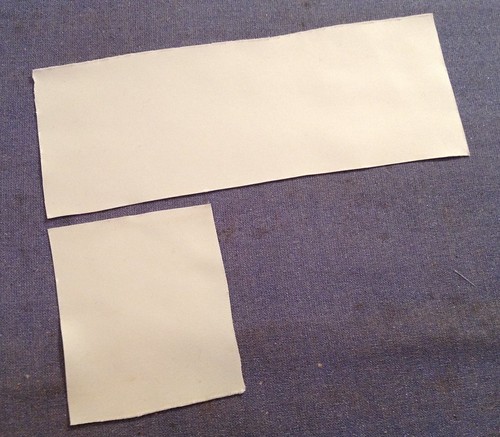
Now before I can show you my finished dress, we've got some accessories to tackle! From the leftover bits of the wedding dress's flappy thing, I cut two small rectangles.
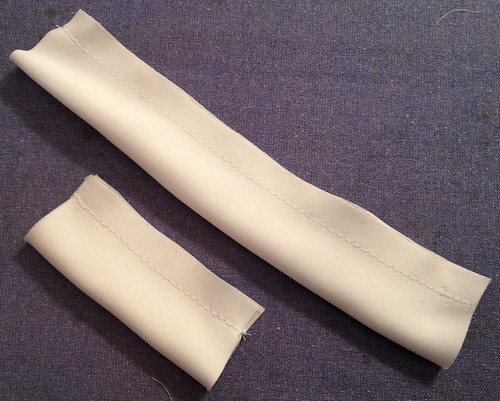
Each was sewn into a tube, the seam was pressed, the tube flipped right-side-out, and pressed again.
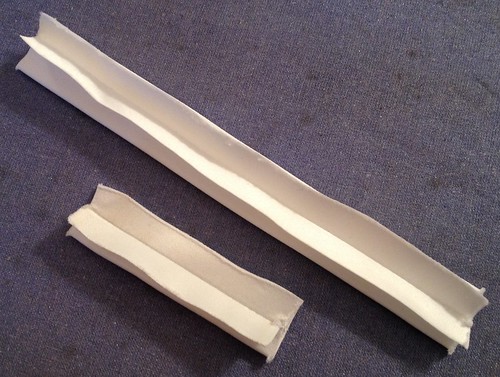

The longer one was folded over to form a bow and sewn down the center.

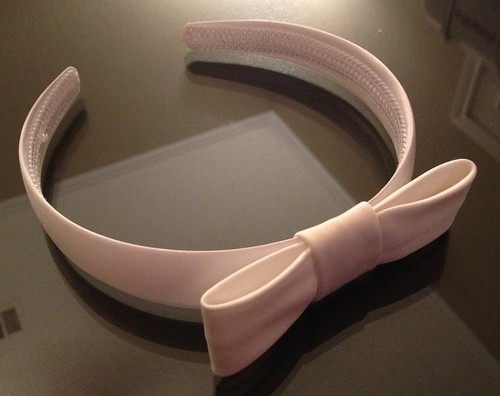
The shorter one was wrapped around the bow and a $1 headband from the craft store (technically, $1.99 but I used a 50% off coupon). Then I hand-sewed it together down.
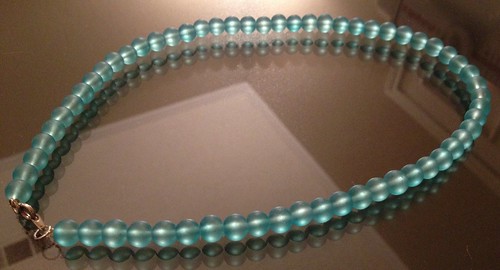
While I was at the craft store, I picked up some blue frosted glass beads for $3 (40% off $4.99). Using fishing line and notions from my jewelry supplies, I whipped up a simple necklace.
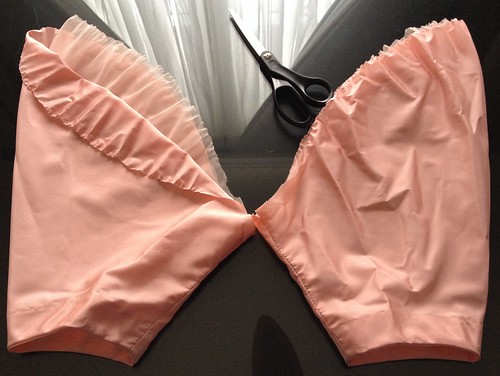
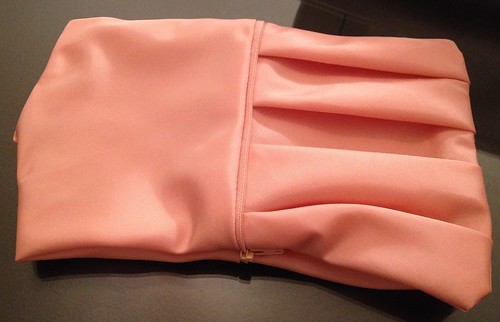
Finally, even though it's not 100% faithful to the costume, I needed a handbag. How else will I carry the keys to my pumpkin carriage? I chopped off the sleeves of the pale pink dress. They had this weird mesh lining, I guess to make them poofier, because, you know, it's all about the poof. The extra layer will add a little more stability to my clutch, so I'll take it.
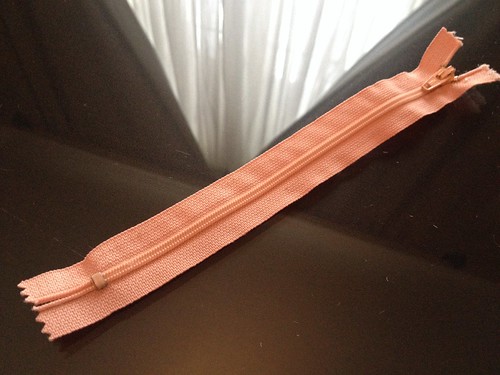
I also salvaged the pale pink zipper from the back of the dress.
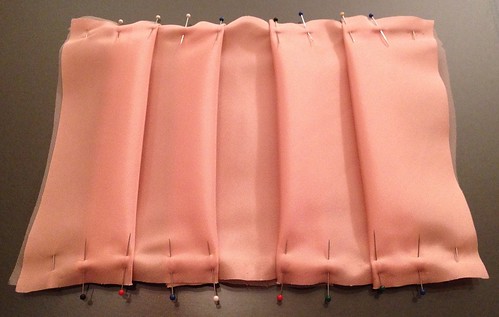
After ironing the poofy wrinkles out of my sleeves, I laid them on top of one another and cut out two rectangles - about 6" x 8" and 6" x 16".
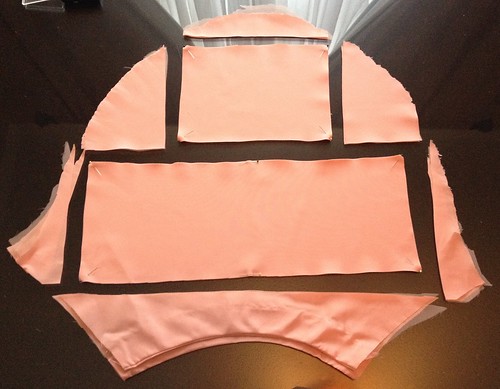
Each long piece got the pleat treatment.

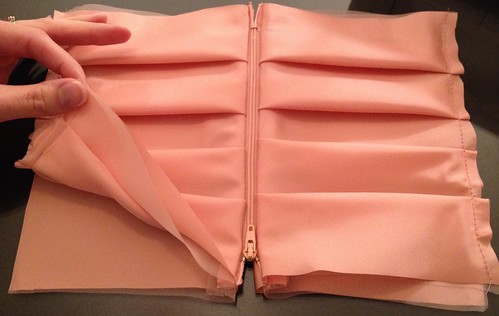
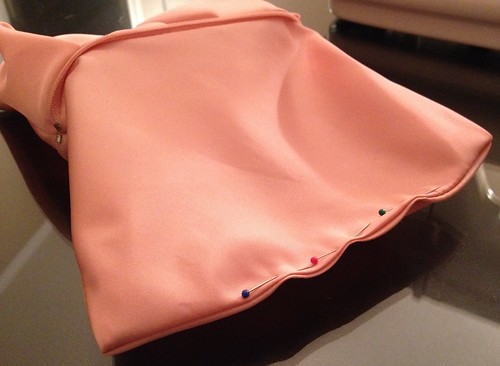
Then I sandwiched the zipper between a pleated piece and a plain piece, with right sides facing, and sewed them together.
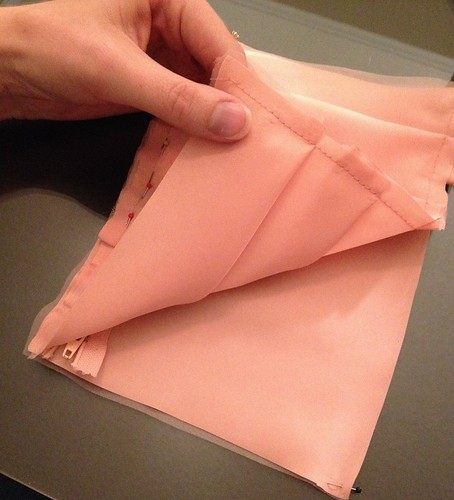
Then I did the same on the other side of the zipper.
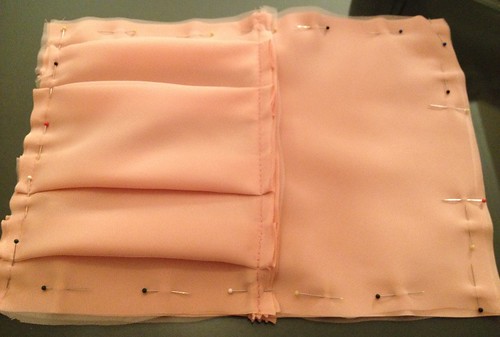
Next, unzip the zipper (that's very important if you want to be able to turn your purse right-side-out later) and pin pleated to pleated and plain to plain, right sides facing. Then I sewed almost all the way around, leaving a hole at the bottom of the plain pieces.
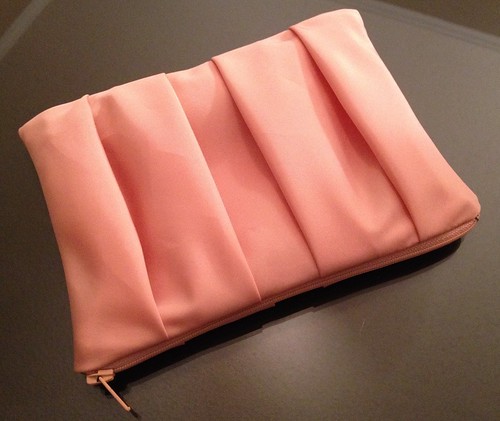
Then, if you unzipped your zipper, you should be able turn your purse right-side-out now.
Close up that hole in the plain pieces.

Stuff your lining inside and you've got a cute little clutch!
And now I would like to address all those people who just scrolled to the bottom without reading about all the hard work that went into this costume. Shame on you!
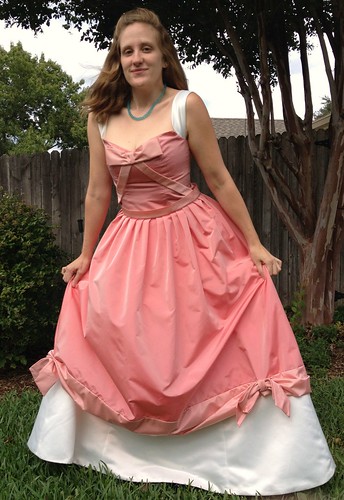
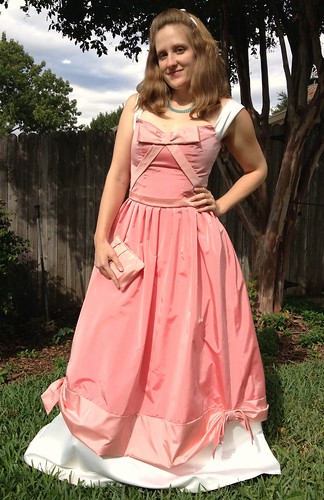
But here it is! All finished and ready for some trick-or-treating. Huh? What do you mean "too old"?

So let's see if I can do the math...
$0 wedding dress
$0 dark pink bridesmaid dress
$0 pale pink bridesmaid dress
$1 headband
$3 beads
$4 thrifted pepto-pink kitten heels
$8 Cinderella costume
Can't beat that price!
What? You didn't know Cinderella had ink?
If only I could convince my husband to dress up as Prince Charming, but alas, there are some things beyond even the power of a Fairy Godmother.


Wow! That's gorgeous! And I did read all the details :) I find it amazing how much work goes into many refashions. Do you do all the math ahead of time to know how much material you'll get out of the different pieces and what you'll use it for? I'm thinking the answer is yes, based on the sketches you've showed for other projects. This turned out beautifully!
ReplyDeleteThanks, Jenny! It really depends. Expanding the bodice to make it fit required some math, definitely. But gathering the excess of the pink skirt over the white skirt, not so much. Of course, if I'm designing something from scratch, like my peplum dress, or working with a very limited amount of fabric, like my tweedy peplum top, then there's a whoooole lotta math involved.
DeleteWow - what a tutorial!!! I have praised your sewing skills and still do, but it is your thought process that blows me away!! AND the reason that you are not making a career of creating custom-made couture is? Cinderella would be delighted with this 3 dresses into 1. The design and execution of the clutch was of great interest to me.
ReplyDeleteThank you, Linda! I would happily quit my day job to sew and knit all day if I could be assured a stable paycheck!
DeleteYou are 5 million billion zillion times amazing! " I had this inexplicable urge to go swimming." Love it!
ReplyDeletePS - I was looking around your site, congratulations on the weight loss! You must have worked really hard to get where you are now!
Thanks, Nay! Indeed, it was quite difficult at times, and still is sometimes, but totally worth it!
DeleteI read every bit too! I usually just admire, "like" and then look forward to the next time. This time I needed to tell you what a great job you did! It's amazing!
ReplyDeleteThank you, Julie! I'm glad you did - I love getting comments!
DeleteI am blown away! You are so talented! Like another commenter, I think you have what it takes to go into business for yourself. Maybe you could start with an easy...
ReplyDeleteNot an easy, an etsy. My auto correct strikes again.
ReplyDeleteThanks, Karen! I do actually have an Etsy account and have sold things before, but it's been a while. Maybe when I quit my job to knit and sew full-time then I'll have time to maintain a shop. :)
DeleteWow...how cool is that!!!
ReplyDeleteThanks, Pamela! I think it's pretty cool too! :)
DeleteWOW! Very nice. :D
ReplyDeleteThank you, Anita!
DeleteCute dress, Carissa! Your tutorial is very clear. Well done!
ReplyDeleteThanks, Trish! Your costume is really cute too. Love the wing skirt!
DeleteI love this. No one ever does Cinderella's original dress! What a beautiful job you did. An amazing tutorial as usual. Congratulations on a fabulous job
ReplyDeleteThank you, Pam! I thought her original dress was more fitting the whole refashion thing anyway, given it was a refashion too and not just a magical illusion.
DeleteThis is amazing! It's so creative and it must have been a lot of work! Excellent work!
ReplyDeleteThanks, Nicky! It was a lot of work, but I'm so happy with how it turned out!
DeleteIf I could, I'd make you some glass slippers.... stunning, yet again!
ReplyDeleteThanks, Eveline! It's the thought that counts! :)
DeleteWow!!! That's amazing! I've linked to your post over at Craft Gossip:
ReplyDeletehttp://sewing.craftgossip.com/tutorial-three-freecycled-formals-become-cinderellas-ball-gown/2013/10/20/
--Anne
I'm gossip-worthy?!? I feel so special! Thanks, Anne!
DeleteAbsolutely stunning, I'm so jealous, you look great and I think your husband should be prince charming. FYI: I read through the whole process, I just had to see how you did it. Now is we could make some glass slippers!!!
ReplyDeleteThank you, Sandy! You'd have a better chance of getting him to dress up like a zombie or ax murderer, but that kinda clashes with the whole princess thing, don't you think? :)
DeleteGreat job Carissa...your gown turned out beautiful! Cinderella would be proud!
ReplyDeleteThanks, Susan! Your witch costume is very impressive as well - so much detail!
DeleteAhhh, this is adorable, Carissa!! You did a great job technically, and I also think you stayed very true to Cinderella's dress. Wow, I was really impressed with the clutch- I haven't tackled anything like that yet, so I know I'll be returning to this post for a how-to someday down the road. And, sad to say, my little sister turned against me and chose your dress as her favorite this week...wonder why? ;) LoL.
ReplyDeleteThank you, Desarae! I had to laugh when I saw there were two Disney-inspired projects this week. Your Jane dress came out really cute! I've never done a bustle before, so thanks for the in-progress shots. Excellent job! Sorry to incite sibling unrest though. :)
DeleteWow, wow, wow - what an amazing job and so close to Cinderella's dress!!! :D
ReplyDeleteThanks, Deb! I tried to stay true to the old cartoon I grew up watching, apart from the addition of the clutch, of course.
DeleteFound you via Craft Gossip and LOVE this transformation! You are amazing and my new sewing heroine! And Disney heroine too!
ReplyDeleteThank you, Abbie! Perhaps a sewing heroine needs a hand-stitched cape... hhmmm...
DeleteI was totally blown away by all the entries for Halloween week, and yours was amazing! I'm pretty sure I gasped out loud when I saw your before and after pictures! It's gorgeous, and I could totally tell which princess it was!
ReplyDeleteThanks, Heather! I don't recall ever wanting to be a Disney princess as a child, but I certainly do now. I would wear this dress daily if I could get away with it!
DeleteWell, I did scroll down to see the photos the other day, but today I finally came back with some extra time to get to read it all and write you a comment. Oh boy, I am amazed at this! Congratulations Carissa!
ReplyDeleteThank you, Magda! I bet you've got some fantastic diy costume in the works for your little one. Or is Halloween even a big deal in Portugal like it is in the United States?
DeleteHalloween isn't a traditional celebration over here, or at least it wasn't until a few years ago. We rather play dress up for Carnival in February, but as I said in the last couple of years, kids do dress up for Halloween, and some even do trick or treat - it's not common though. My kid went to daycare for the first time this year, and they are allowed to dress up if wanted. I plan to make her a little witch costume, i haven't done it yet, I wanted an alternative to the all black witch dress, I guess I might try to do something like Susan did. Isn't that the greatest witch costume ever?
DeleteOh yeah, Susan's witch costume was fabulous! Cheery and colorful instead of drab black - perfect for a little girl! I'm sure she impress all her daycare friends. I hope you post pics when you're finished.
DeleteTHANKS- now I know what do to with the 2 evil 80s formal dresses my daughter was given- ones gold satin, the other dk green velvet. Yup-im thinking renaissance princess. thanks for the inspiration!
ReplyDeleteOh, that sounds lovely - very medieval! I hope you post pics when you're finished!
Deletebrilliant! you should get a little stuffed bird (or mouse!) and have it on your shoulder to complete the look; but that's really just nit-picking: it's awesome!
ReplyDeleteThanks! I thought about going to the craft store for some of those "life-like" birds from the floral department, but then I remembered how much those things give me the heebie-jeebies.
DeleteVERY, VERY clever refashioning!!! The clutch purse may not be authentic, but I love it.
ReplyDeleteThank you, Pam!
Delete