


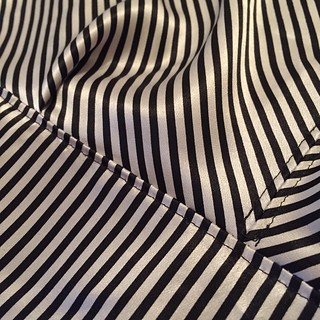
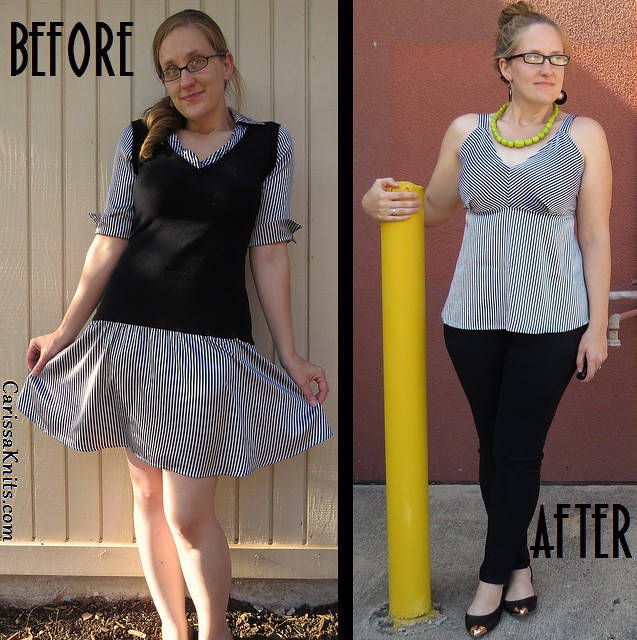
As you may recall, all I did was pick out the seams attaching the striped fabric, and I had the perfect black sweater vest. But I was left with those striped remnants which have languished in my stash for over a year now. And with the resurgence of black and white stripes, so these stripes resurfaced in my mind and on my sewing table. I didn't have much to work with, but I thought it would be enough for a strappy little blouse. Now this is gonna be a little photo intensive, so bear with me please.
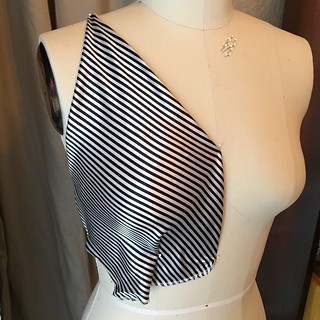
With Rosy's help, I got to work, draping and pinning my pieces to see how I could fit them together and cover all the necessary bits. First, I cut off the cuffs and placed one sleeve on Rosy's chest, at an angle. I pinned the top corner at the shoulder. Then I pinned at the center and the side and folded under the extra fabric.
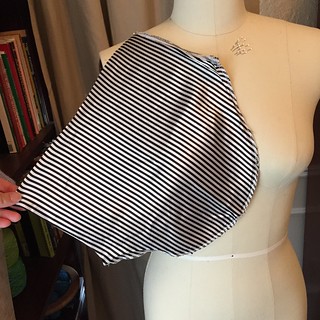
I added two more pins, a few inches down on the side and in the center. I made a simple pleat just under the bust to take in the extra fabric.
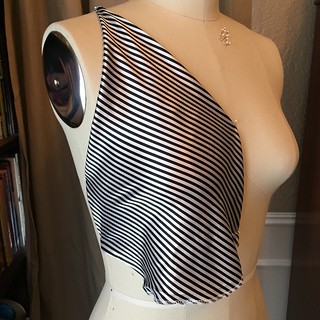
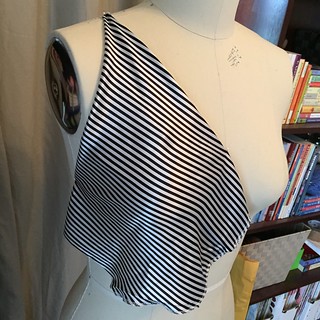
Then I duplicated this with the other sleeve on the other half of the chest. And I added what was once the skirt to cover the belly and around the lower back.
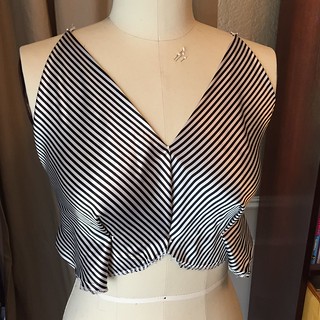
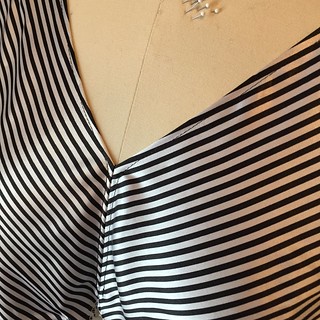
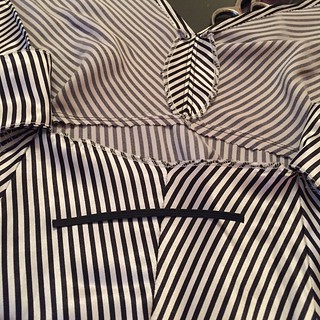
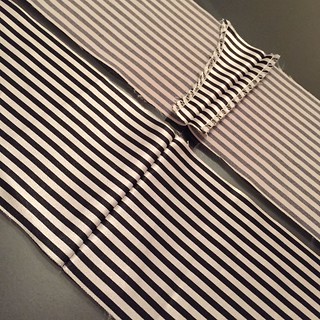
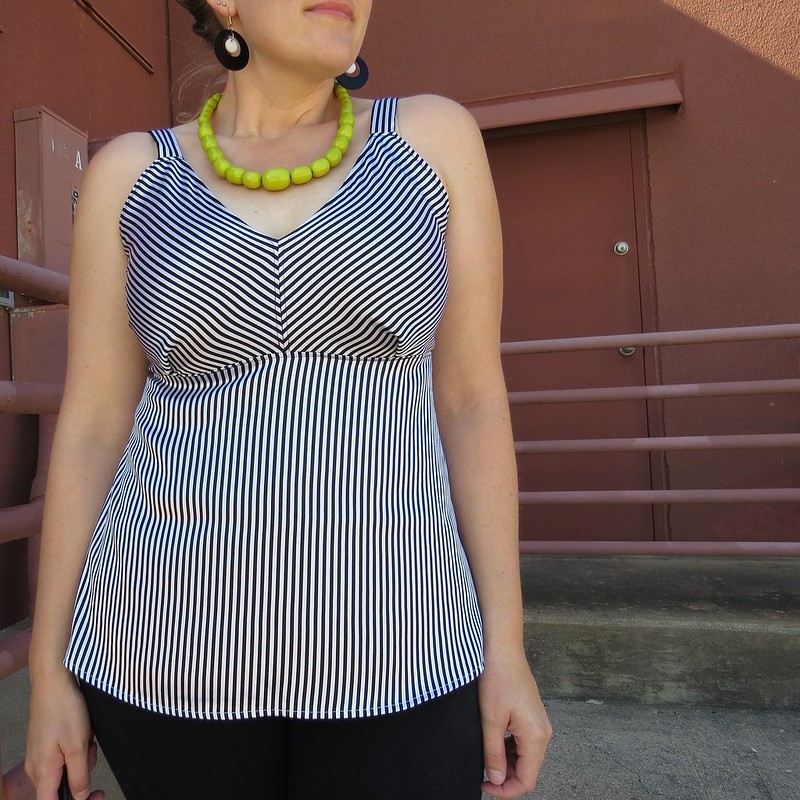
Once the basic plan was settled, the actual sewing began. I stitched the two former sleeves together down what will become the center front. Then I pressed them open and folded over my v-shaped neckline.

I top-stitched along the folded neckline and the center seam for a nice, finished look. Then I used my pinking shears to trim the excess.

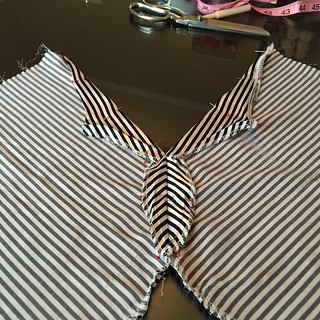
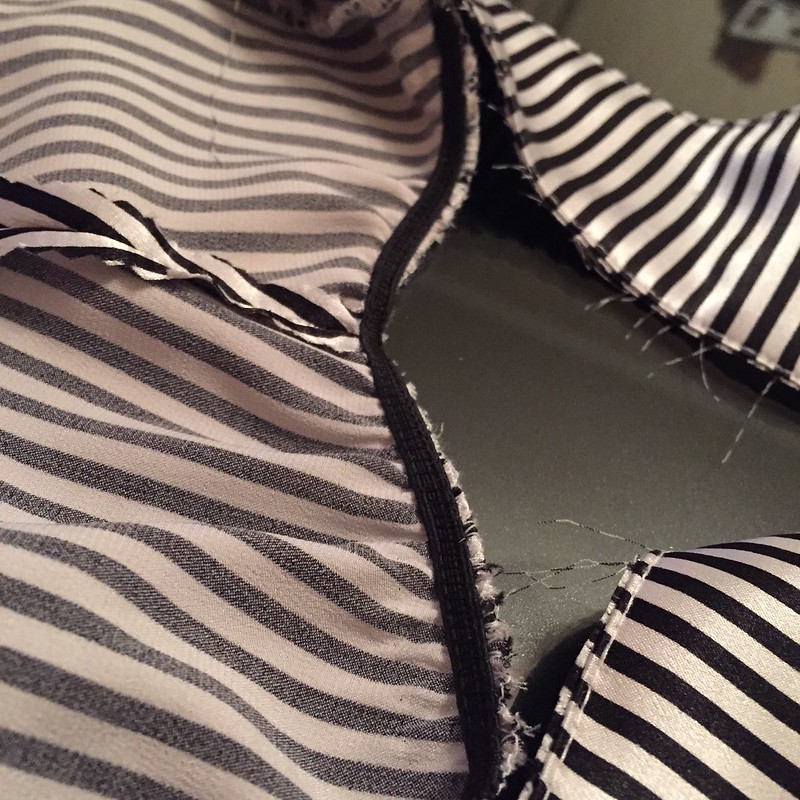
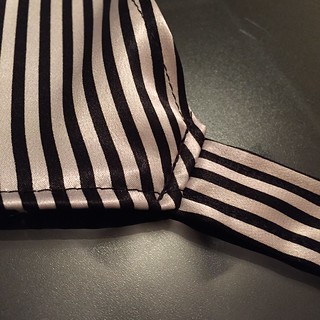
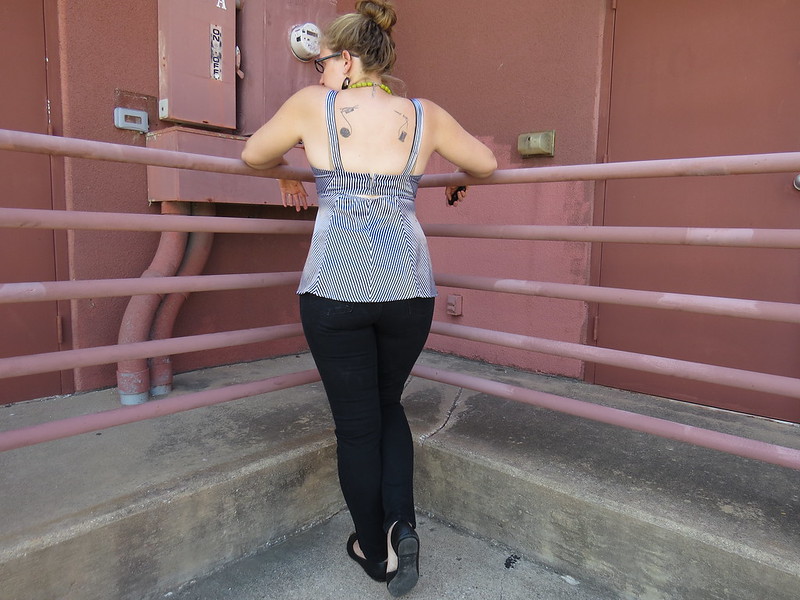
After that, I attached the skirt, making sure my bust pleats were in the correct places. I also attached each of the old cuffs to the sides of the bust. These will wrap around and fasten in the center back, a lot like a bra.
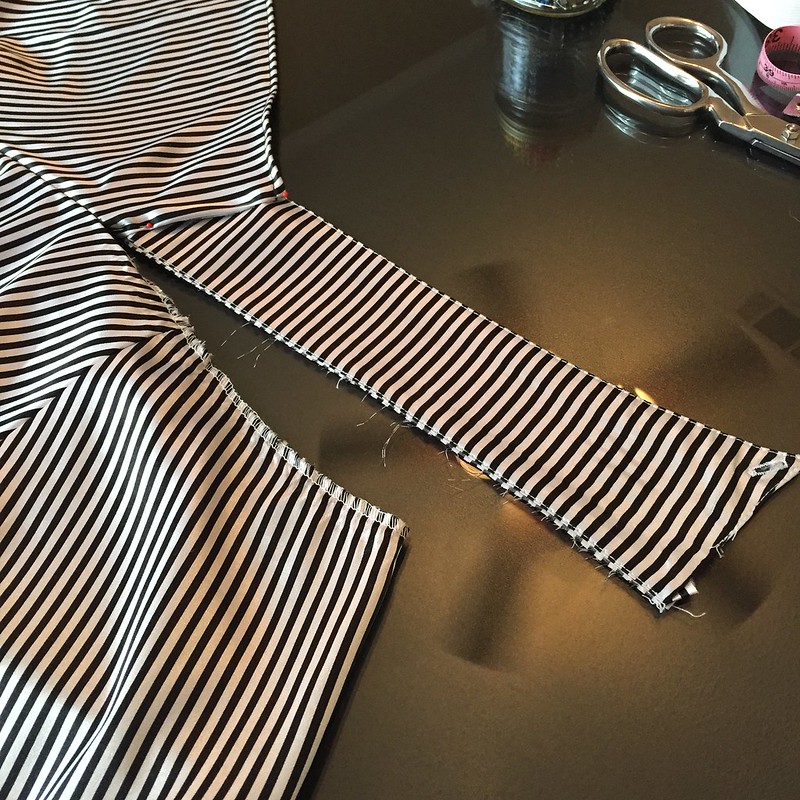
The skirt had more fabric than necessary to go around my torso, so I created a new center back seam and pinked off the excess.
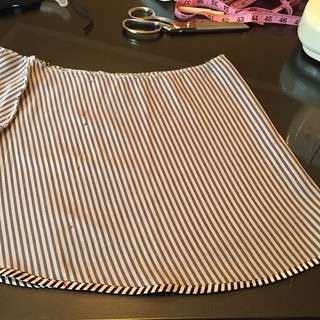
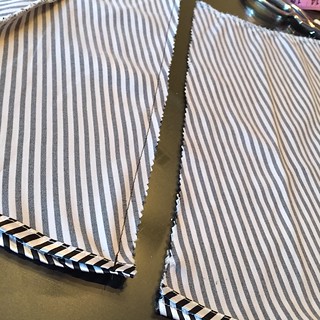
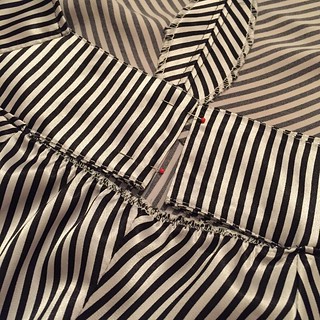
The skirt/torso was attached to the cuff/back-straps, leaving about 6 inches of each strap free. Then the whole horizontal seam was top-stitched.

I had left enough circumference in the skirt/torso to get over my head, but I didn't want it to sag once I had it on. So I grabbed a small piece of thin elastic (salvaged from another project) and zig-zag stitched it to the top edge of the center back.
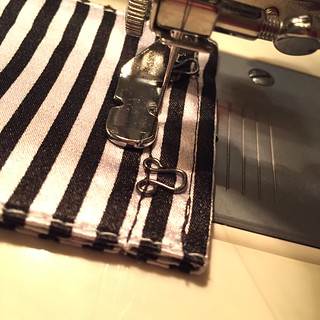
Next I measured how long the back straps needed to be and folded over the extra. Each end was stitched down, and I used my zipper foot to add two large hook-n-eyes.
Lastly, my shirt would need shoulder straps. So I cut four long rectangles from the extra skirt material and joined them in pairs, end-to-end.
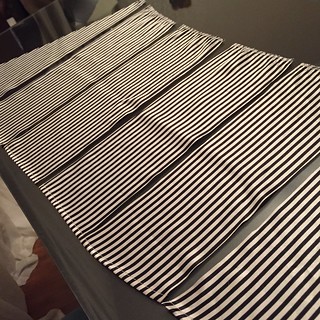
I pressed the sides toward the center, then the whole thing in half to create strong, 4-layer-thick straps. I top-stitched them over the black stripes so you can barely even see the stitching.

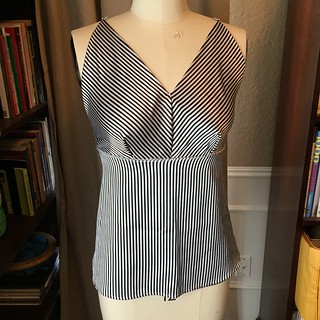
Finally, the shoulder straps were attached in the front and in the back.

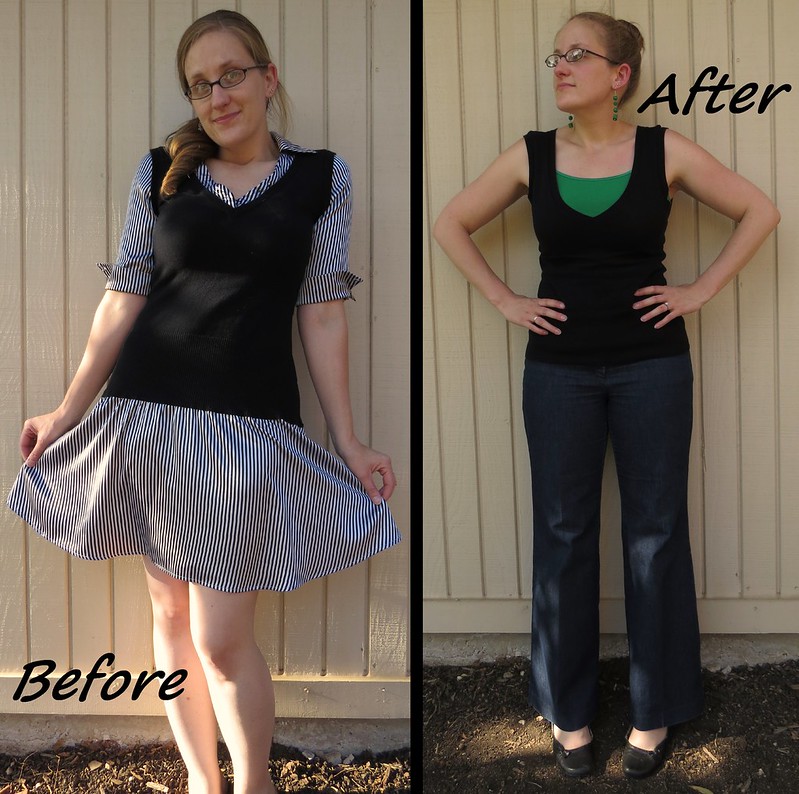
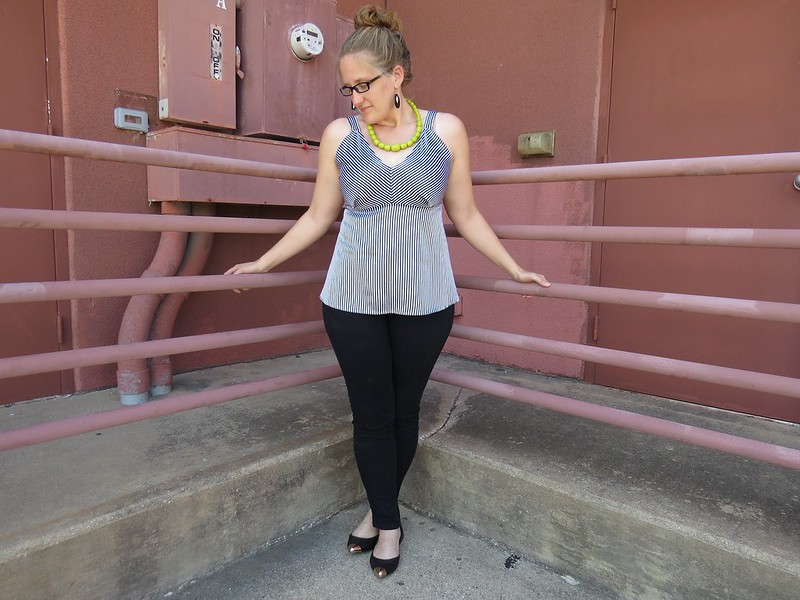
It's fits like a glove!

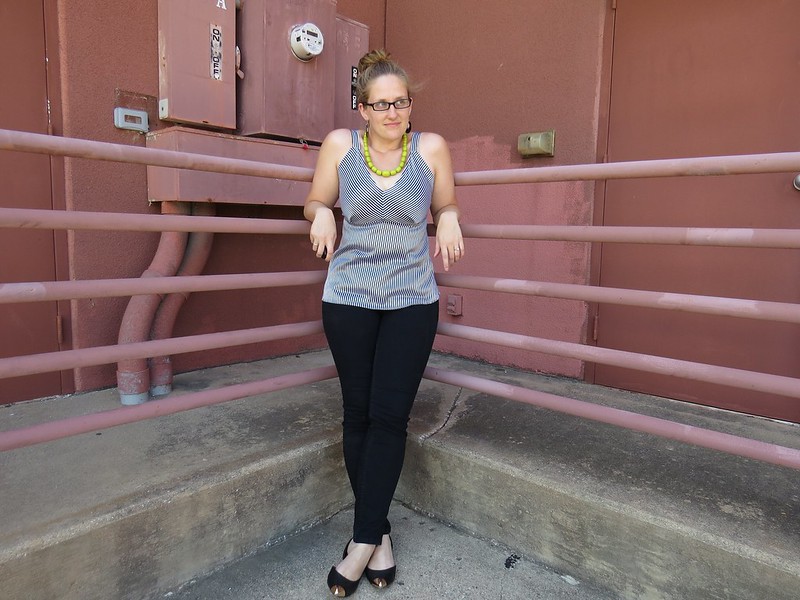
I kept the outfit fairly monochromatic with my black skinnified jeans and my Nasty Gal gold-toed black flats.
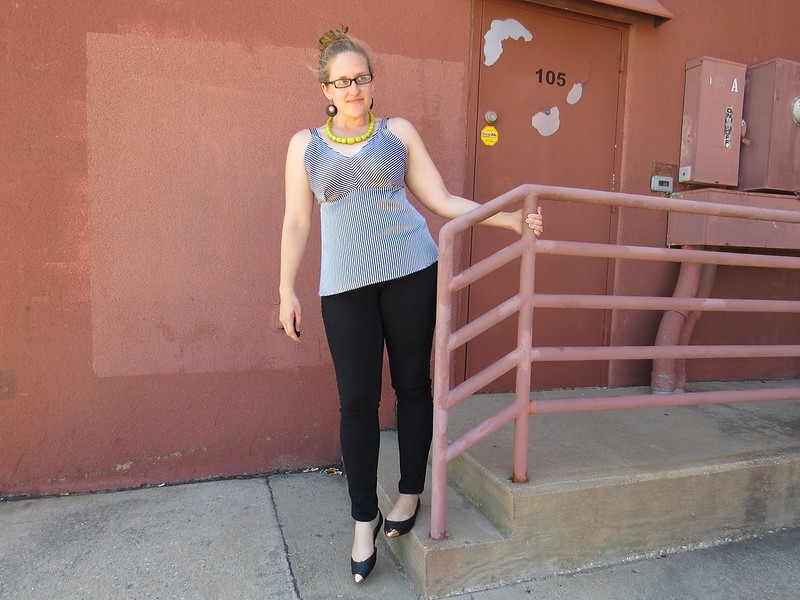
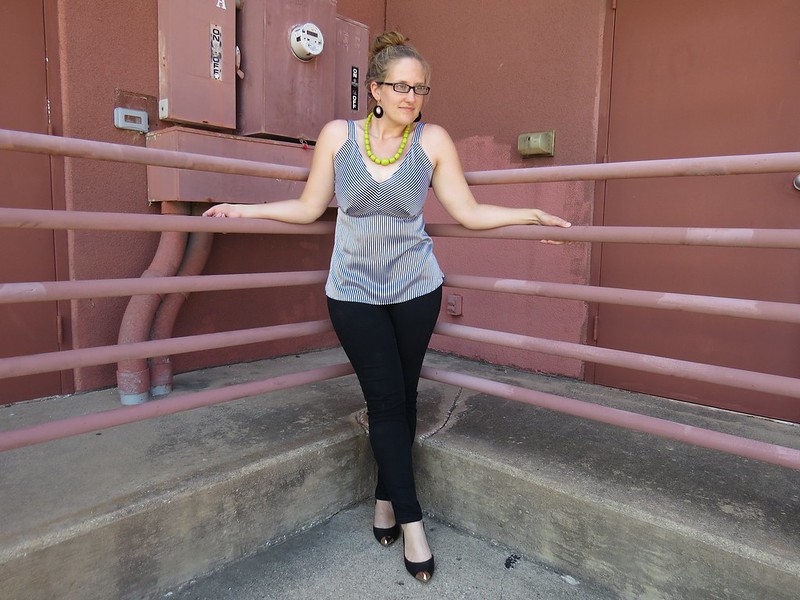
My black and white mod earrings were a fun addition, and I added one little pop of color with a chunky, lime green necklace.
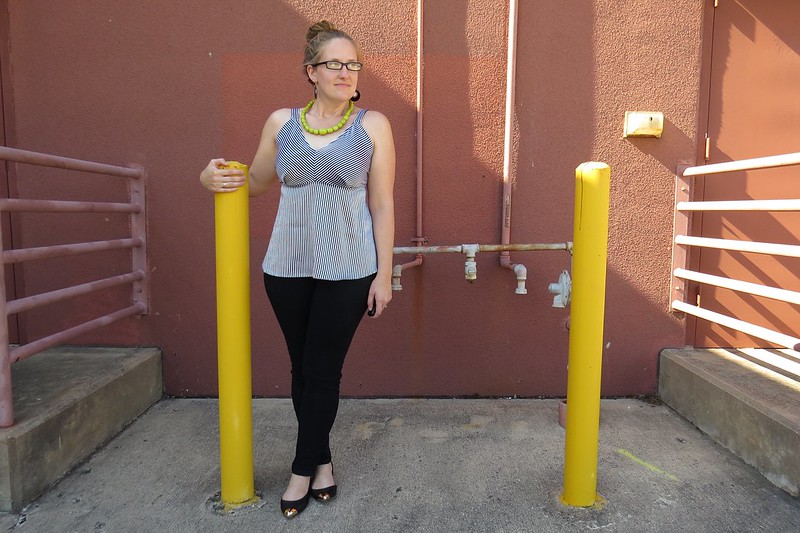
The shiny, clingy fabric and the bra-like fastening in the back give it a pretty slinky appearance. Not exactly office appropriate, unless accompanied by a cardigan or blazer.
Top: free and refashioned // Jeans: $7 thrifted and skinnified // Shoes: $5 Yerdle // Necklace: clothes swap // Earrings: Etsy
How's that for an almost-zero-waste refashion?

Very cool refashion Carissa. I'm thinking of getting a tailor's dummy - what make is yours please? Would you recommend it and is it customisable in any way? Cheers!
ReplyDeleteI *highly* recommend it! Rosy has become invaluable to me! I got her here. I decided to get a non-adjustable dress form because I read a lot of reviews about how flimsy the adjustable ones can be. I picked the size that most closely resembled my measurements, leaning toward the smaller side if anything (you can add padding to fill out your dress form if need be, but you can't make it smaller). Rosy is pinnable, but only at an angle; her fabric exterior is not very thick. The collapsible shoulders have made it so much easier to get things on and off over her head (or lack thereof). She stands on a cast iron base, so it's weighty enough not to tip over easily, but it has wheels so she's easy to move around. The one thing that is adjustable is her height. There's a foot pedal and giant spring to raise and lower her body. That way, I can bring the section I'm working on closer to eye level, or make her the same height as I am if I'm working on a floor-length dress. Seriously, I can't speak highly enough about having a dress form. Rosy has been a real life saver!
DeleteThanks Carissa. You've convinced me and great tip about the size. No wonder you get such great results! :)
DeleteYou've made me want to start draping, in a big way! The fit of this is amazing... Thanks for sharing, great refashion... Possibly my favourite of yours to date! :)
ReplyDeleteThanks, Gema! Rest assured, there was a lot more draping going on than what you see here, but I only posted photos of the plan I eventually followed. Rosy and I had a lot of fun with this one!
DeleteI LOVE this top! I love that it showcases your tats, I love the black and white, the stripes, and the fit is ridiculous! Holy crap I love this top ;) lol, seriously, it couldn't be better....oh but wait, then you added that necklace!
ReplyDeleteWow! Thanks, Andrea! Any chance I get to show off the ink, you know I'm taking it!
DeleteMorning, Carissa -----I am super amazed at your thought process ! I loved the black sweater vest when you separated the pieces of the dress and I loved "watching" you create this trendy top from the rest of the pieces - another WINNER in the re-Fashion
ReplyDeletearena !
Thank you, Linda! This was certainly an exercise in creativity, trying to get all those little scraps to come together as one without looking too patchwork-y.
DeleteThis is an amazing job you have done! It makes me want to invest in a dress form too. Very creative work with all the small pieces of fabric (and matching the stripes too)!
ReplyDeleteI tried not to worry too much about the stripes matching up because I knew I could easily drive myself mad about it. It's a much more pleasant surprise when they mostly line up by accident, than the torture of the stripes only mostly lining up when you were going for perfect.
DeleteThose stripes are hard on my eyes but I LOVED watching the process of refashioning. I am pinning this because I can see many uses for the process.
ReplyDeleteGreat job!!!
You're telling me! Staring at those stripes for a few hours was the worst part of sewing this top!
DeleteThis is such a great refashion - love that it's so close to zero-waste, it's original, it's so neatly and cleanly sewn, it fits like a glove - this is a winner! Looks lovely on you.
ReplyDeleteThanks, Jenny! I'm also happy to decrease my remnant stash, even if it is just a drop in the bucket.
DeleteI am so impressed with how you used every bit of fabric to it's best advantage! And what a cool location you found for your photo shoot! The colors set off your outfit very well!
ReplyDeleteJJ
www.dressupnotdown.blogspot.com
Well, I didn't use the original collar, but I *did* save the buttons. Who knows when you may see them again!
Delete