


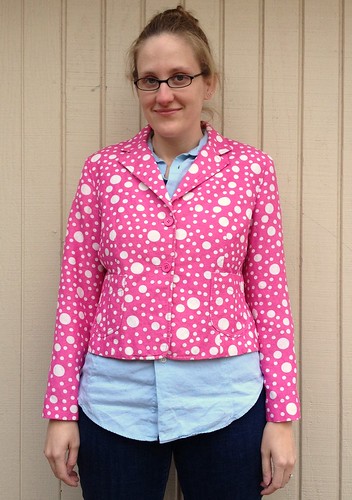
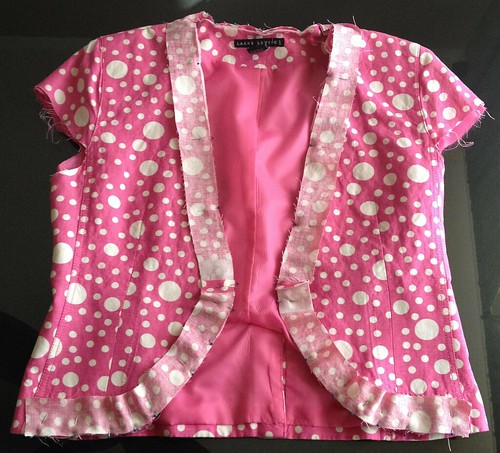
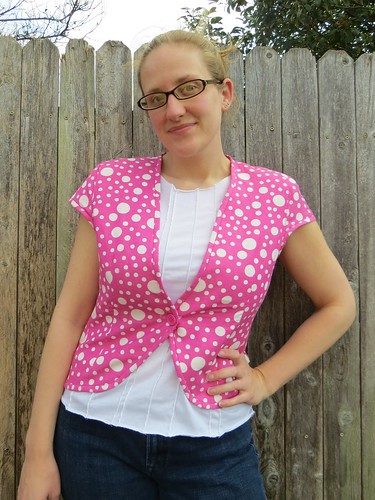
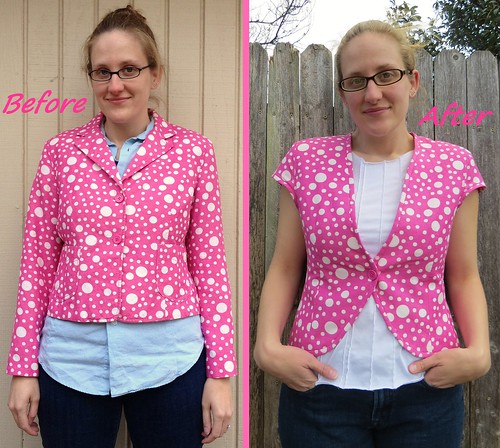
...a blazer! Surprise! Okay, so maybe it's no big transformation or anything, but I felt like this one had some potential as is. It just fell a little short. I like pink. I like polka dots. But this blazer just seemed to have a bit too much of both. Plus, I felt like the patch pockets and boxy style didn't really suit the fun, feminine fabric.
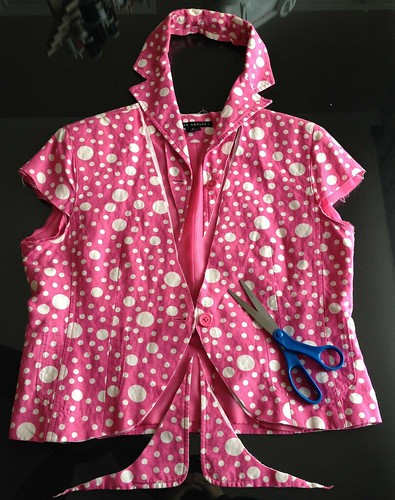
So my first step was to remove the pockets.

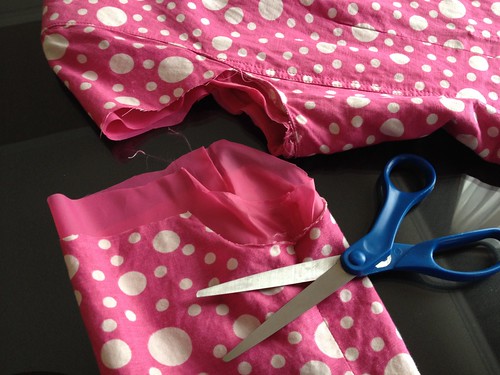
Then I cut off the sleeves, as close to the underarm seam as possible, then straight across for a little cap sleeve.
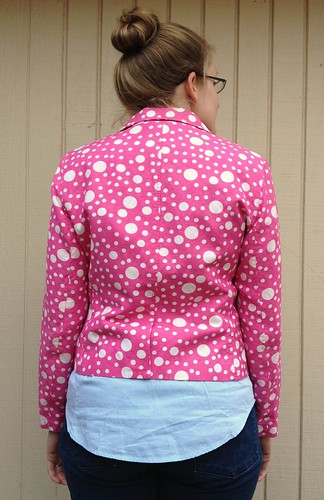
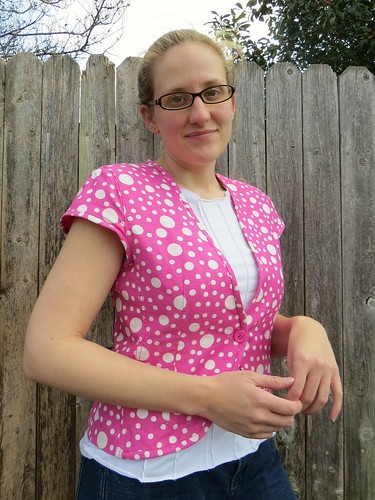
I cut off the collar and the bottom corners, leaving only one button.
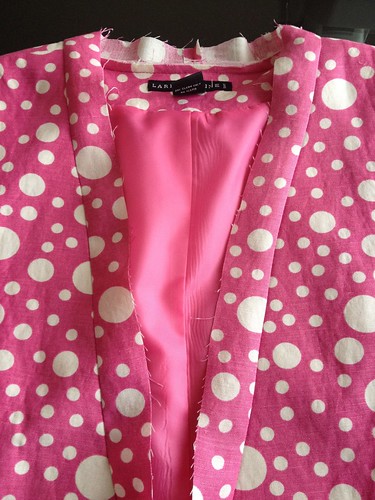
With the sleeves cut open, I could access the inside, between the lining and the outer fabric. I flipped the sides inside out and seam-ripped a couple inches of the bottom edge where the two fabrics were attached to one another.
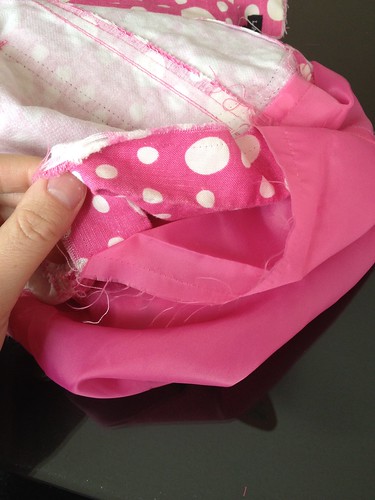
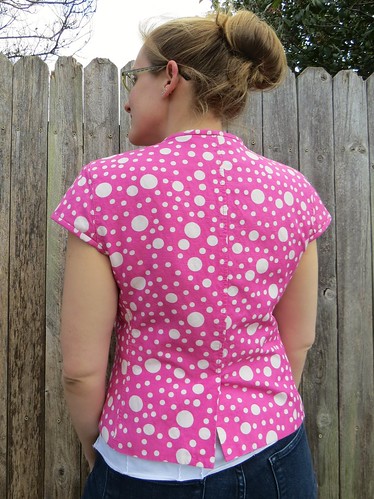
Then I was able to take in a couple inches on each side of both fabrics.

And I resewed the bottom edge afterward.
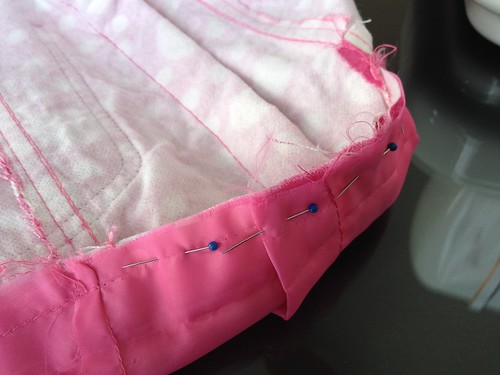
After a quick trip under the iron, no one's the wiser!
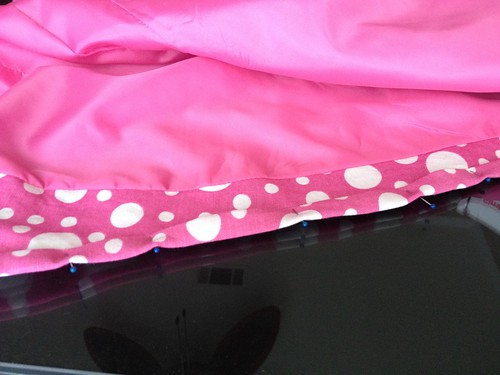
From one of the discarded sleeves, I cut six 1.5-inch wide strips.
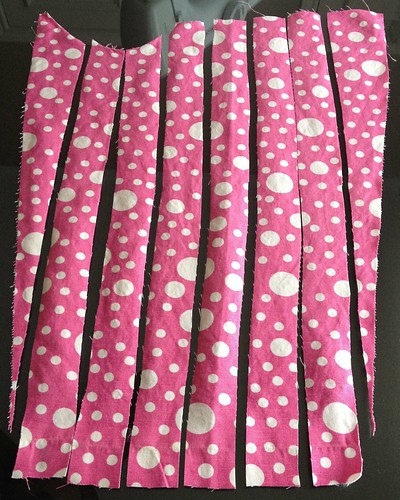
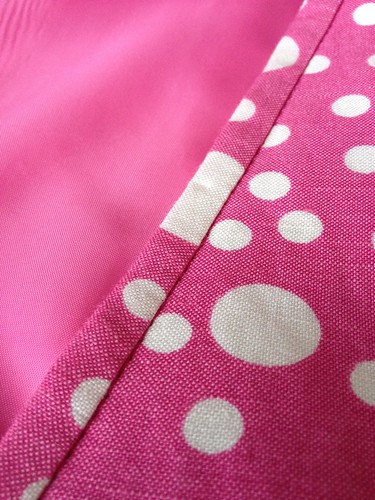
Four of the strips were sewn end-to-end and used as a binding around the front and collar edges. I pinned them together with right sides facing.
I ran a line of stitches about 1/4 inch from the edges, then folded and pressed the binding flat.
I folded the binding over toward the inside and pinned again.
Then I stitched "in the ditch" so you can hardly even see it from the outside.
I repeated this process with the remaining two strips to finish off the sleeve edges.
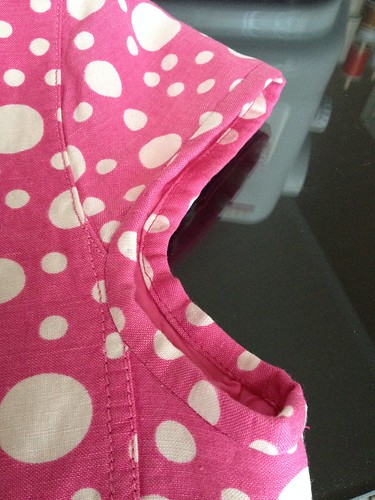
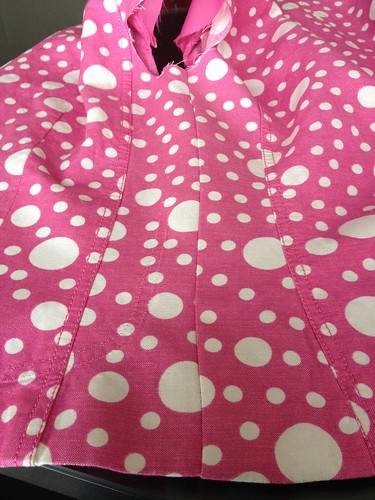
I think removing a lot of extra fabric makes the pattern not quite so overwhelming. Plus, taking in the sides and rounding the corners adds to the femininity.


Oh yeah, and I also picked out those little stitches that keep the back flap together. You know, the ones you're supposed to snip as soon as you get it home from the store, but apparently no one ever did for this jacket. I wonder if the previous owner ever even wore it...

This new jacket is amazingly creative from the original piece and, of course, you know that I love the descriptive photo steps!!!
ReplyDeleteThanks, Linda! If it hadn't worked out, maybe I would've scrapped the jacket idea and tried a bikini. ;)
DeleteYou win! I could not imagine what you would make out of that fabric and have it look cute not clownish. Like your skirt from the clown blazer, you did it again!
ReplyDeleteI learned something new from your tutorial, how to restyle a sleeve into a cap sleeve. It had never dawned on me to cut off the bottom of the sleeve first! LOL and I know how to make a cap sleeve pattern, just never connected the two things. Thanks.
regards,
Theresa
Thanks, Theresa! The cap sleeve was new for me too, but I'm glad my experiment was a success!
DeleteSo cute, great way to update it! :)
ReplyDeleteThank you, Des!
DeleteThat is super cute!
ReplyDeleteThanks, Danny!
DeleteI think this is my all-time favourite of your refashions! Amazing how "less is more" sometimes. Love the colour and the style, and the white T-shirt is perfect with it.
ReplyDeleteThanks, Jenny! I wore it to work yesterday and got lots of compliments. :D
Delete
ReplyDeleteIs much better!
Thank you, Lina!
DeleteI love how detailed you document your refashions Carissa - so that we can all follow :-) Added this one to the most helpful refashion tutorials of the month Pinterest board.
ReplyDeleteThanks,
Eddie
Thanks, Eddie! Always glad to inspire others!
Delete