


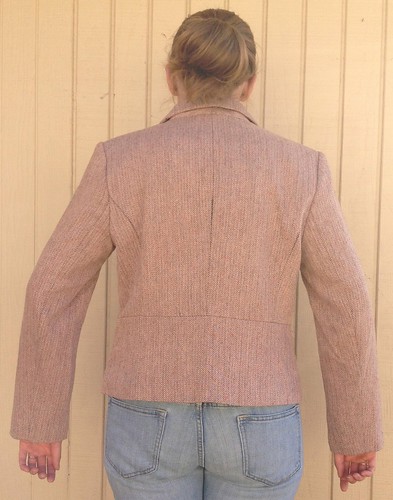
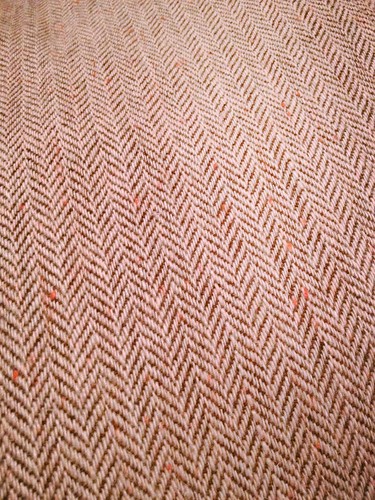
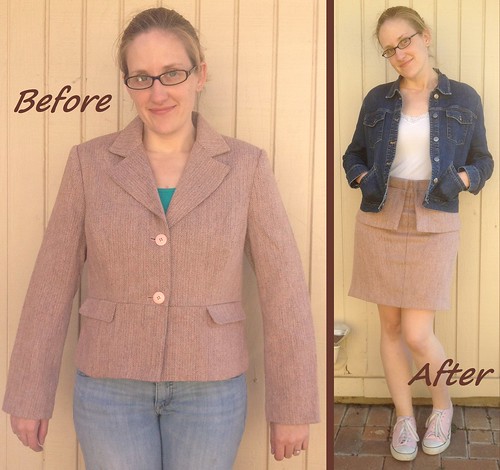
It's a decent quality wool blend in a beautiful pale pink and chocolate brown herringbone weave. And believe it or not, I'm going to turn it into a skirt.
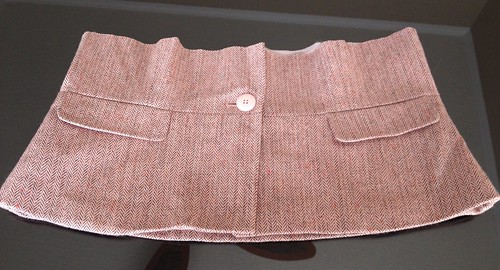
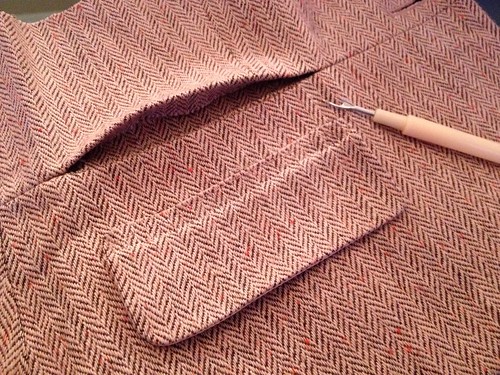
I plan to reuse the peplum-ish pocket band, so I chopped that off first.
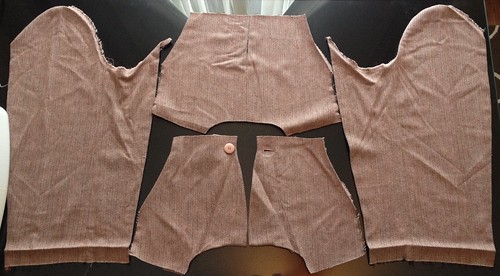
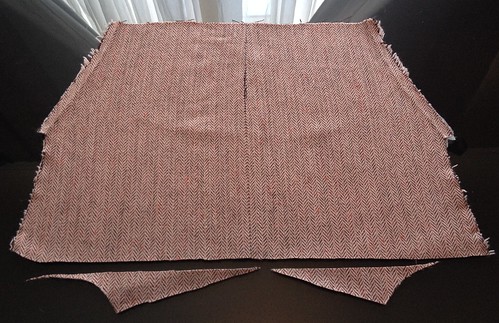
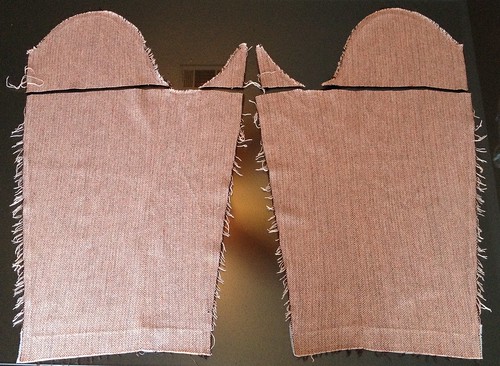
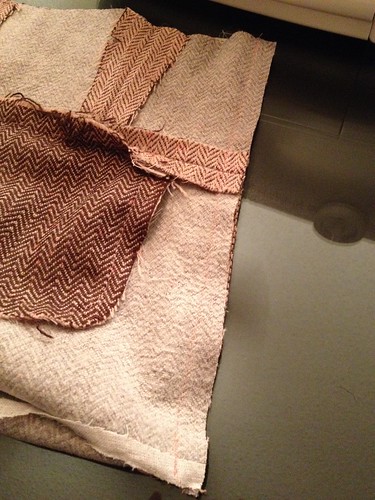
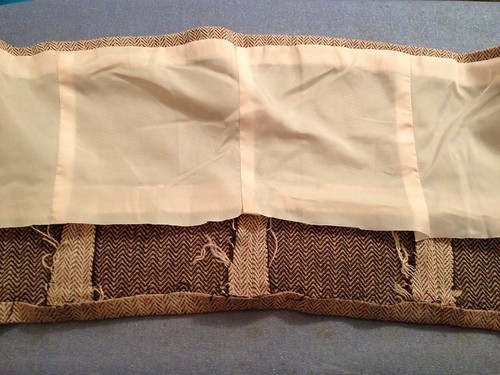
Then I carefully disassembled the jacket, saving the sleeves (left and right), the top portion of the back (top center - upside down), and the top portions of the front lapels (bottom center - upside down). This layout is approximately how the pieces will be re-assembled in skirt form.
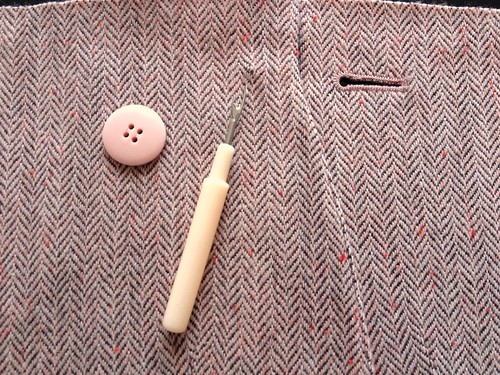
I gave all my pieces a good press to get all those wrinkles out. And I removed the button from what was the left-hand front piece.
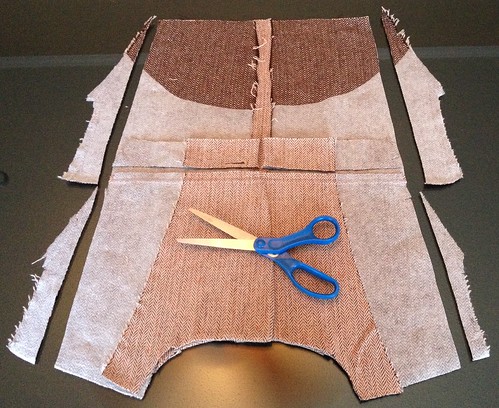
I evened up the edge of the upper back piece, where the shoulders and collar used to be.
Then I attached the upper back to the upper fronts with right sides together.

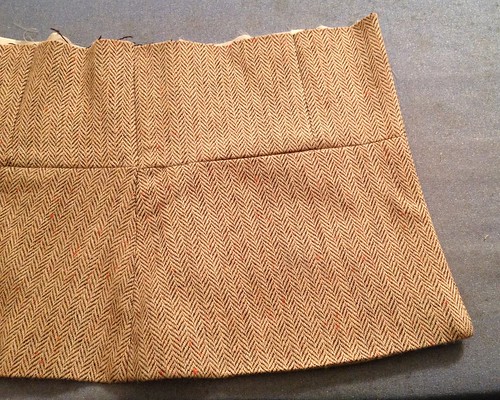
I folded the upper back upward and top-stitched along my new seam. The former lapels are going to be my back slit in my new skirt.

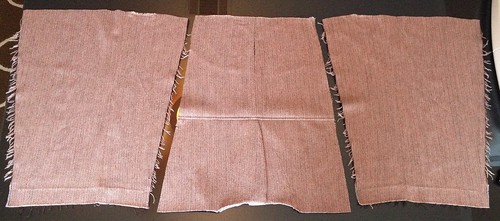
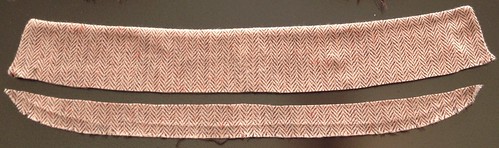
I trimmed off all the excess bits.
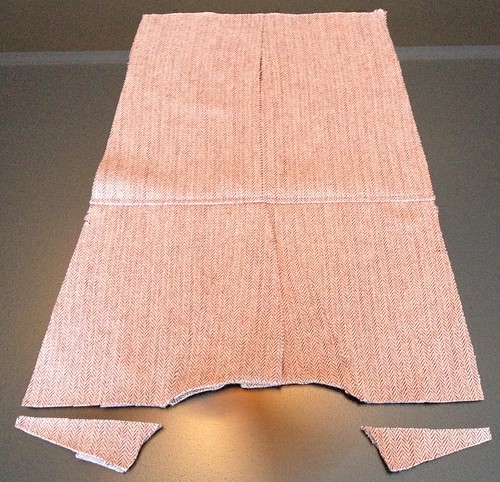
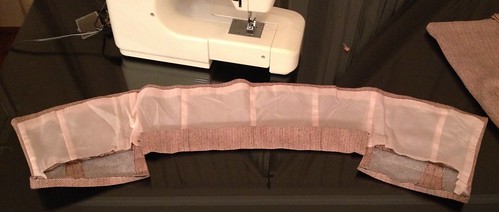
I also chopped off the sleeve caps for a straight edge.
Same layout as before, but now it's looking a little more like a potential skirt, isn't it?
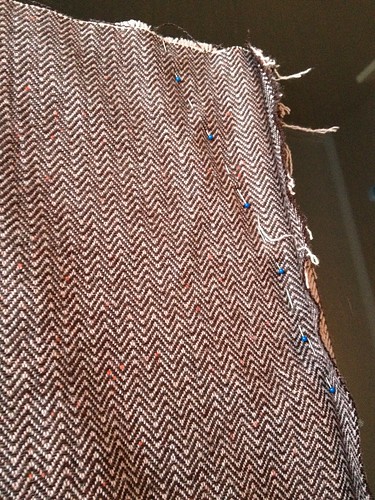
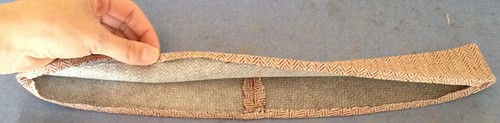
Once the three pieces were joined into a tube, I tried it on inside out and pinned my side darts.
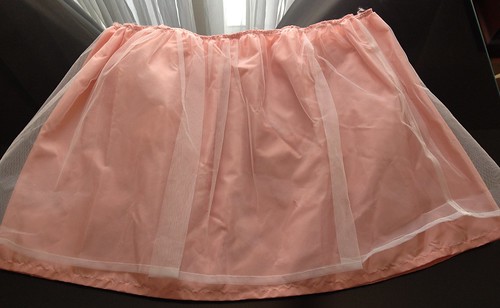
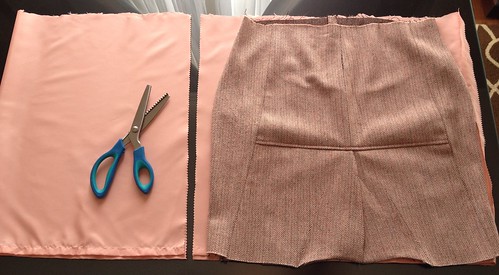
With the main skirt complete, I needed a lining. I didn't really want to piece together the lining from the blazer the same way I did the skirt itself, so I grabbed a ghost of refashions past from my scrap pile. You may recognize this as the underskirt from the paler pink bridesmaid dress that went into my Cinderella costume.
I removed the tulle layer and ironed out the wrinkles from the underskirt. I laid my tweed skirt-to-be on top and cut off the extra.
Then I realized the skirt fabric has a bit of stretch and the lining fabric does not. So I spliced in a couple more inches to be safe.
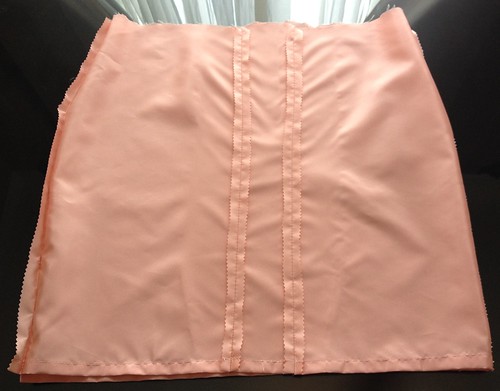
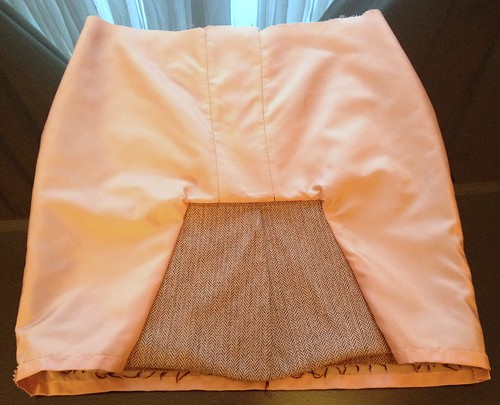
I stuck my inside-skirt into my right-side out lining and cut away a trapezoid where the slit is.
I pressed the bottom edge upward all around, and pressed the facing of the slit upward the other direction. Then I flipped each corner of the slit inside-out and sewed the outer and facing together (and promptly moved on to the next step without taking a photo).
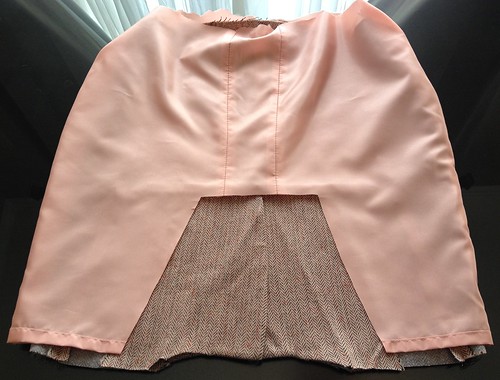
With quite a bit of finagling, I attached the trapezoidal cut-out around the edges of the slit facing.

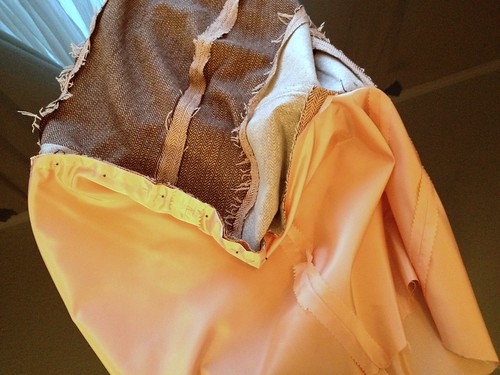
So it looked like this once flipped right-side-out again.
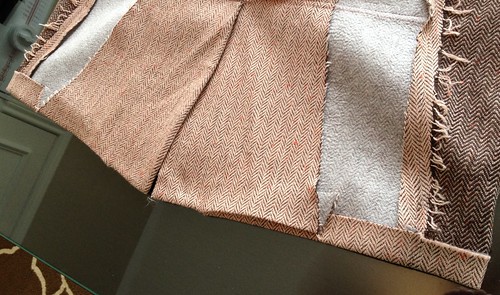
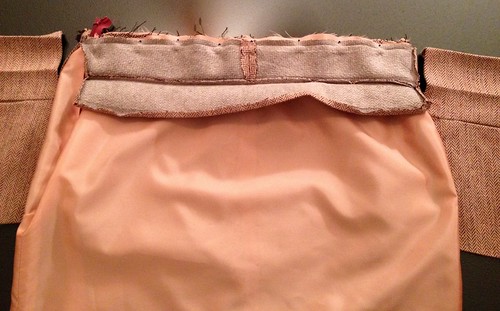
A lot more finagling had to happen to attach the bottom edge of the lining to the bottom edge of skirt, so much so that I couldn't really even get a decent photo of it.
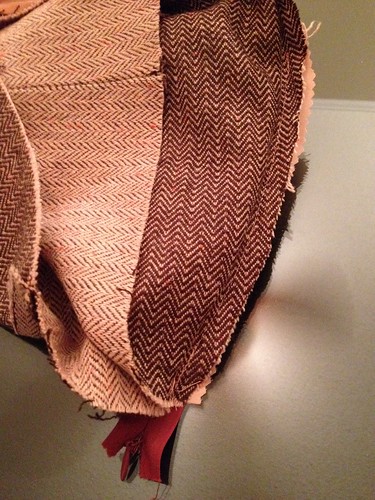
But after sewing around the bottom edge, here it is all pretty and pressed.

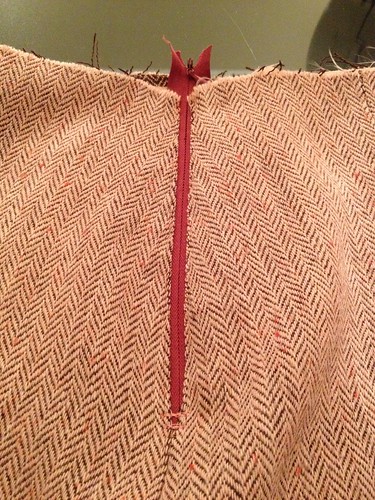
Then came the zipper installation. I had this burgundy zipper in my stash - not quite the right color, but close enough considering it will be hidden under the peplum. So I sandwiched it between my tweed and my lining and sewed it to the seam allowances.
Then I top-stitched around the edges for a clean finish.
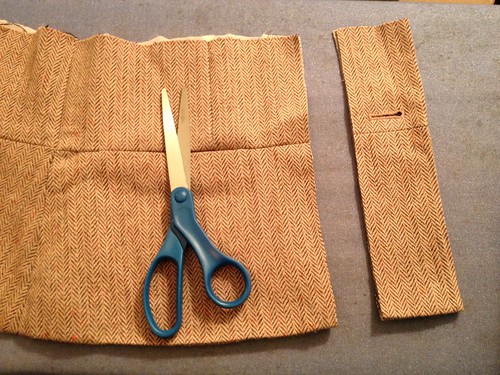
Now my skirt is functional. Let's make it pretty! I removed the pocket flaps from my blazer peplum by opening up that seam and then sewing it back together without the flaps.
The fabric just above the peplum will serve as my waistband, but the original darts made the fabric flare out a bit. So I picked out those seams and made them straight vertical.

To make the waistband/peplum fit, I needed to trim off about three inches from each end.
I flipped it inside out and re-sewed the ends.
Right-side-out again and you can barely even tell!
I cut away the excess lining fabric and pressed the edge over.
Then I folded over my new waistband and pressed again. I opened up the side seams a couple inches down. The center portion will be the waistband along the back side of my skirt, and the ends will be peplum flaps that fasten in the front. This way the peplum covers up the zipper without hindering the zipping and unzipping.
For the front portion of the waistband, I grabbed the collar from my old blazer. I trimmed off the bottom a bit and pressed the edges inward.
I pinned my front waistband and my peplum waistband to the skirt, inside-out.
Once that was sewn, I folded them over and sewed around again, making sure to sew "in the ditch" on the peplum, so the stitching wouldn't be too visible.

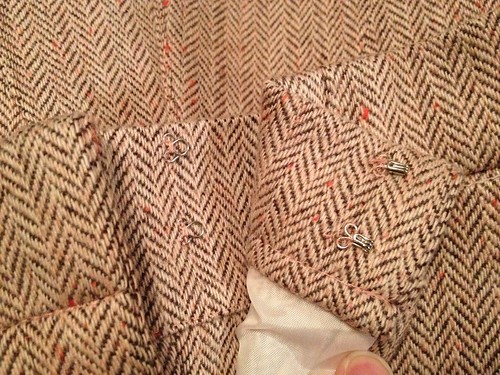
Last but not least, I hand-sewed on four hook-n-eyes, two per peplum flap.
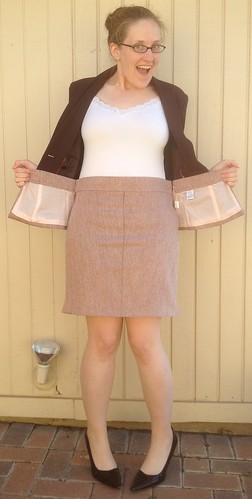
I can go casual...


...or professional...


...but not too professional.
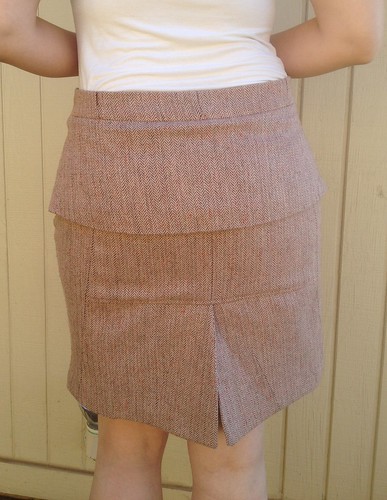
How's about a little closer look at that pepulm?

And the back slit...

Carissa!!! Your thought process is just Amazing!!! This is definitely an interesting transformation!
ReplyDeleteThanks, Linda! I had a lot of fun without this one, even with the doubts I'd have enough fabric and the trials and tribulations of attaching the lining and all that jazz.
DeleteI can't belive it ! It's amazing !!!
ReplyDeleteI am very impressed, Carissa! You have serious skills, cutting and splicing those various pieces together to construct a skirt. Great job! :)
ReplyDeleteThanks, Des!
DeleteI love your process on this! What a great transformation. Oh, it can be easier when lining a skirt, to leave them unattached at the hem - just hem the inner & outer separately, with the lining an inch or so shorter than the outer.
ReplyDeleteYes, indeed, I have left the lining unattached at the bottom on skirts in the past, but this sort of loose weave herringbone was fraying like mad. I wanted to encase it all so I was constantly dropping bits of thread as I walked!
DeletePretty amazing, and I definitely didn't picture this. I was thinking more along the lines of using the peplum at the bottom of the skirt to make it flare out! But there probably wasn't enough material for that anyhow. I love the colours in the fabric.
ReplyDeleteThanks! Walking would've been difficult had a put the peplum at the bottom. But I suppose I could've still done a slit and the ruffle would just have a break in it. That's one of the great things about refashioning - there are no right or wrong answers!
DeleteThat.is.amazing!!!
ReplyDeletewww.dressupnotdown.blogspot.com
Thank you!
DeleteWow! You did a great job. I never would have come up with anything like this. Keep it up!
ReplyDeleteThanks, Theresa!
DeleteWow..... you are my refashioning hero!
ReplyDeleteAw, shucks! :)
DeleteLOVE.
ReplyDeleteI'm so glad you can look past its non-velvet-ness. :)
Deletecreativity at its best!!!!
ReplyDeleteThanks, Magda!
Deletewow. the execution of your idea is incredible!!
ReplyDeleteThank you, Cari! Sometimes things come out exactly as I pictured them in my head. Of course, most of the time they don't, but this time? This time it worked out nicely.
DeleteWow - it's an amazing transformation. I'm really impressed.
ReplyDeleteThanks, Vicky!
DeleteYou are Amazing!
ReplyDeleteWhy thank you, Emma!
DeleteWonderful transformation and Tute!
ReplyDeleteI am thinking a nice re-cycled buckle or frog closure might be a nice attachment external closure for the peplum pockets. What do you think?
I think that's an excellent idea! I'll have to keep an eye out for the right buckle-type thing on my thrifting adventures. Thanks!
DeleteNiice. You are very talented. Thank you for sharing.
ReplyDelete