


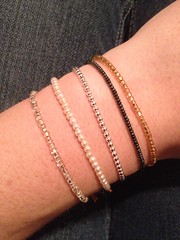
Check out how below!
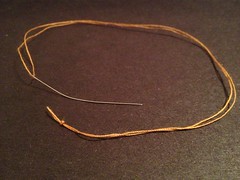
I started with a piece of thread about 24 inches long (or 12 inches once it's threaded on your beading needle and folded in half). Tie a knot about 1/4 inch from the end, like so:
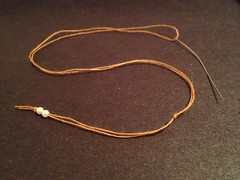
Now add two tiny beads. I used small faux pearls for my prototype, just a little larger than seed beads. Then tie another knot about three inches up from the first knot.
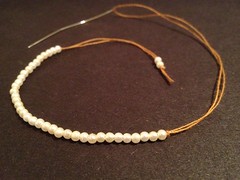
Next, we'll add lots of tiny beads, about half the circumference of your wrist, and tie another knot at the end of these beads.
Thread your needle back through those first two beads, being careful to only go through the beads and not pierce the original strands of thread (or else your adjustable bracelets won't adjust). Tie one last knot about three inches from your previous knot, and trim the end of your thread about 1/4 inch from that last knot.
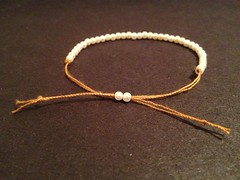
Gently pull the sides of the threads to expand the bracelet and slip your hand through. And now simply pull the two original beads away from each other to tighten. I say simply, but really, this might be the most difficult part seeing as how you'll be doing it one-handed. I've become quite adept at tightening these bracelets with my teeth. Or you can find a friend to help out.
Now make yourself a whole bunch!

You've completely inspired me!
ReplyDeleteSky Exchange is an online platform that provides users with access to a wide range of sports and entertainment markets through a user-friendly interface. Designed for smooth navigation and real-time updates, the platform offers features that help users follow live events, track market movements, and manage their accounts efficiently. With a focus on accessibility, performance, and customer support, Sky Exchange aims to deliver a seamless digital experience for users seeking interactive sports and entertainment engagement.
ReplyDeleteskyexchange official
sky exchange in play