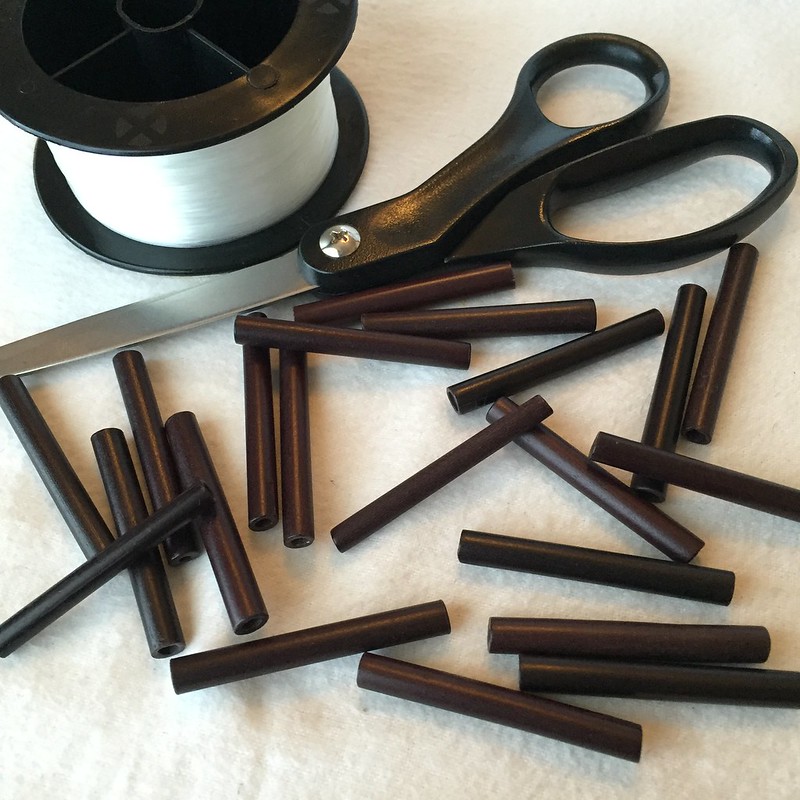
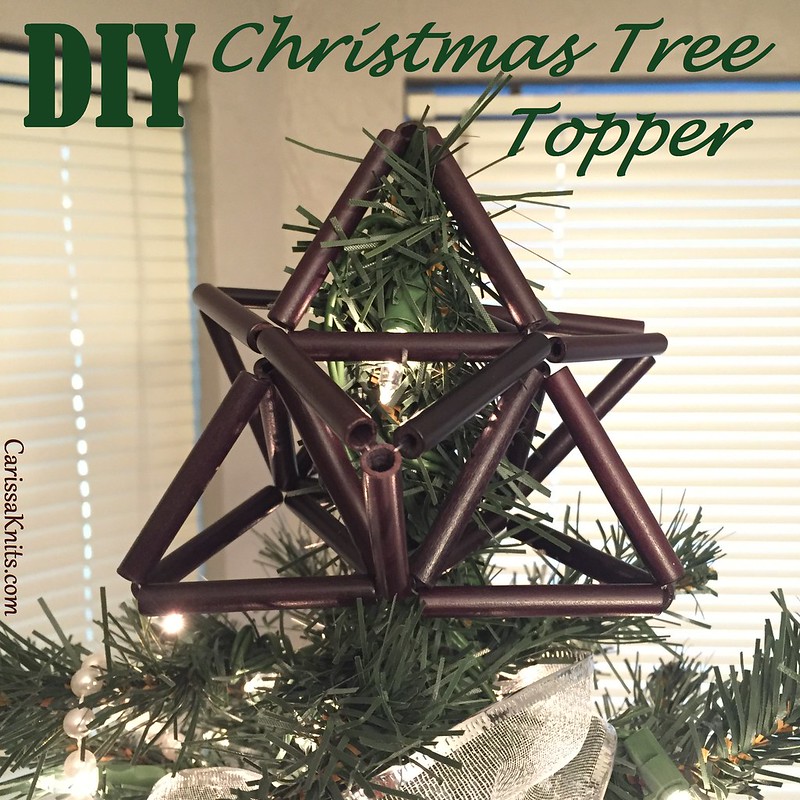
What's a Christmas tree without a star, right? I'd seen a nifty Himmeli-inspired tree topper on Pinterest and thought I could DIY something along those lines from materials I already had on hand. I dug out these 2-inch long wooden beads, originally salvaged from a thrifted placement years ago, along with some fishing line and a pair of scissors, and I got to work!
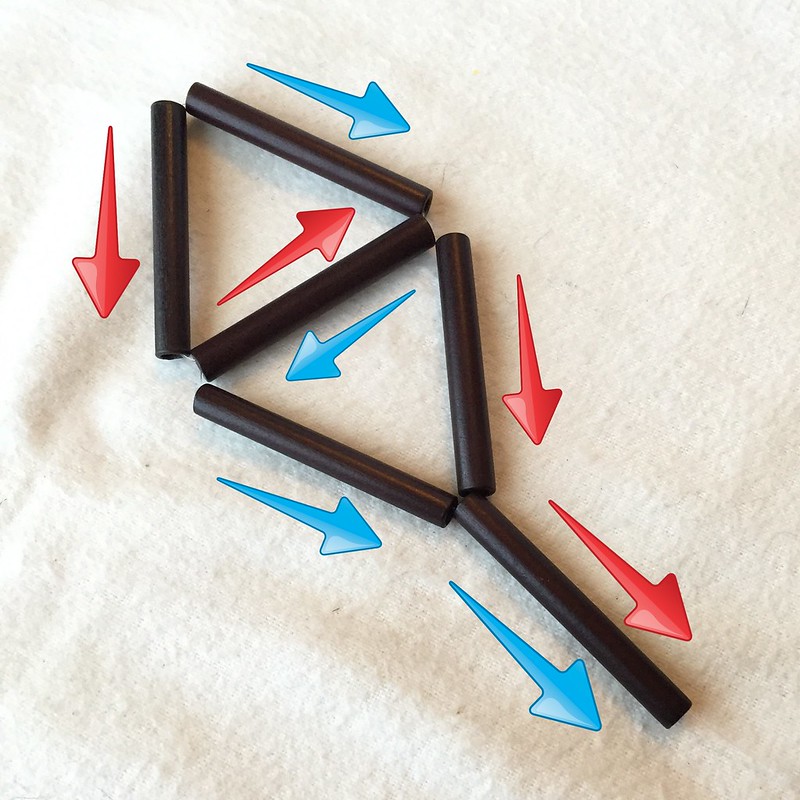
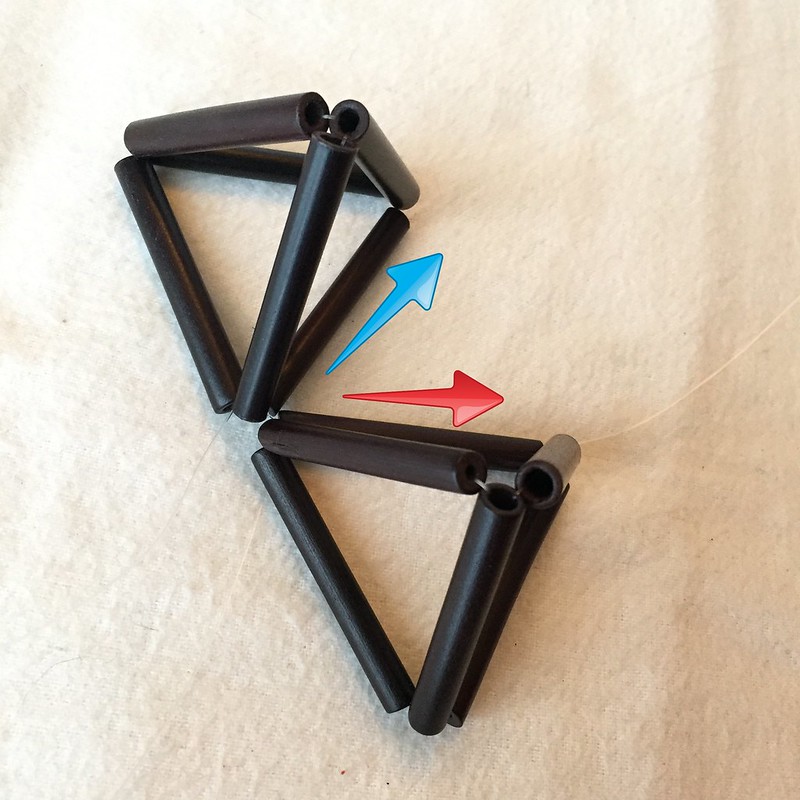
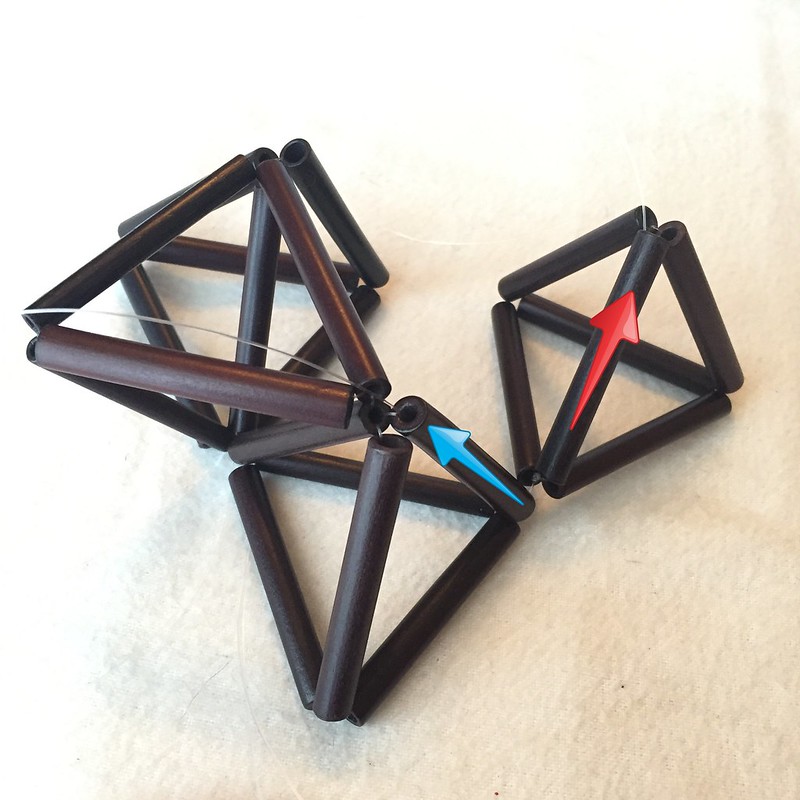
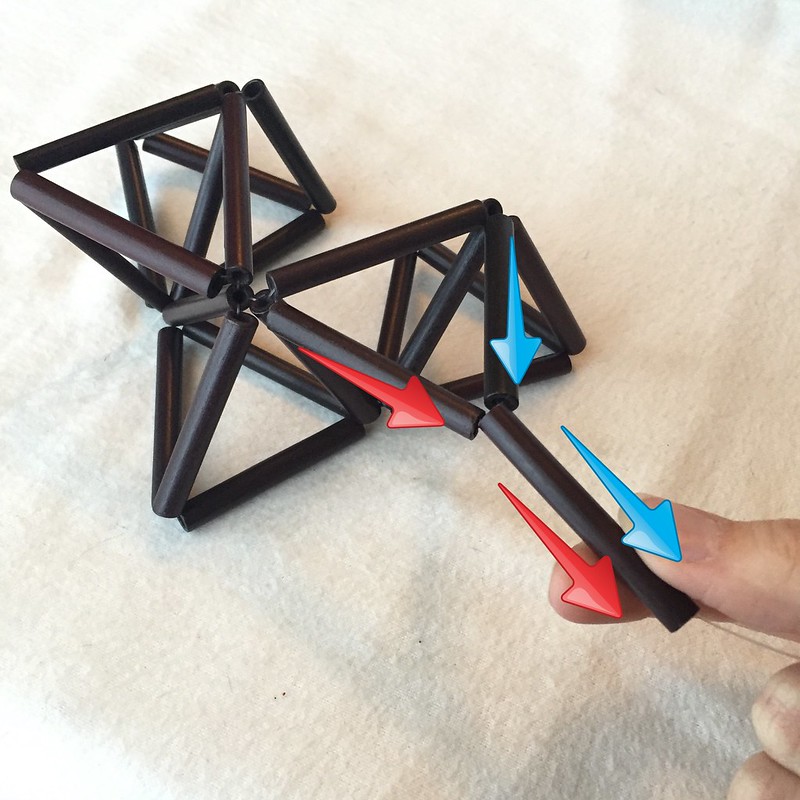
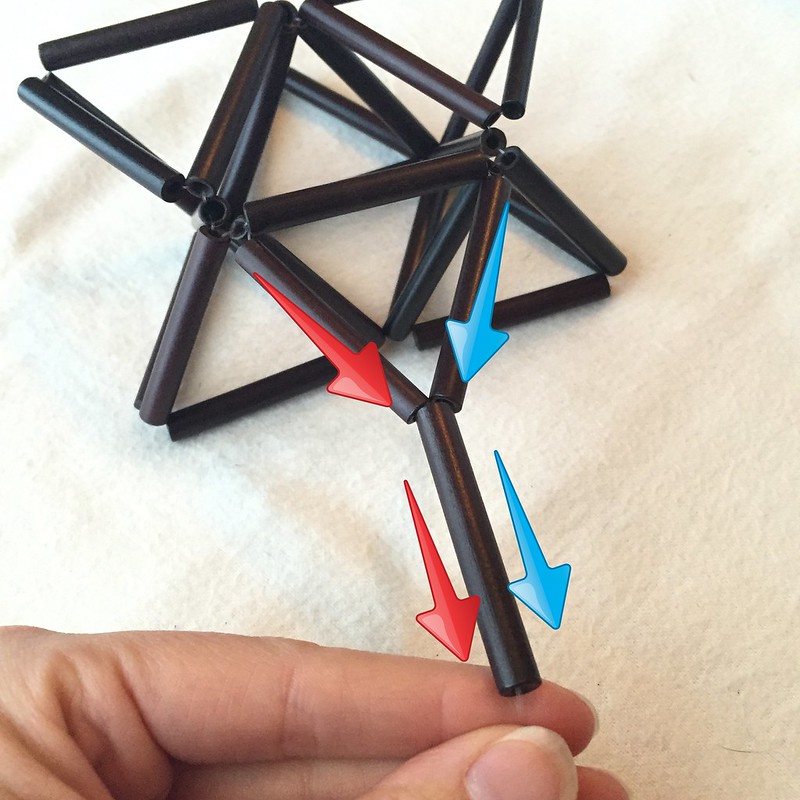
I cut a piece of fishing line about 2 feet long, strung two beads onto it, and slid them to the center (top left corner of photo below). Then I threaded the two ends of the fishing line (denoted by blue and red arrows) through a third bead in opposite directions. A fourth and fifth bead were then added, one on each end of the fishing line. And finally, both ends of the line went through a sixth bead in the same direction.
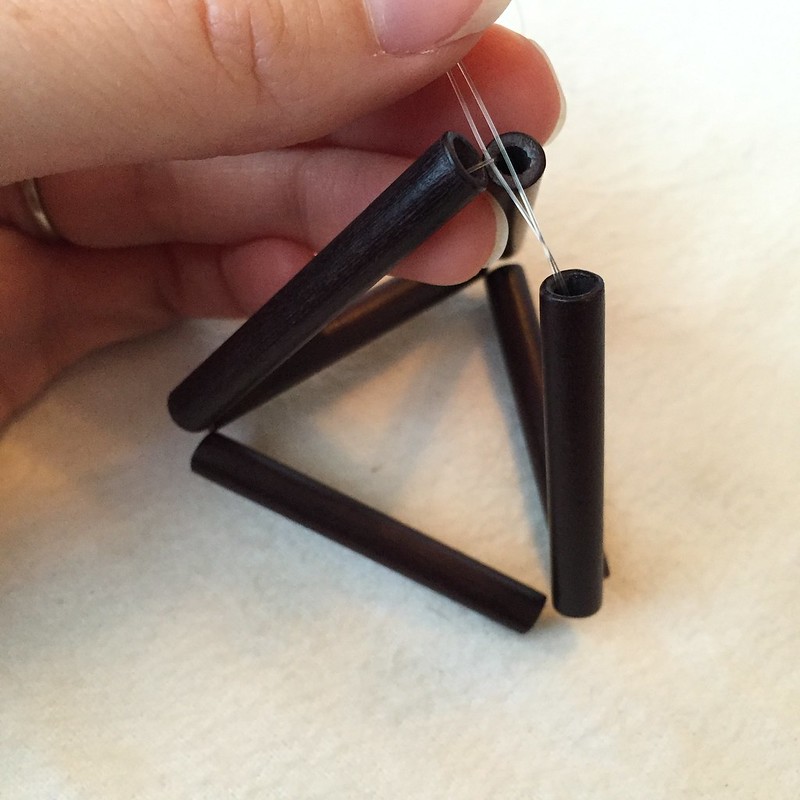
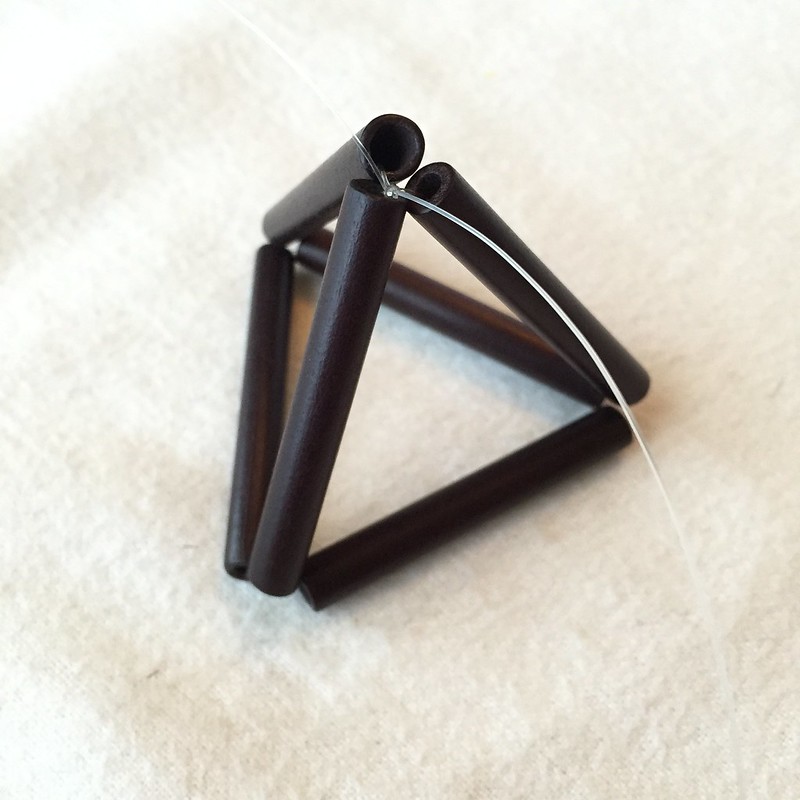
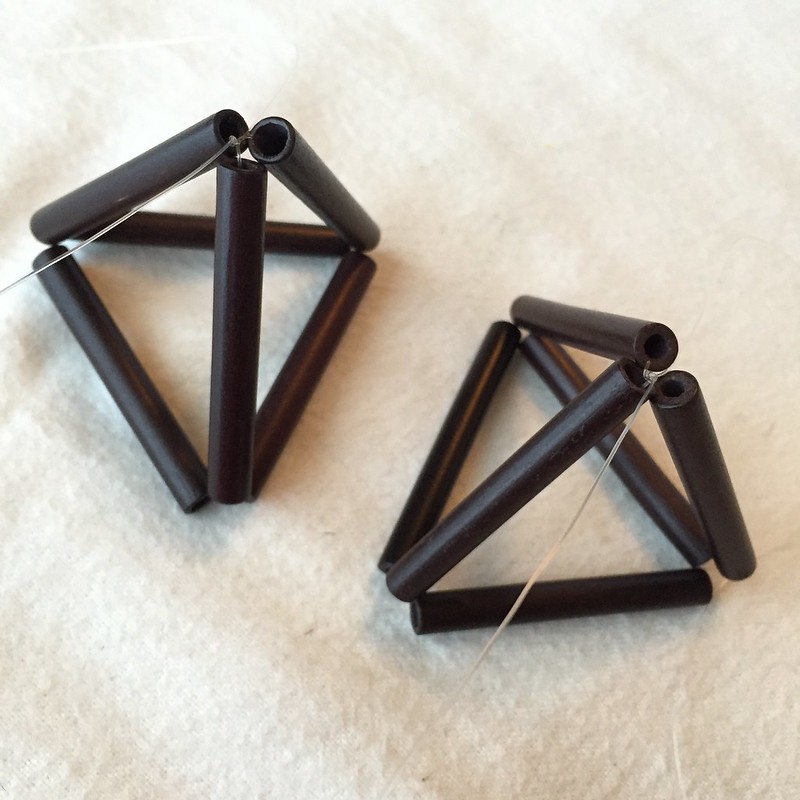
I then folded this shape in half and tied the two ends of fishing line in a knot around the fishing line between the original two beads.
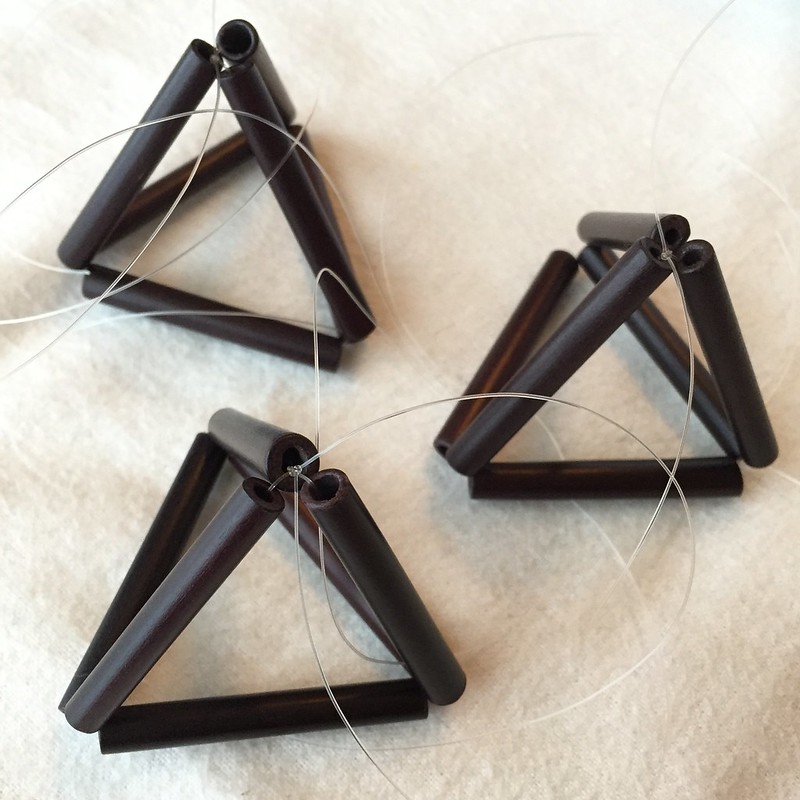
I repeated this process to make a second pyramid, and then repeated it again for a third one.
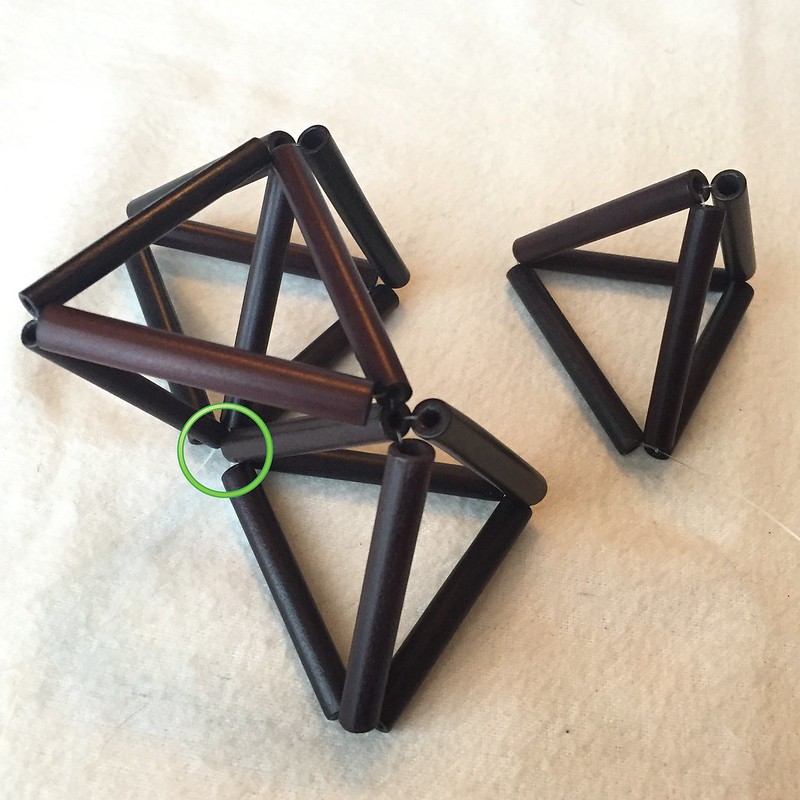
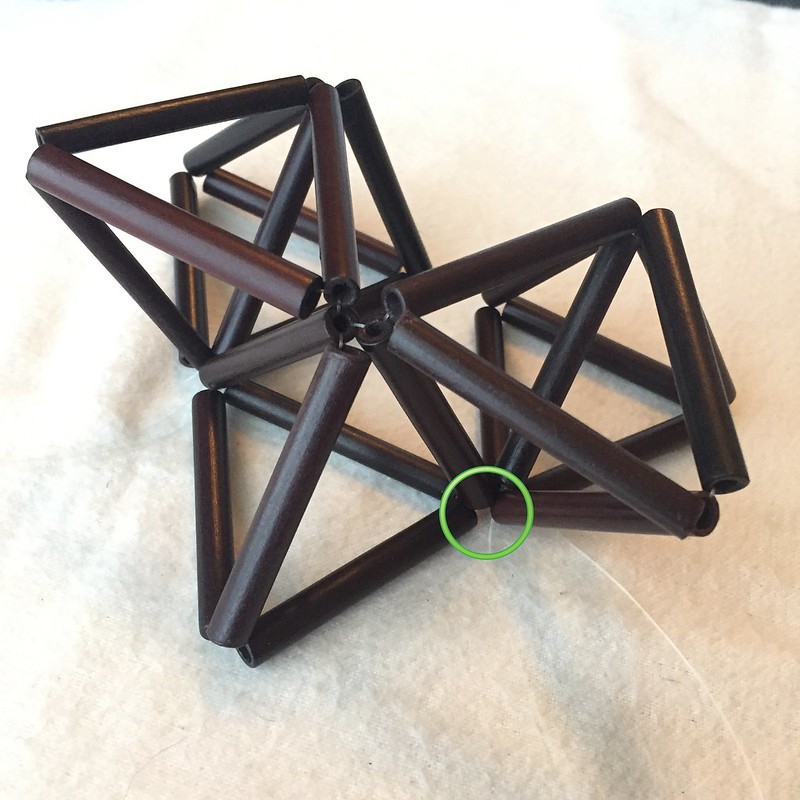
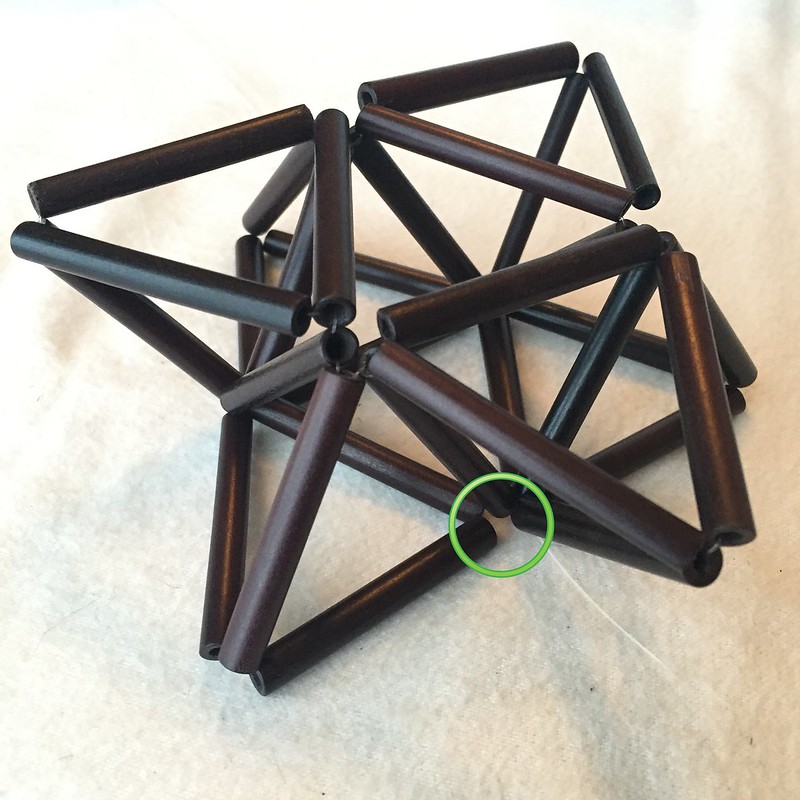
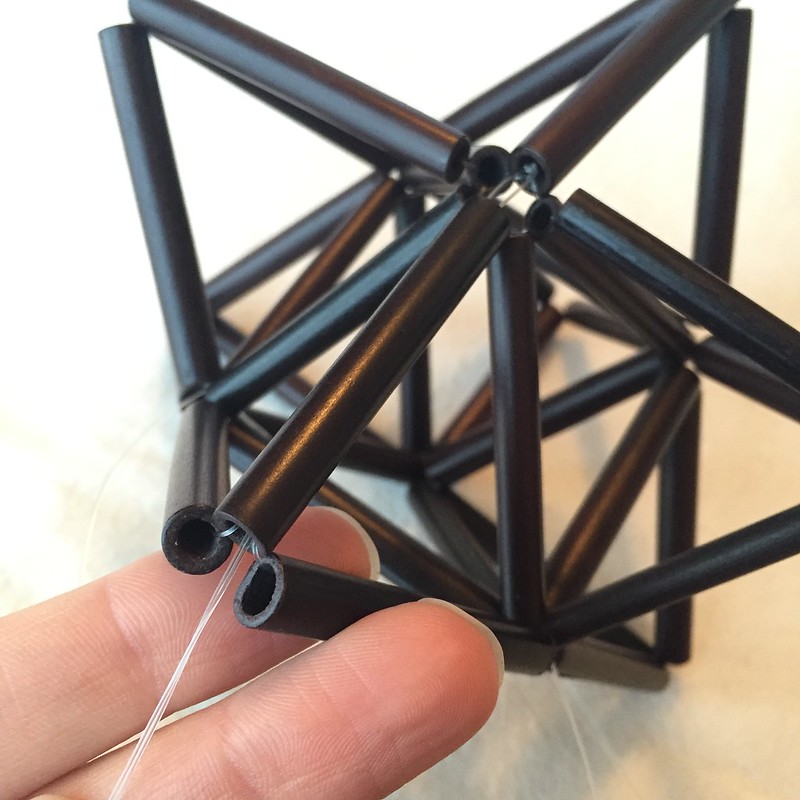
I placed two of these pyramids next to one another and threaded a new 2-ft piece of fishing line through the adjacent legs of each pyramid as shown. Then I added four more beads following the same pattern as above.
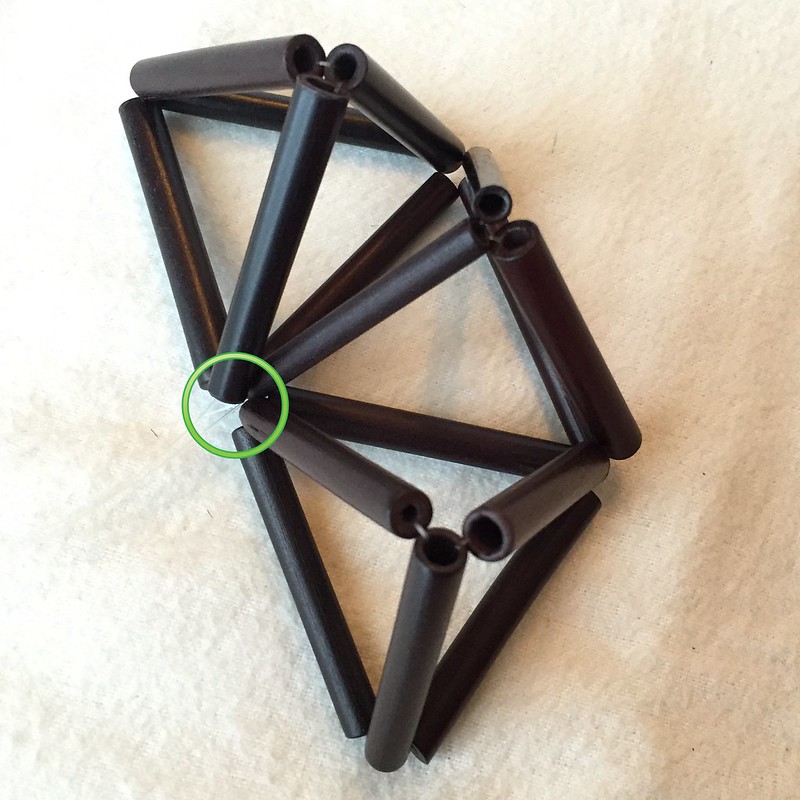
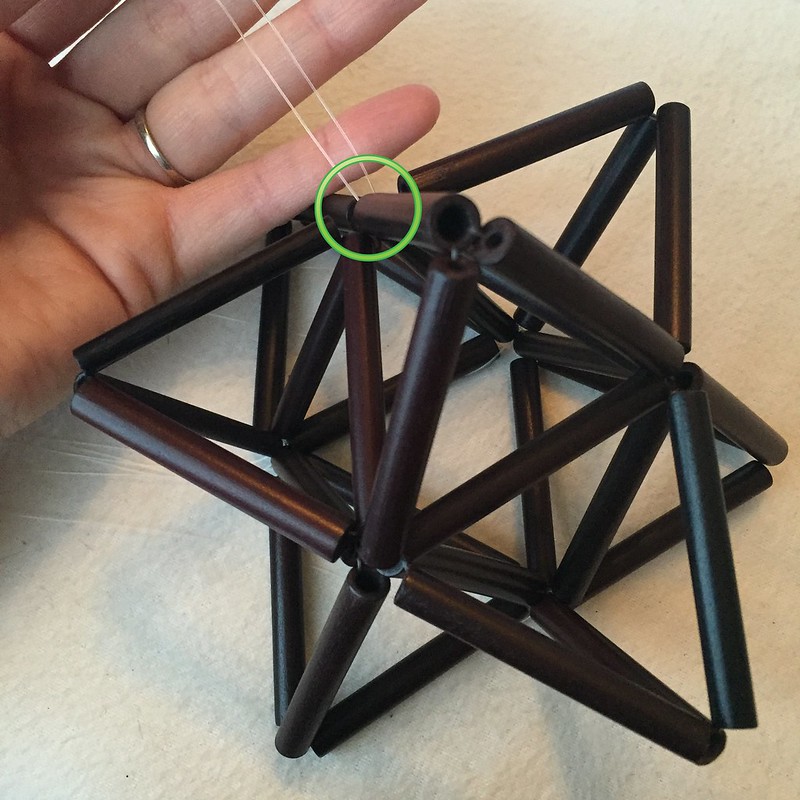
These last few beads were folded upward and the fishing line was tied in a knot around the same corner where the original pyramids' knots were (green circle). Then I rotated this piece so the newest pyramid was pointing to the left (green circle still shows where knots are) in preparation to join the third of the original pyramids.
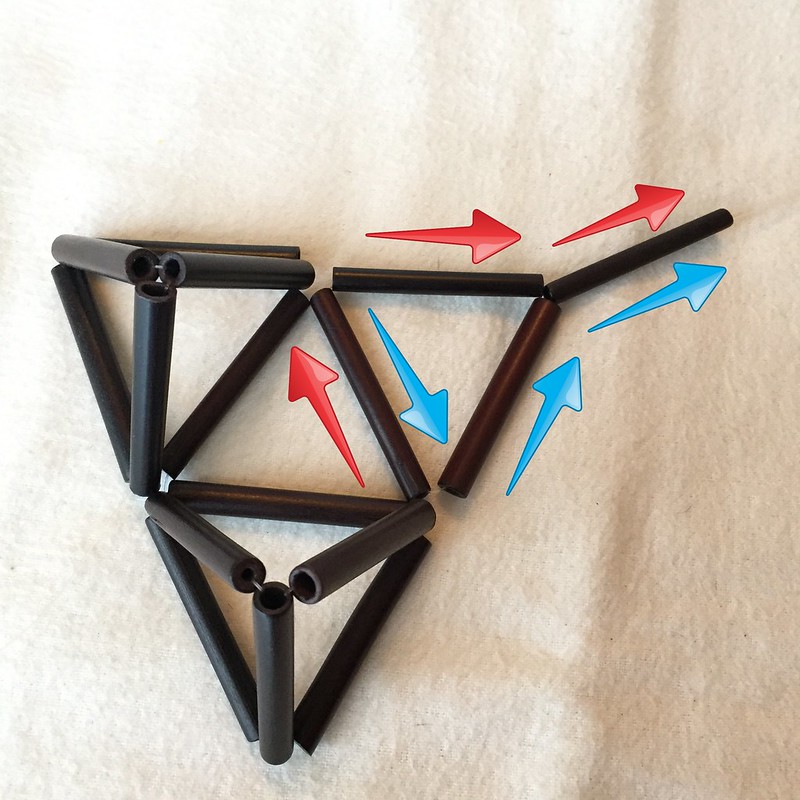
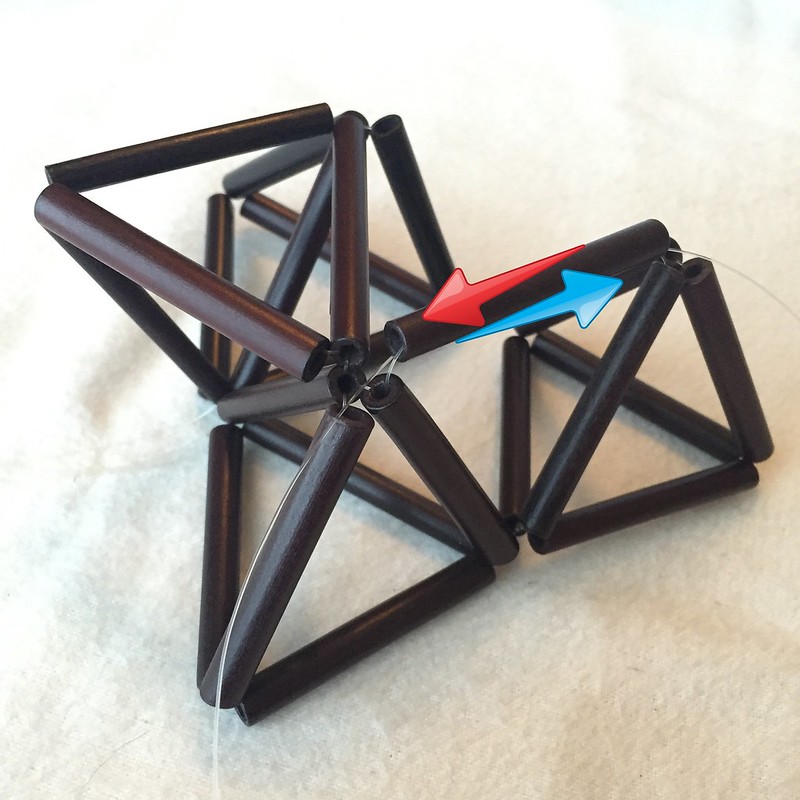
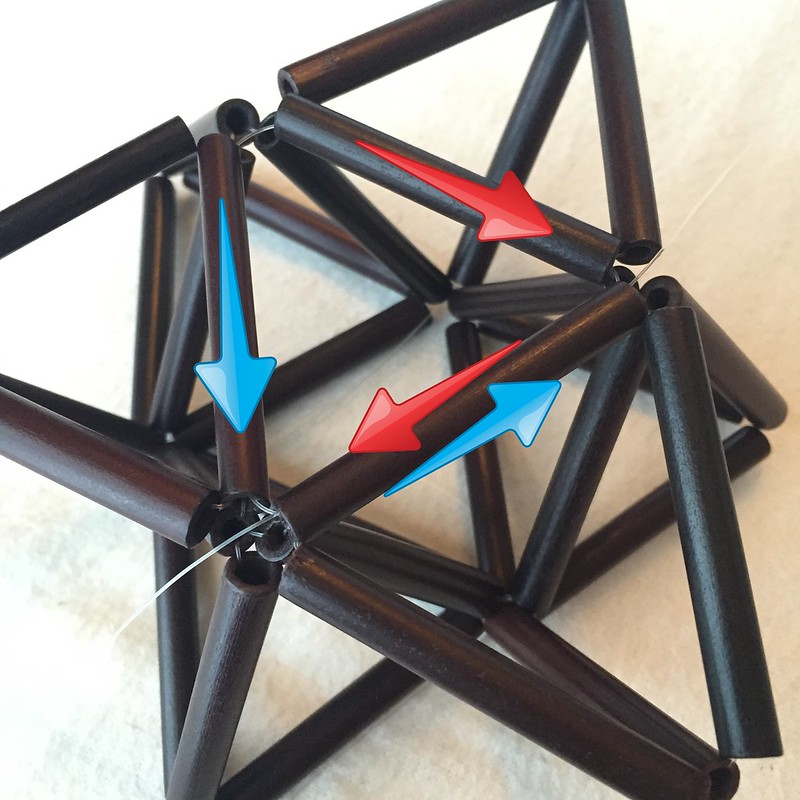
A cut another 2-ft piece of line and threaded it through adjacent legs of the large piece and the third pyramid as shown. Then a new bead was added across the top of that triangle.
I added three more beads in the same pattern as before and knotted the fishing line at the bottom to complete this pyramid.
I rotated the whole piece to close up the ring of pyramids following the same pattern as each of the previous pyramids.
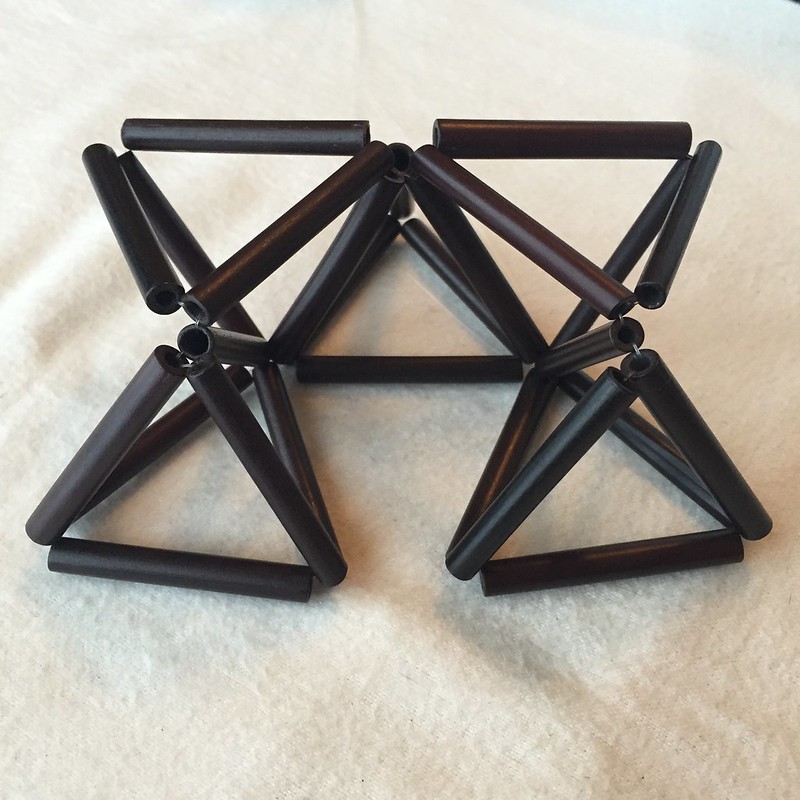
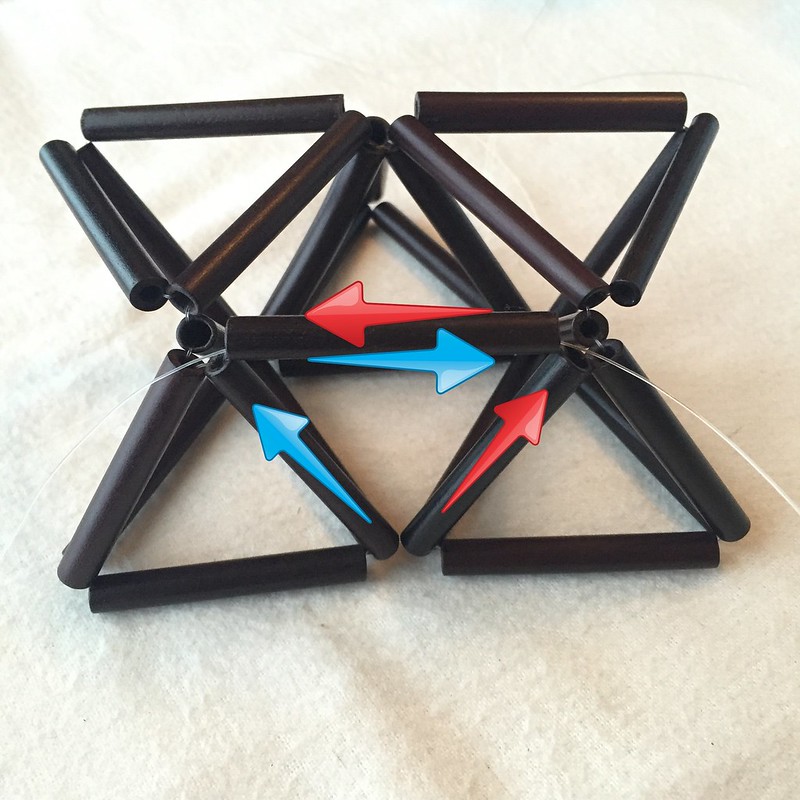
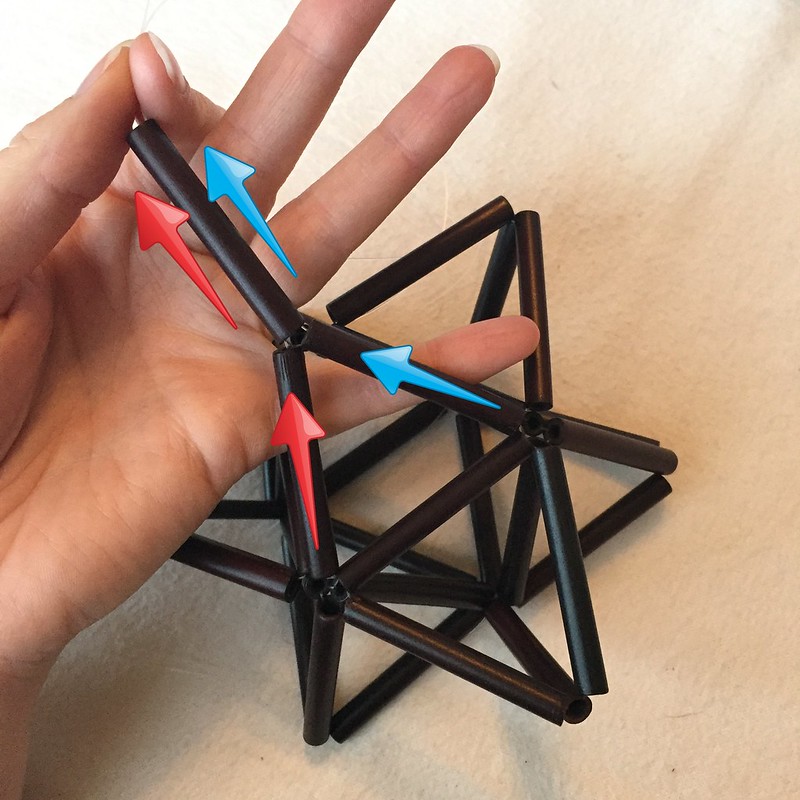
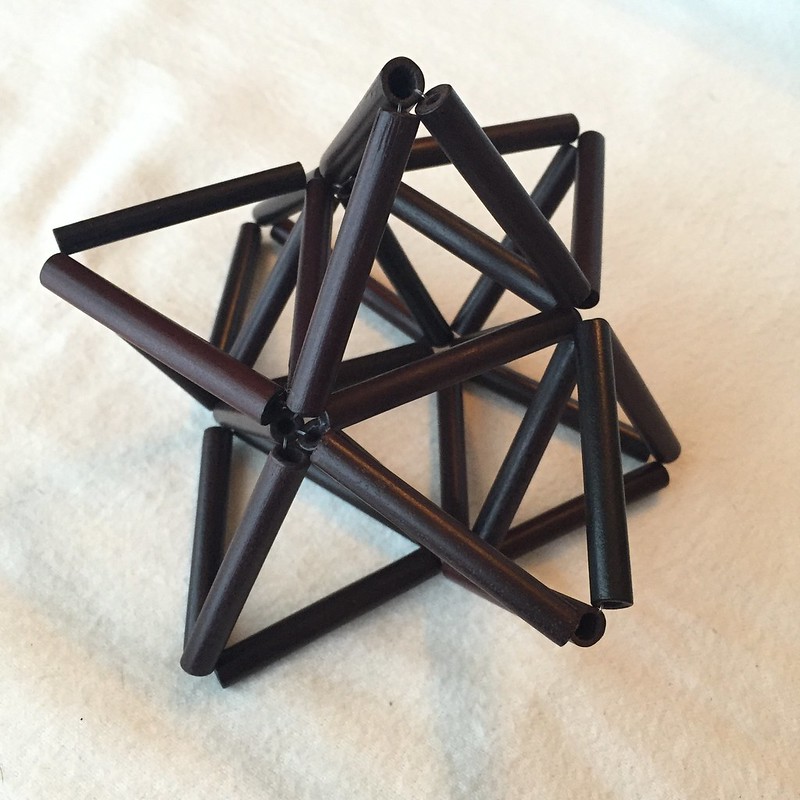
To add the uppermost point to my star, I got a new 2-ft length of fishing line and threaded it through the inner triangle of the top edge as shown. Then three new beads were added, following the same pattern as before.
I knotted the fishing line at the opposite corner to form the last pyramid. All that was left was to clean up all the bits of fishing line sticking out. I simply threaded each of them into a nearby bead and snipped the excess at the other end.
In the end, I used 33 beads total. I decided not to add an 8th point on the bottom of my star, so it will sit nicely on top of my tree, but you certainly could if you wanted to do so.



Fantastic! Thanks for all the details.
ReplyDeleteYou are very welcome!
DeleteCrikey, my head hurts! I think you must be very mathy ... but as always, your instructions are so clear. Even I could do this. Bravo!
ReplyDeleteI do loves me some math, especially geometry! :)
DeleteGood reading your poost
ReplyDeleteThis comment has been removed by the author.
ReplyDeleteThe blog is a vibrant hub of creativity and inspiration, offering a delightful blend of art and design. A creative platform and design studio, the blog is a treasure trove for art enthusiasts. With a passion for all things creative, the blog serves as a source of inspiration, providing readers with fresh perspectives. New Kent DUI Lawyer Virginia
ReplyDeleteNeed divorce lawyers in New Jersey? Divorce lawyers in new jersey , Find experienced attorneys to navigate legal complexities, protect your interests, and guide you through the divorce process effectively in the Garden State.
ReplyDeleteThank you for sharing more interested article it's so excited to read this keep doing. job-ready skills
ReplyDelete"Craftmas Part Three: A Star Is Born" is part of a Craftmas series involving DIY Christmas decorations. The title suggests creating a star for a tree topper. For ideas or instructions, contact the author for assistance How to Get Divorce in New York.
ReplyDeleteThe legal ramifications of dissolving a marriage, such as property distribution, child custody agreements, and other associated issues, are handled by divorce attorneys. They try to reach fair settlements between couples and, if needed, fight for your rights in court. Having an experienced attorney at your side may be quite beneficial, especially considering the emotional and legal difficulties that come with divorce. If you're in need of a Dui Lawyer Charlotte VA , or require assistance from a skilled divorce attorney, we’re here to provide expert legal guidance. Get in touch with us now to find out more.
ReplyDelete